

Crafting your individual DIY backyard markers or plant markers gives a artistic method to set up your backyard or indoor crops. This tutorial will present you make your very personal clay backyard markers.
Gardening might be extremely rewarding, but preserving monitor of your backyard crops or the flowers in your flower beds, typically presents a problem, notably when cultivating varied herbs, greens, and flowers.
That is the place a plant marker turns into particularly helpful. They mean you can simply establish crops, particularly new crops, whereas including a private contact to your backyard area.
Whether or not you’re planning a veggie backyard or an herb backyard, these simple-to-make markers are perfect for indoor or out of doors use.
Supplies Wanted for DIY Plant Markers
To make your individual backyard markers, you’ll want just a few fundamental supplies. In case you don’t have any of the supplies, they’re all simply accessible for buy.
Air dry clay is a improbable alternative and might be discovered at any craft retailer. You’ll additionally want a rolling pin to flatten the clay to your required thickness. Utilizing wax paper beneath the clay whereas rolling it out will make cleanup simpler and stop sticking.
For shaping your markers, assorted cookie cutters turn out to be useful, permitting you to create varied enjoyable and distinctive shapes. Select shapes that complement your backyard’s fashion, whether or not it’s easy circles or extra intricate designs.
These fundamental provides will set you up for creating sturdy and engaging backyard markers tailor-made to your particular crops and backyard aesthetic.
Step-by-Step Information to Making Backyard Markers
 Lexy Ward
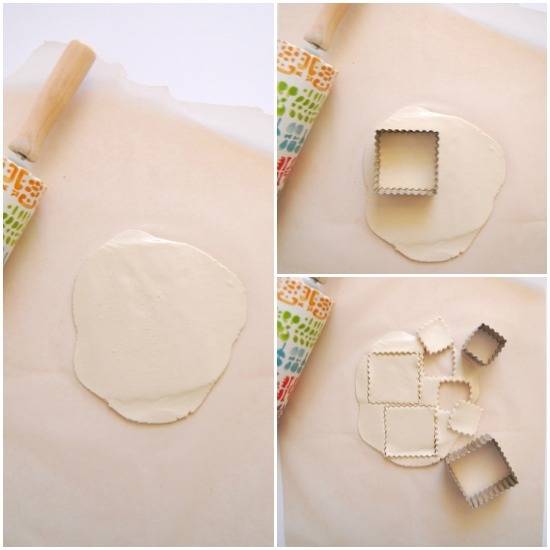
Begin by rolling out a big slab of clay to a thickness of about 1/4 inch utilizing a rolling pin. Be certain to put down sheets of wax paper beneath the clay to stop sticking and make cleanup simpler.
 Lexy Ward
As soon as the clay is rolled out, use assorted cookie cutters to chop out varied styles and sizes to your backyard markers. Lay the minimize shapes flat on extra wax paper.
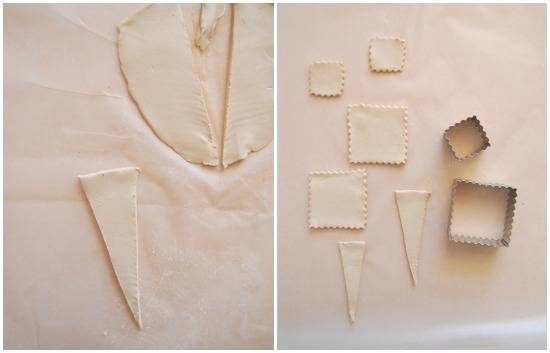
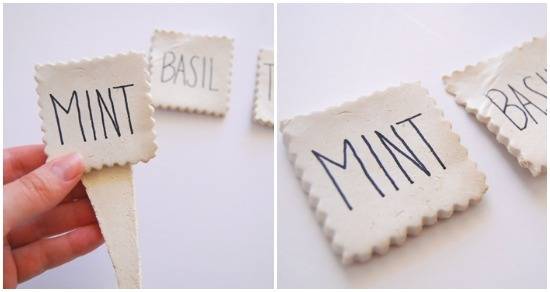
Subsequent, use a pointy knife— a butter knife additionally works nicely, particularly if doing this with youngsters— to chop out small triangles from the clay. You’ll want one triangle for every marker form you’ve minimize. These triangles will function stakes to safe the markers within the soil.
 Lexy Ward
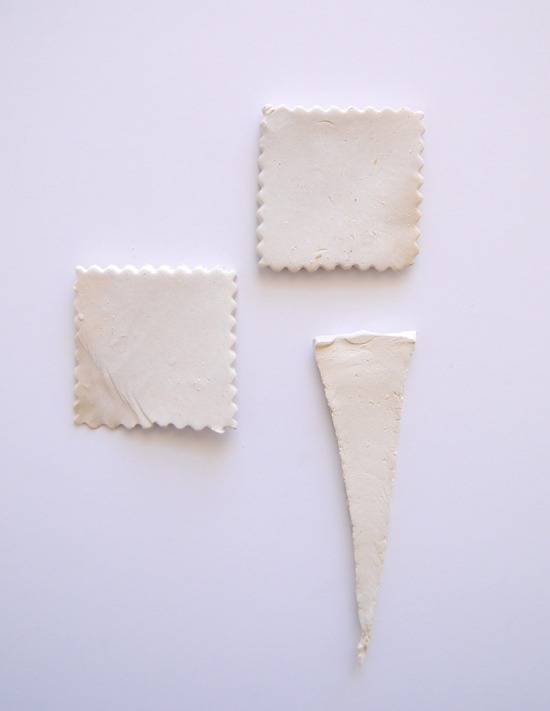
Permit the clay shapes and triangles to dry for about 48 hours. Place them in a sunny, dry location the place they will sit safely and completely.
 Lexy Ward
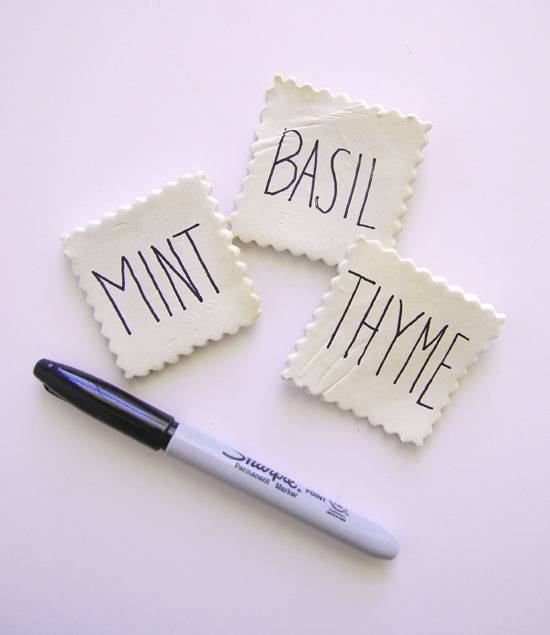
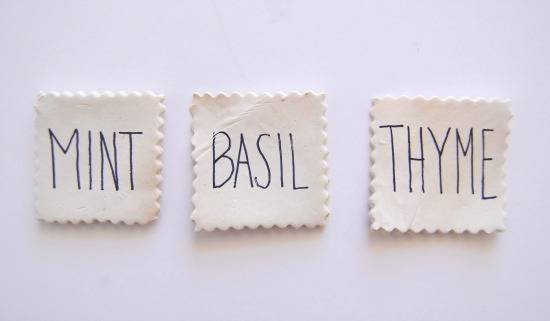
As soon as the clay is totally dry, use a everlasting marker like a Sharpie to jot down the names of your herbs, greens, or different crops on the markers. Go for tall, skinny letters to make sure the title of your plant is legible.
 Lexy Ward
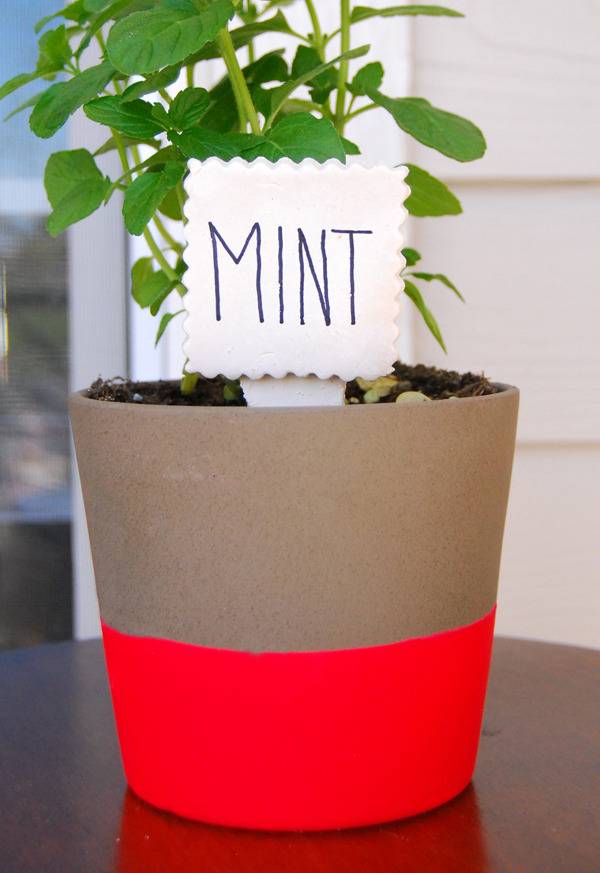
After labeling the markers, connect a triangle to the again of every one utilizing a small dab of scorching glue. The triangles will operate as stakes, making it straightforward to put the markers into the soil.
Lastly, positioning your plant labels subsequent to their corresponding crops is your final step. Including each performance and a private contact to your backyard.
Ideas for Lengthy-lasting Plant and Backyard Markers
After taking the time to make these cute backyard markers, you’ll positively need them to final. The following tips will assist ensure that they’re round for years to return.
Take into account the climate situations of your space
To make sure your DIY plant markers final via varied climate situations, begin by deciding on sturdy supplies.
Clay and stone are glorious choices as they endure out of doors parts successfully.
In case you go for picket markers, making use of a transparent sealant can considerably enhance their resistance to moisture.
Labeling correctly
In the case of labeling, go for fade-resistant inks or weatherproof paint pens to take care of readability over time.
In case you’re utilizing metallic markers, ensure that they’re rust-resistant to keep away from deterioration.
Including protecting coating
For added sturdiness, take into account double-coating your markers.
First, apply your base colour or design, then add a transparent protecting layer. This additional step helps defend the markers from rain and solar publicity.
Placement can also be essential
Guarantee your markers are securely positioned within the soil to stop them from being blown away by sturdy winds.
Take into account anchoring them deeper into the bottom or utilizing small rocks to carry them in place.
Preserve markers when wanted
It’s helpful to verify your markers for indicators of wear and tear periodically.
Reapply protecting coatings or contact up paint as wanted. Conserving some additional markers readily available can be a superb technique, permitting for fast replacements if any turn out to be broken.
For these in colder climates, take into account bringing your markers indoors on the finish of the season. Conserving them inside or lined throughout low season durations can lengthen their lifespan. This easy motion can stop them from cracking or fading as a result of harsh winter situations.
By taking these steps, your DIY backyard markers won’t solely be practical however will even retain their aesthetic enchantment all through the rising season.
 Lexy Ward
Inspiration and Concepts for Inventive Markers
Trying so as to add a private contact to your backyard markers? Listed below are some artistic methods you’ll be able to add some flare to your plant and backyard markers.
Think about using shiny acrylic paints so as to add colour and aptitude.
You may paint enjoyable patterns, like polka dots or stripes, to make every marker stand out.
Chalkboard paint
On your indoor crops, you possibly can think about using chalkboard paint on the clay, which lets you simply use and reuse them by altering the label utilizing chalk.
Add whimsical flare
For a whimsical contact, take into account including small drawings or symbols subsequent to the plant names, like a tiny tomato subsequent to your plant marker to your tomatoes.
Stamps and stencils
You too can use stamps or stencils to realize a extra uniform look.
If in case you have youngsters, involving them within the adorning course of could make it a enjoyable household exercise.
Whether or not you go for a contemporary, colourful strategy or a extra earthy, pure vibe, the chances for artistic backyard markers are limitless.
Supplies
air dry clay (discovered at any craft retailer)
rolling pin
wax paper
assorted cookie cutters
Directions
Working with a big slab of clay, roll it out with the rolling pin. Roll clay to 1/4″ thick. Lower out completely different styles and sizes and lay flat on sheets of wax paper.Lower out small triangles with a knife. A butter knife or plastic knife will work simply advantageous. One triangle ought to be minimize for every cookie form. The clay wants about 48 hours to dry. Lay it flat in a sunny and dry place the place it could possibly set safely.As soon as the clay is dry, write the names of your herbs and different crops in tall skinny letters with a sharpie or different everlasting marker.Connect the triangle to the again of every marker with a small dab of scorching glue. The triangle will act as a stake,, permitting you to safe the marker within the soil round every plant.Place every marker subsequent to their coordinating plant and admire your lovely and straightforward to navigate backyard!
")


")


")


