

Privateness screens is usually a backyard characteristic that takes up solely a small footprint, however attracts a ton of consideration. You’ll be able to construct a wooden privateness display screen your self with just a few easy-to-find supplies and get rising with an espaliered climbing shrub that appears stunning for all 4 seasons.
This publish will cowl…
If in case you have a small city lot or an in depth proximity to your neighbours’ yards, you may additionally have to create a way of privateness in your out of doors oasis. Whereas I really like utilizing bushes and huge shrubs to border the perimeter of the backyard, they’ll take up area.
I had a big Carolina Allspice rising on the East aspect of my city yard that bloomed many deep purple, peach-scented flowers every year in June and pulled double-duty by creating privateness within the yard.

For some motive, this normally tidy shrub grew to mammoth proportions, and it fully stuffed up the fence that divides us from the neighbour’s deck. It acted as an exquisite framework to the again of the backyard and a privateness display screen in the summertime months after we wanted it most.
After which, final summer season, one of many branches died again. After which one other department, and one other. By fall, the entire leaves and branches had died, and I couldn’t discover a single motive why. The entire surrounding vegetation had been wholesome, and we didn’t have any uncommon climate. It stays a thriller.
I hoped that it will develop again this yr, however, sadly, it didn’t. It’s unhappy to say goodbye to a tree or shrub from the backyard that has offered a lot enjoyment and objective. It was time for a brand new answer.
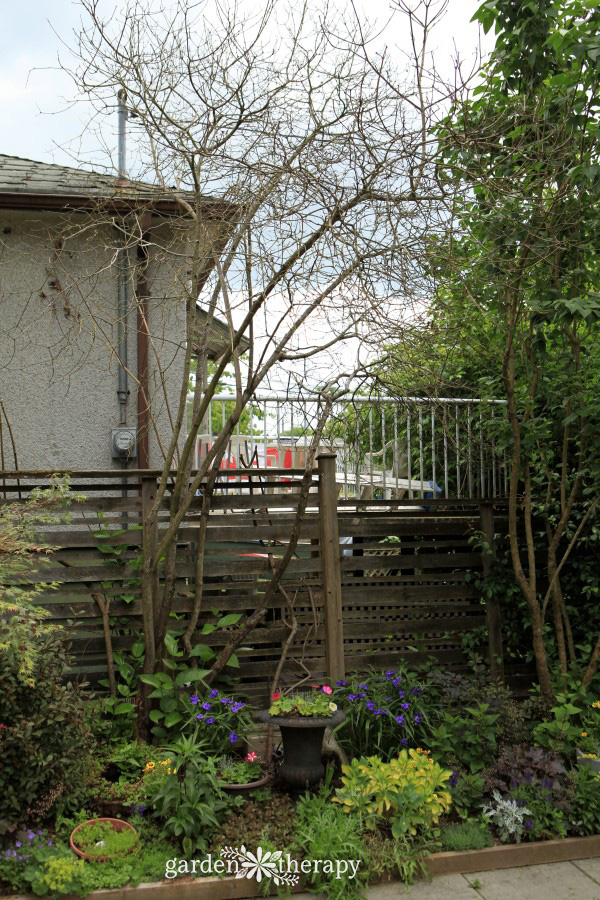
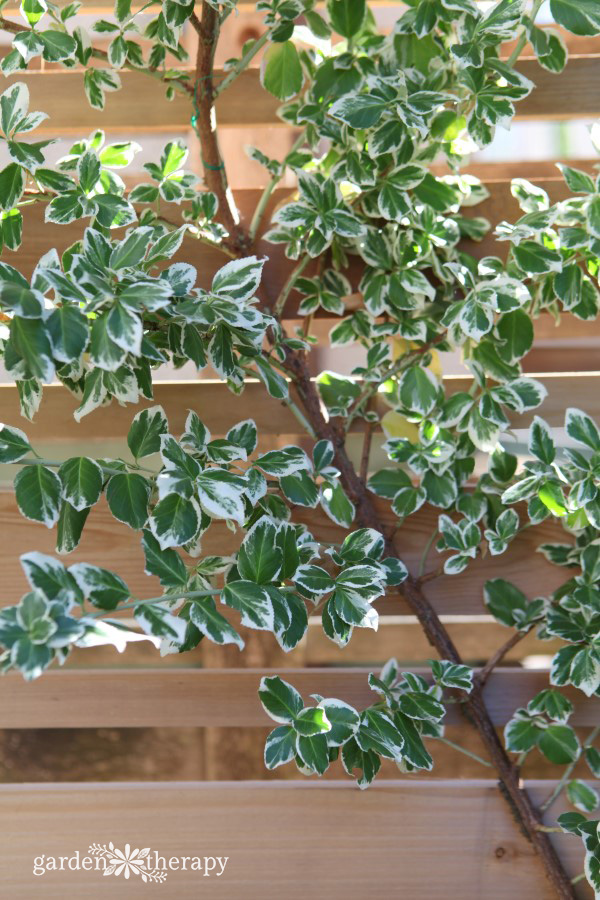
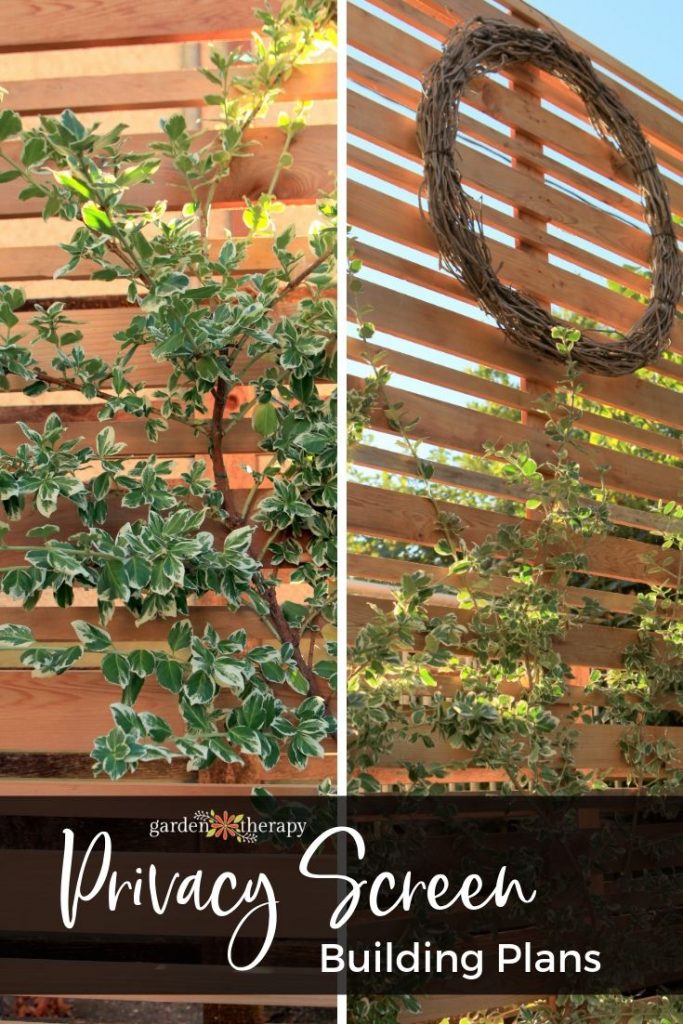
I made a decision on a wooden privateness display screen as a result of I needed one thing instantaneous to replenish the area. This massive, freestanding cedar trellis was the proper answer. I had an evergreen Wintercreeper rising within the backyard that I used to be capable of transplant and espalier on the trellis.
I can develop the branches all the best way as much as the highest and allow them to fill out right into a mass of inexperienced and white leaves, or I can proceed to prune it into an espalier form, maintaining the leaves tidy.
Since pruning is considered one of my favorite gardening jobs, I’ll actually be engaged on its kind as an espalier. You’ll be able to learn extra about espaliers right here.
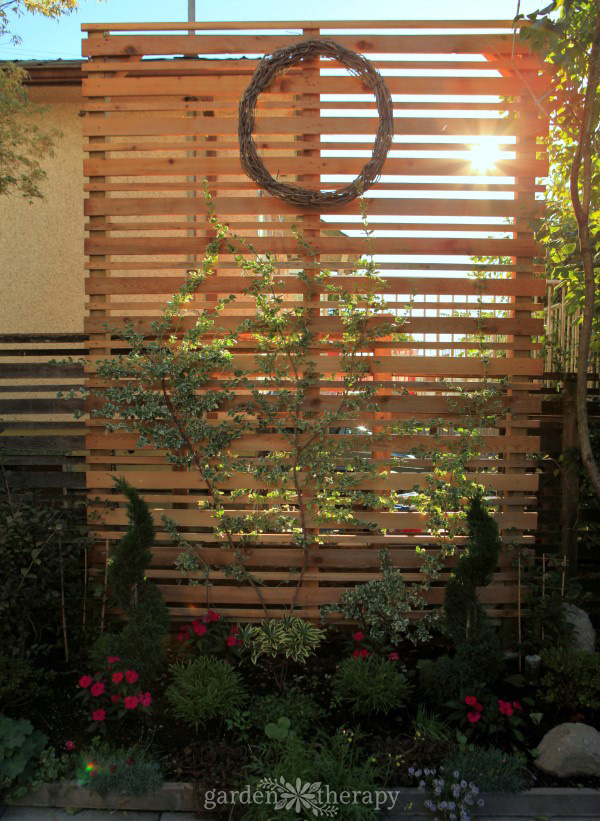
Easy methods to Construct a Freestanding Wooden Privateness Display screen
A very powerful a part of constructing any construction is making certain that its basis is powerful sufficient to forestall it from tipping or blowing over on a windy day. An excellent rule of thumb is to dig every publish gap no less than 1/3 the depth of the fence’s top. For this undertaking, the privateness display screen is 11’ tall, and so the publish holes should be no less than 3’6” deep.
Many fence posts are constructed by putting the precise publish within the publish gap and pouring concrete round it, however for this undertaking, we selected to seat the posts onto publish saddles as an alternative to assist preserve the posts out of the soil and water. It will scale back the danger of the posts rotting prematurely.
Dimensions: 11 ft excessive x 8 ft large – alter on your area
Supplies
(3) 4”x4”x12’ – stress handled
(2) 2”x4”x8’ – stress handled
(15) 1”x4”x8’ – cedar
(15) 1”x2”x8’ – cedar
(1) 1”x4”x12’ – cedar
(about 16) 60 lb bag of concrete
12”x12’ concrete forming tubes
1½” and three” deck screws
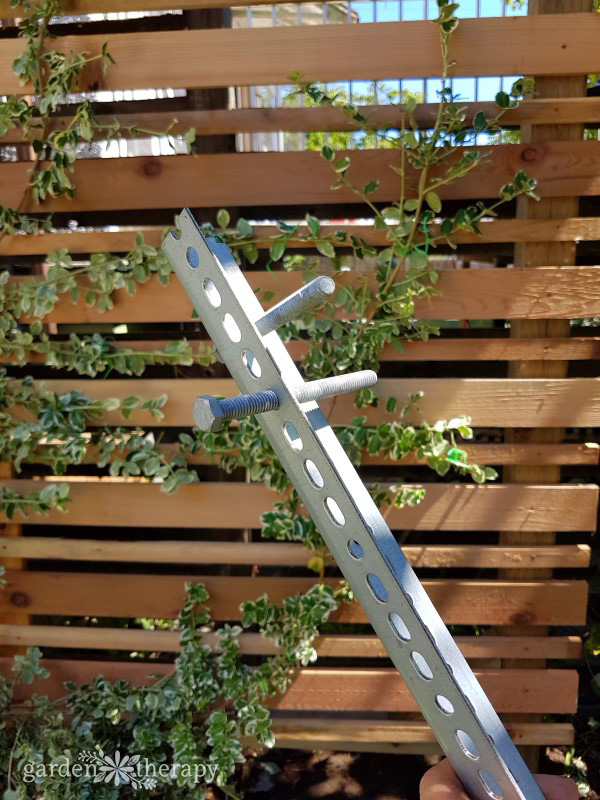
(2) galvanized publish saddles
(8) ½”x2” galvanized lag bolts
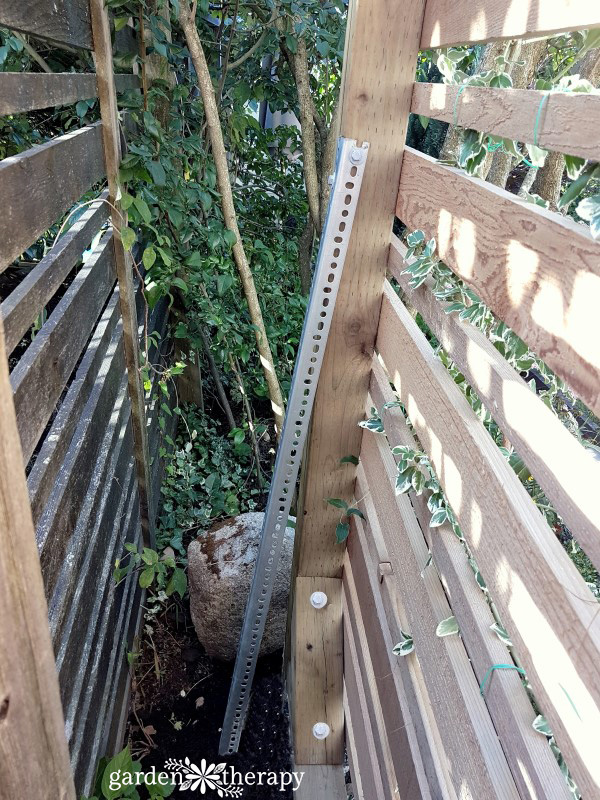
(4) ½”x6” galvanized lag bolts
(2) 6’ galvanized angle iron
Gravel
Instruments
Shovel or publish gap digger
Wheelbarrow or concrete mixer
Round noticed
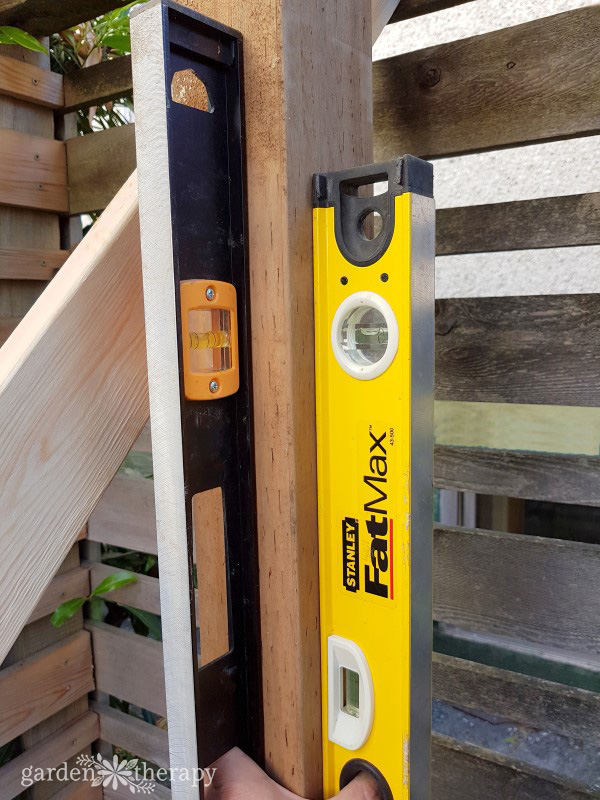
Ranges
Hammer
Drill
Scrap 2”x4”
Stepladder that may let you safely attain no less than 12’ excessive.

Make It!
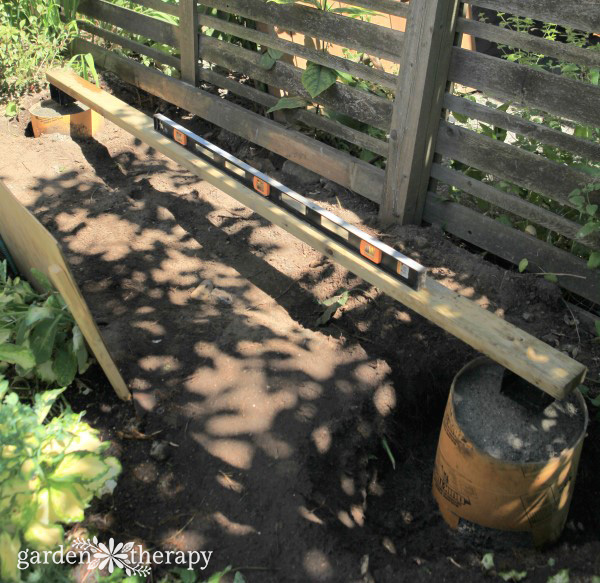
Put together Concrete Footers and Saddles
Dig two holes 7’2” aside on middle, 3’5” deep, and 14” large. Just remember to are utilizing the suitable digging device and approach on your undertaking and your physique.
Reduce a concrete forming tube into two 3’8” lengths, place every tube into the publish holes, and make it possible for the highest of the tubes are above grade.
Backfill across the exterior of every tube with filth.
Tamp down the underside of every gap and pour in 3” gravel.
Pour about 6 baggage of ready concrete into every tube whereas periodically tamping the concrete.
Spherical the highest of every concrete footer away from the middle to forestall rainwater from pooling.
Insert publish saddles into the middle of every concrete footer. There ought to be a few 1” hole between the underside of the saddle and the highest of the concrete footer to forestall the publish from contacting water and soil and prematurely rotting. Make sure that the publish saddles are degree vertically, horizontally, and with one another.
Enable the concrete to remedy.
Connect the Privateness Display screen Posts
Reduce two 4”x4”x12’ pressure-treated posts to 11’.
Seat every publish onto the saddle and degree them vertically.
Stabilize the posts with scrap 2”x4” anchored to each the posts and the bottom to make sure that they keep degree whereas finishing the remainder of the privateness display screen construction.
Use 2” galvanized lag bolts to firmly connect the posts to the saddles.
Stabilize the Posts (Optionally available)
The posts shouldn’t sway or lean once you push on them. Should you really feel that the posts are usually not secure sufficient, then observe these steps to offer further stability.
Put together two concrete footers about 2’ deep by 12” large, straight behind every fence publish.
Insert two 6” galvanized lag bolts into the ends of every 6’ galvanized angle iron.
Insert the angle iron (lag bolt first) deep into the concrete footer and connect the opposite finish to the nook of every fence publish utilizing two 2” lengthy lag bolts.
Enable the concrete to remedy.
Connect the Rails and Braces
Reduce two 2”x4”x8’ pressure-treated planks to suit the within size of the 2 posts and connect them 6” from the highest and 6” from the underside of the posts.
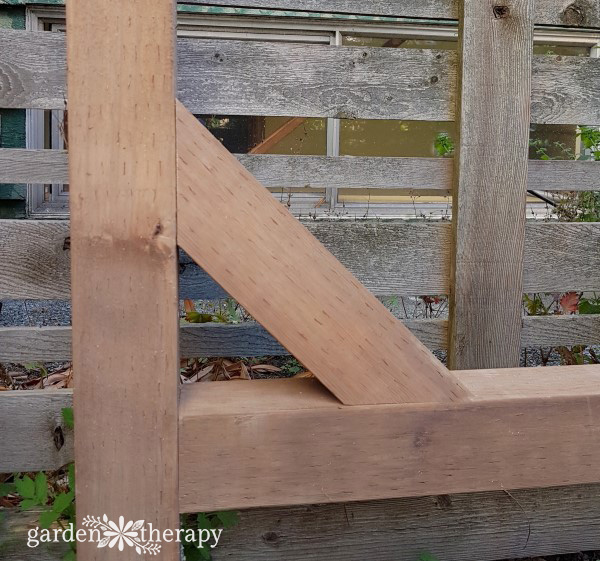
Reduce a 4”x4”x12’ pressure-treated publish into 4 equal items, trim the ends at 45 diploma angles, and connect them to the within corners of the privateness display screen construction. It will assist forestall diagonal swaying.
Set up the Lattice
The lattice is made up of alternating strips of 1”x2” and 1”x4” cedar planks with a 1½” hole in between every strip. To make measuring the 1½” hole simple and constant, use the broader half and further 1”x2” cedar plank as a spacing information.
Reduce a 2”x4”x12’ cedar plank to 11’ and connect it vertically to the middle of the highest and backside rails. This middle plank will assist forestall the lattice strips from sagging.
Working from the highest down, connect horizontally to the posts and vertical middle plank the 1”x2” and 1”x4” cedar planks in alternating order with a 1½” hole between every plank.
Plant It!
Lastly, you’ll be able to plant your espalier on the base of the construction and use backyard ties to connect the branches to the lattice. Strive adorning the display screen with different ornamental parts as properly; we added a grapevine wreath to fill within the empty area on the high.
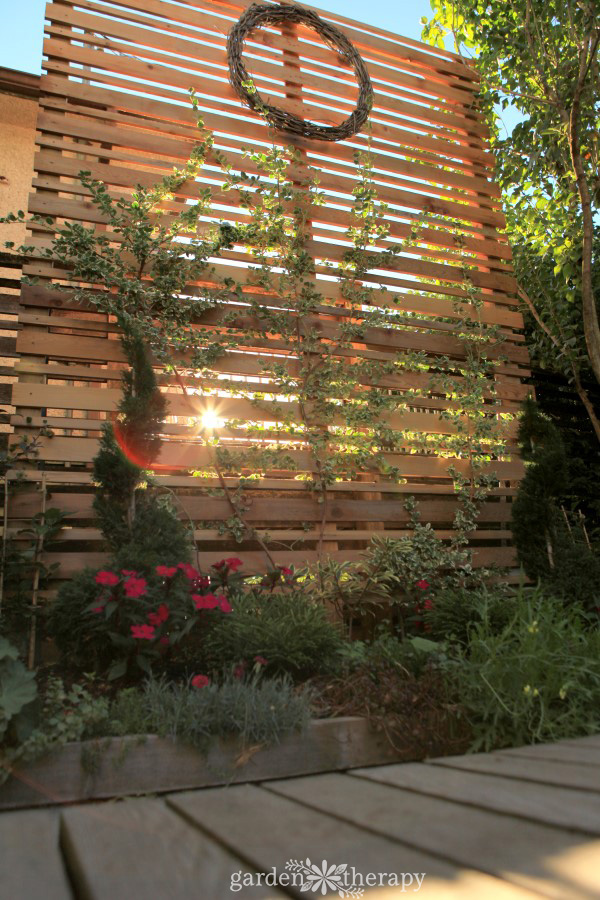
The solar can shine by way of, giving us dappled gentle and a wonderful backdrop to the backyard.
Extra DIY Yard Tasks to Strive
A metropolis woman who discovered to backyard and it modified the whole lot. Creator, artist, Grasp Gardener. Higher dwelling by way of vegetation.
")


