

I completed putting in my grasscloth wallpaper in our bed room suite final Thursday, so I’ve had a weekend to reside with it. I’ve had three days to have a look at it, reside with it, and be surrounded by it, and I like it increasingly with every passing day. There’s nothing like grasscloth wallpaper so as to add pure texture to your partitions, however putting in grasscloth wallpaper is a bit completely different from hanging common wallpaper. It’s not troublesome to put in, particularly when you’ve had expertise hanging common wallpaper, however there are some suggestions and tips that I realized alongside the best way. So at present, I wish to share learn how to grasp grasscloth wallpaper, begin to end, and share these suggestions and tips that I realized alongside the best way.
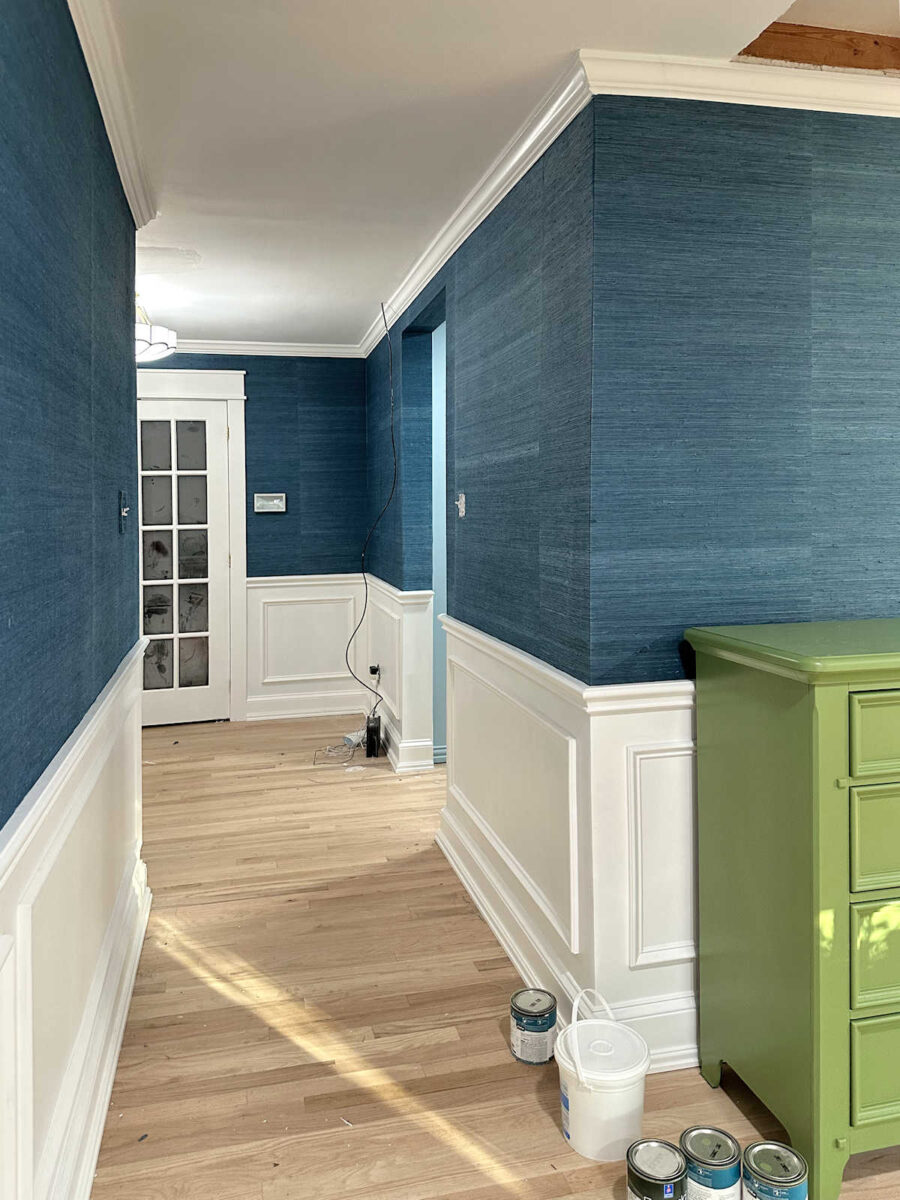
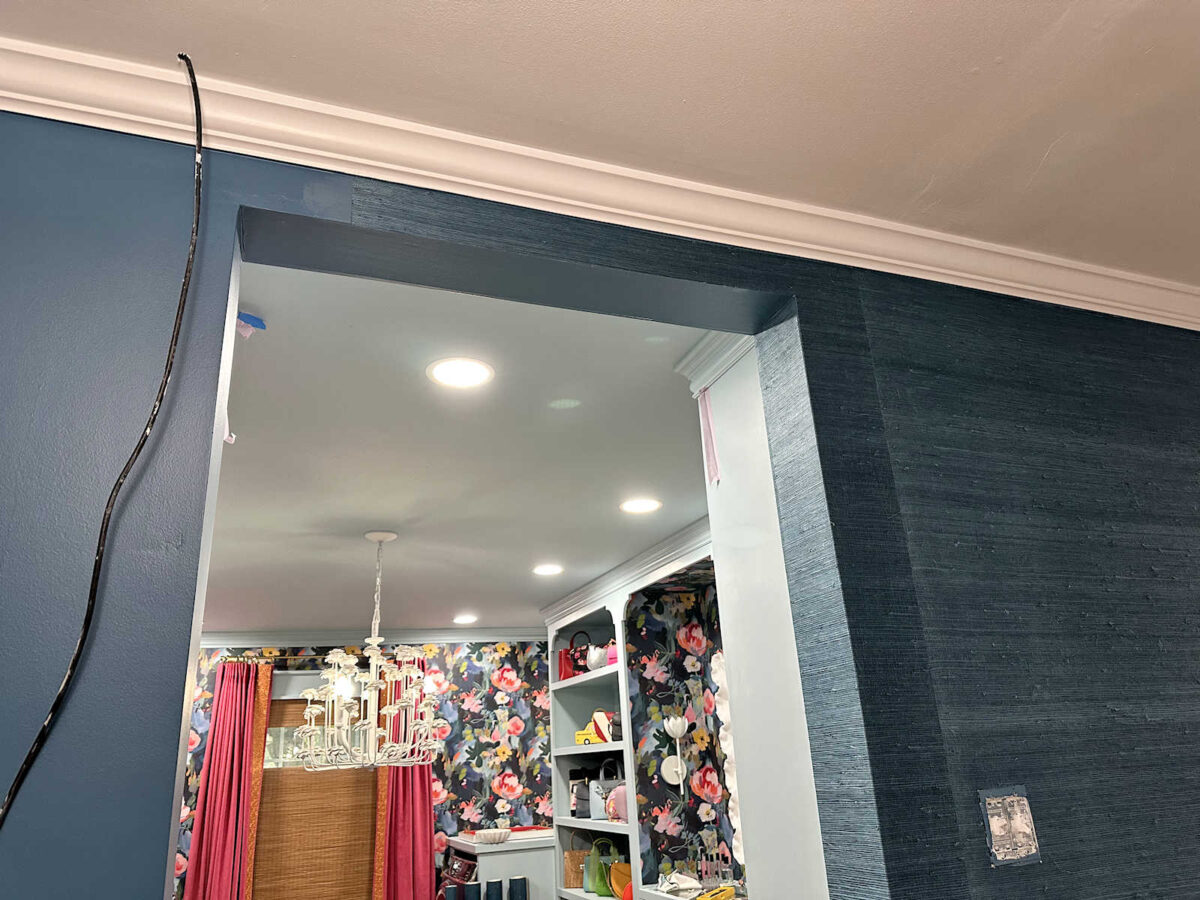
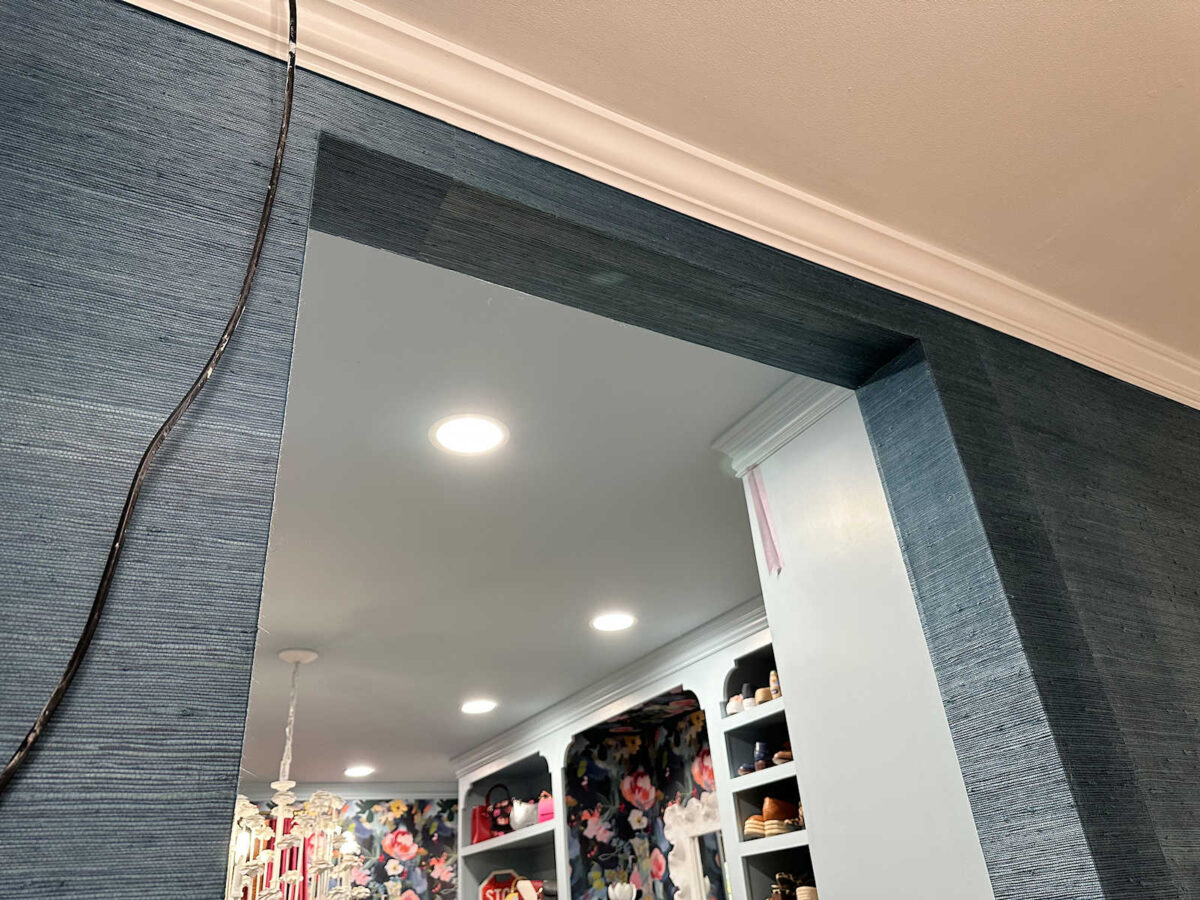
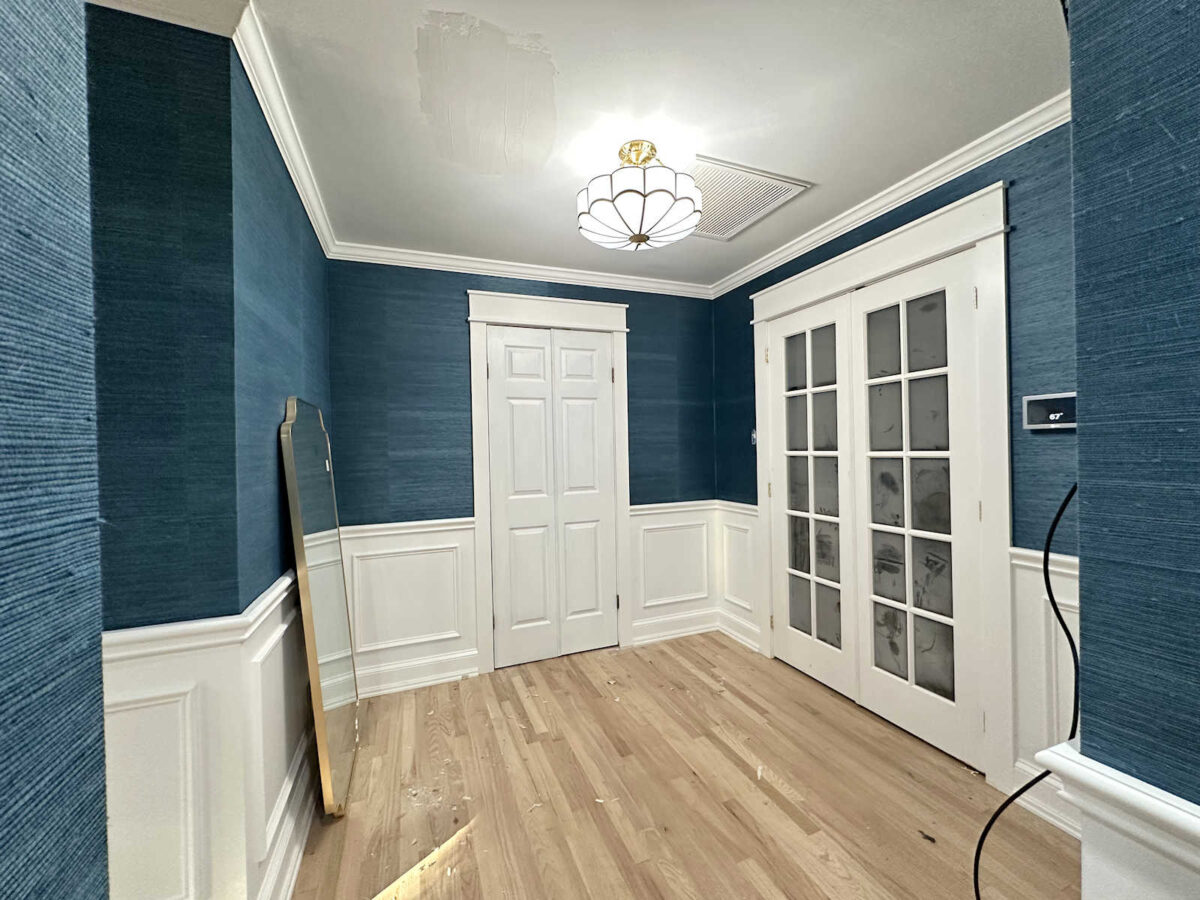
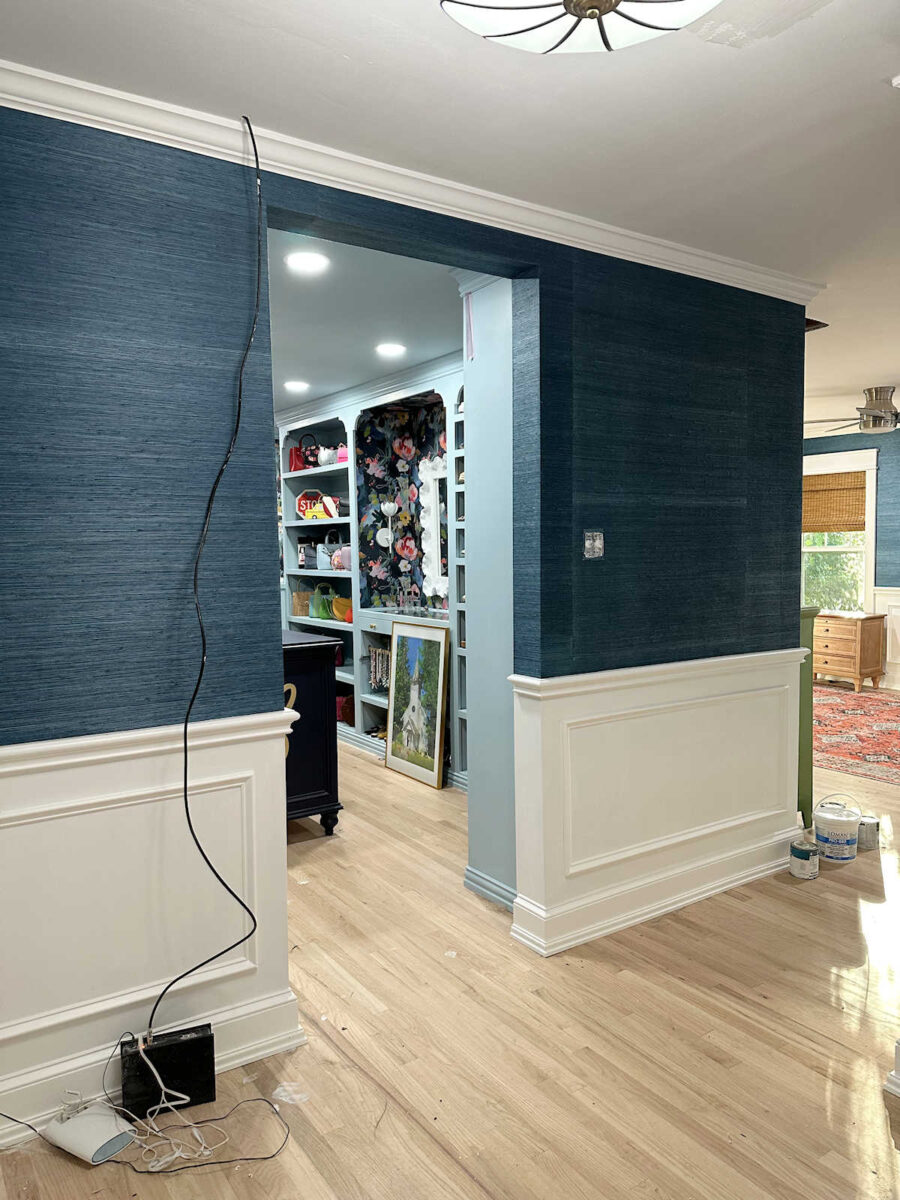
However first, let’s simply take one other have a look at these superb partitions. Y’all, I significantly can’t get sufficient of this darkish teal.
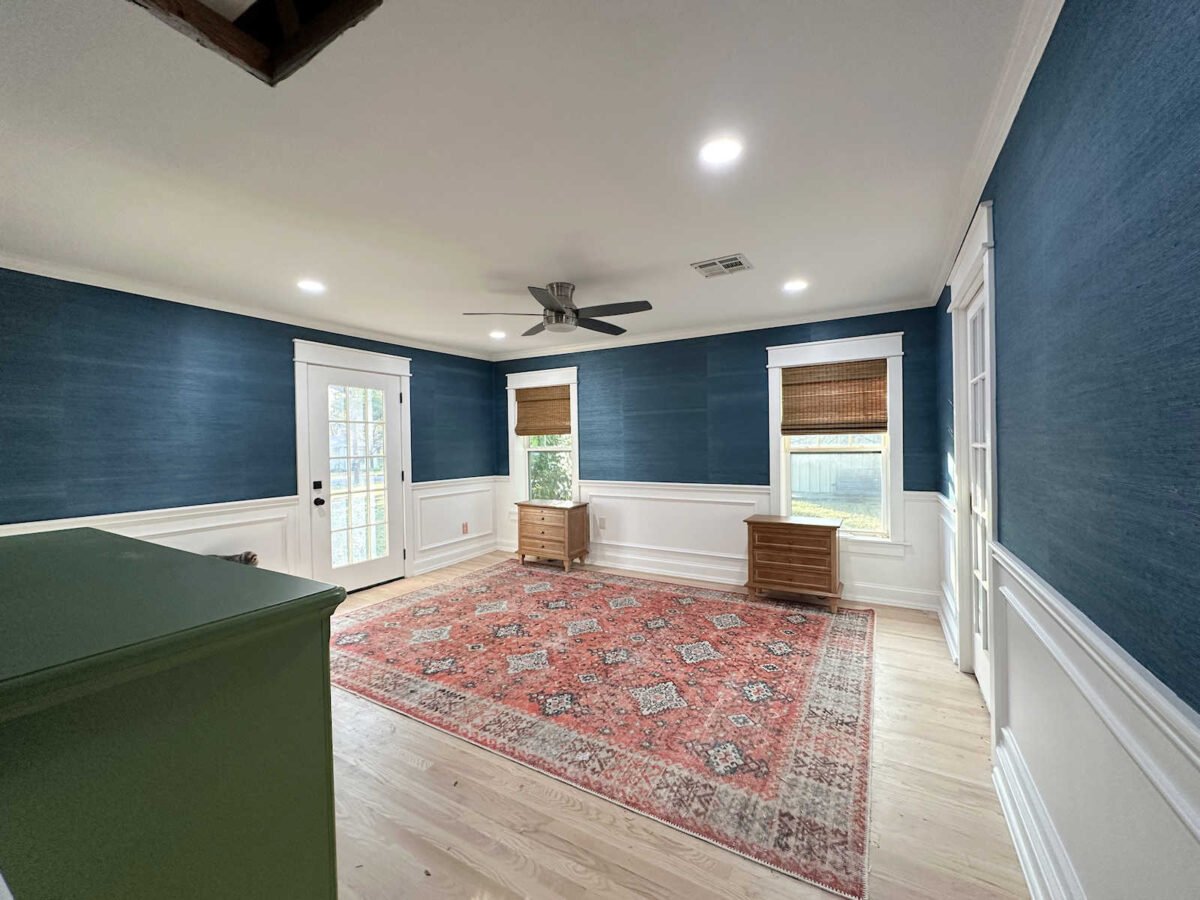
There’s merely no strategy to get this type of look with paint. Grasscloth is a very distinctive look that may’t be replicated (and I’ve tried!)
So let me begin at first and share the entire course of.
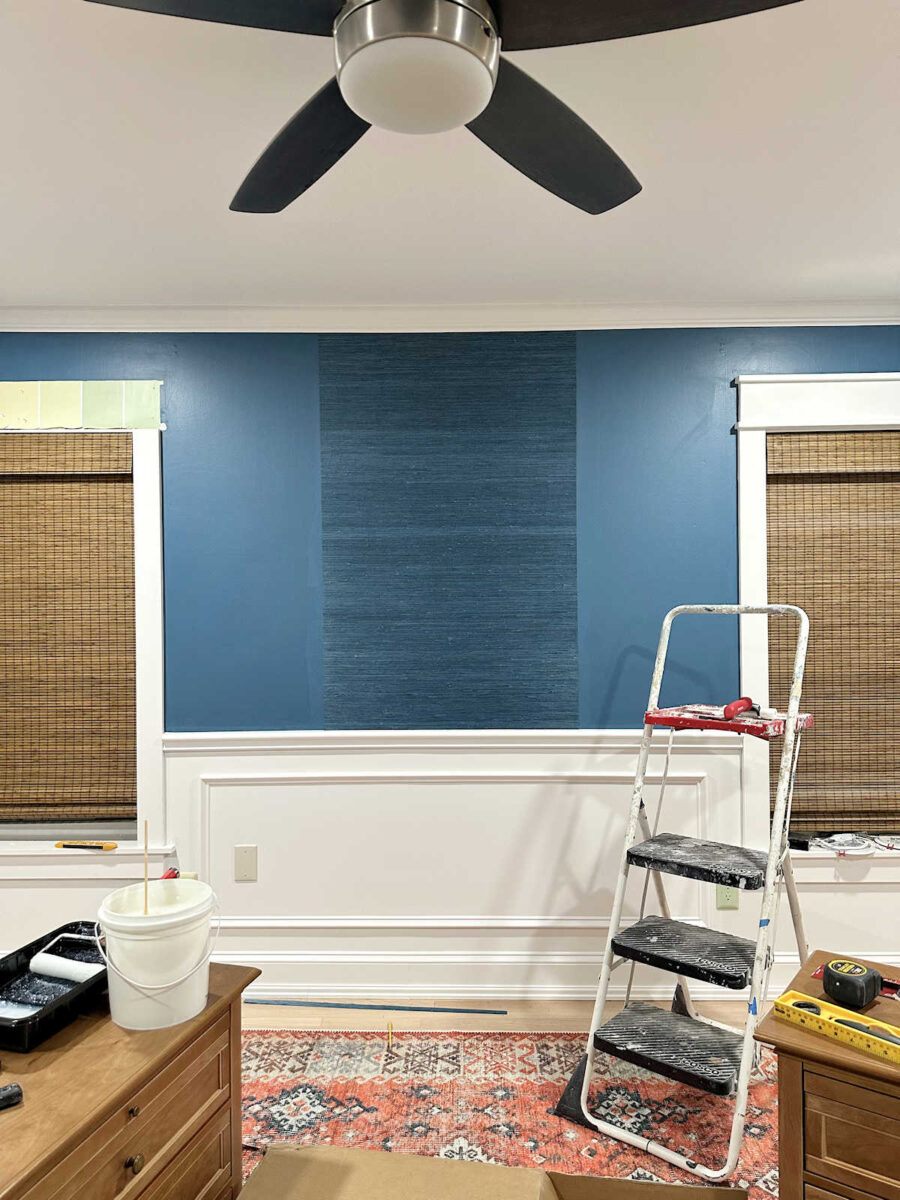
1. Paint the partitions to match the grasscloth.
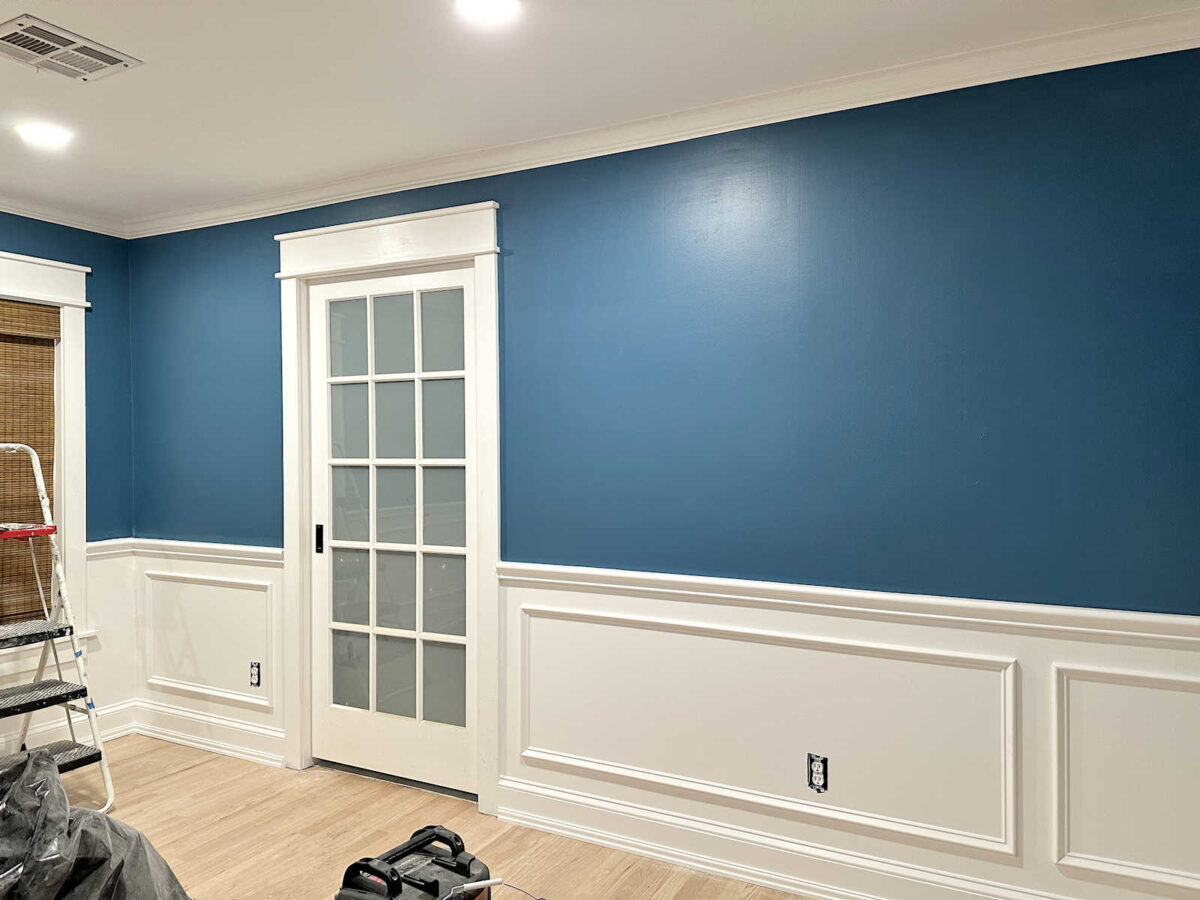
I took a chunk of the grasscloth to Dwelling Depot and had it colour matched of their Behr Premium Plus paint. I attempted to match it to the darkest colour within the grasscloth. After which I painted the partitions with that colour. After portray, I gave the partitions about 3-4 weeks in order that the paint might remedy utterly, so this took some planning forward. In the event you don’t wish to wait that lengthy, I’ve heard that there are primers made particularly to be used with wallpaper that may be colour matched to your wallpaper and that don’t take practically so long as latex paint to remedy.
One factor I did that I believe made an enormous distinction is that I painted this little backside fringe of the crown molding the identical colour because the partitions.
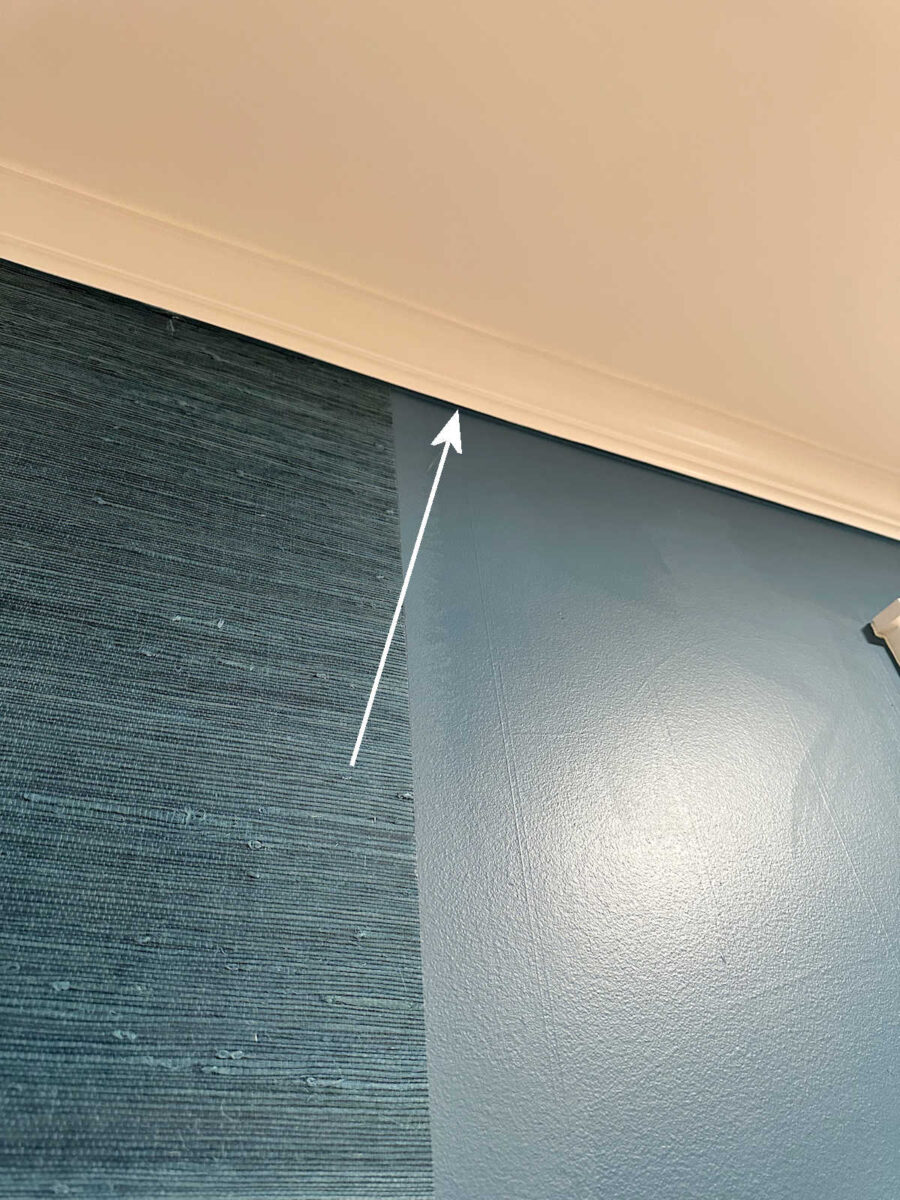
This isn’t as tedious as it could sound. I simply used a traditional paint brush and painted it on considerably rigorously however shortly, after which used a moist rag to wipe off any paint that bought on the face of the crown molding. I did this on the identical time I did the slicing in alongside the highest of the partitions with the wall colour, and it really went in a short time. However having this little backside edge the identical because the wall colour and the grasscloth gave me a extremely sharp and clear distinction between the grasscloth colour and the white crown molding.
2. Minimize, mark, and quantity the items of grasscloth.
Since I used to be solely doing the higher a part of the partitions with wallpaper, I had already figured what number of items I might get out of every roll of wallpaper. I minimize one roll at a time, 5 items from every roll. I numbered the items as I minimize them, after which I marked the highest edge of every piece with arrows in order that I knew which finish was up and which finish was down.

You actually don’t want lots of instruments for hanging grasscloth wallpaper. I used a 6-inch curler with 1/4-inch nap curler covers (marked for easy surfaces), a curler for seams (discovered within the flooring division of Dwelling Depot), a straight edge (I used a 10-inch mudding knife), and a utility knife. I used the sort with the snap-off blades since you’ll undergo lots of blades putting in grasscloth. In reality, I snapped off a brand new blade for every sheet of grasscloth.

Along with what’s proven above, I additionally stored a moist rag available simply in case I bought any adhesive on the grasscloth in order that I might wipe it off instantly. And I additionally used a 2-inch Purdy sash brush (any top quality paint brush will do) to use the adhesive alongside the crown molding, the chair rail, and alongside the sting of the beforehand put in piece of wallpaper. And naturally, I wanted a 7-inch paint pan to pour the adhesive into.
4. Choose your adhesive.
I watched lots of movies and browse a ton of feedback on these movies to seek out the correct adhesive for putting in grasscloth wallpaper. The favourite among the many execs appeared to be Roman Professional-880. However execs work actually quick and have numerous expertise. I discovered that for me, as a novice in hanging grasscloth wallpaper, it didn’t have sufficient tack to it to carry the burden of the paper up lengthy sufficient for me to get it good (since grasscloth is heavier than normal wallpaper), and it additionally didn’t maintain the seams down sufficient for my liking. I didn’t like having to return and babysit the seams, ensuring to press them down repeatedly till the adhesive dried sufficient to carry them down.
So I swapped and went with what appeared to be the second most beneficial (which additionally occurs to be my private favourite) — Roman Professional-555 Excessive Tack. This has been my go-to adhesive for years now. It’s sturdy sufficient to carry the heavy paper on the wall with out it coming down in your head as you’re positioning it, and it additionally does a ravishing job at holding the seams down instantly. However it nonetheless offers you adequate working time if it’s good to modify the piece or utterly take away the piece and reapply it.

Now right here’s the factor. The directions on the Professional-555 Excessive Tack say very clearly DO NOT ADD WATER. However I’m not excellent at following directions, and I all the time add water to mine. The Professional-555 is so thick that it’s virtually too thick and goopy for a non-pro like myself to work with, and I discover that including only a tiny little bit of water (not more than 1/8 cup/30 ml. per gallon) is sufficient to make it go from that loopy thick and goopy texture to a easy texture as soon as it’s stirred totally. And that small quantity of water has by no means destroyed the “excessive tack” high quality of the product for me. However once more, do that at your personal threat as a result of the directions clearly say NOT so as to add water. I’ve accomplished it each single time I’ve used this product, and I’ve by no means had a problem with it, however when you resolve to comply with in my rebellious footsteps, simply know that it’s clearly the other of what the producer recommends.
5. Rigorously select your start line.
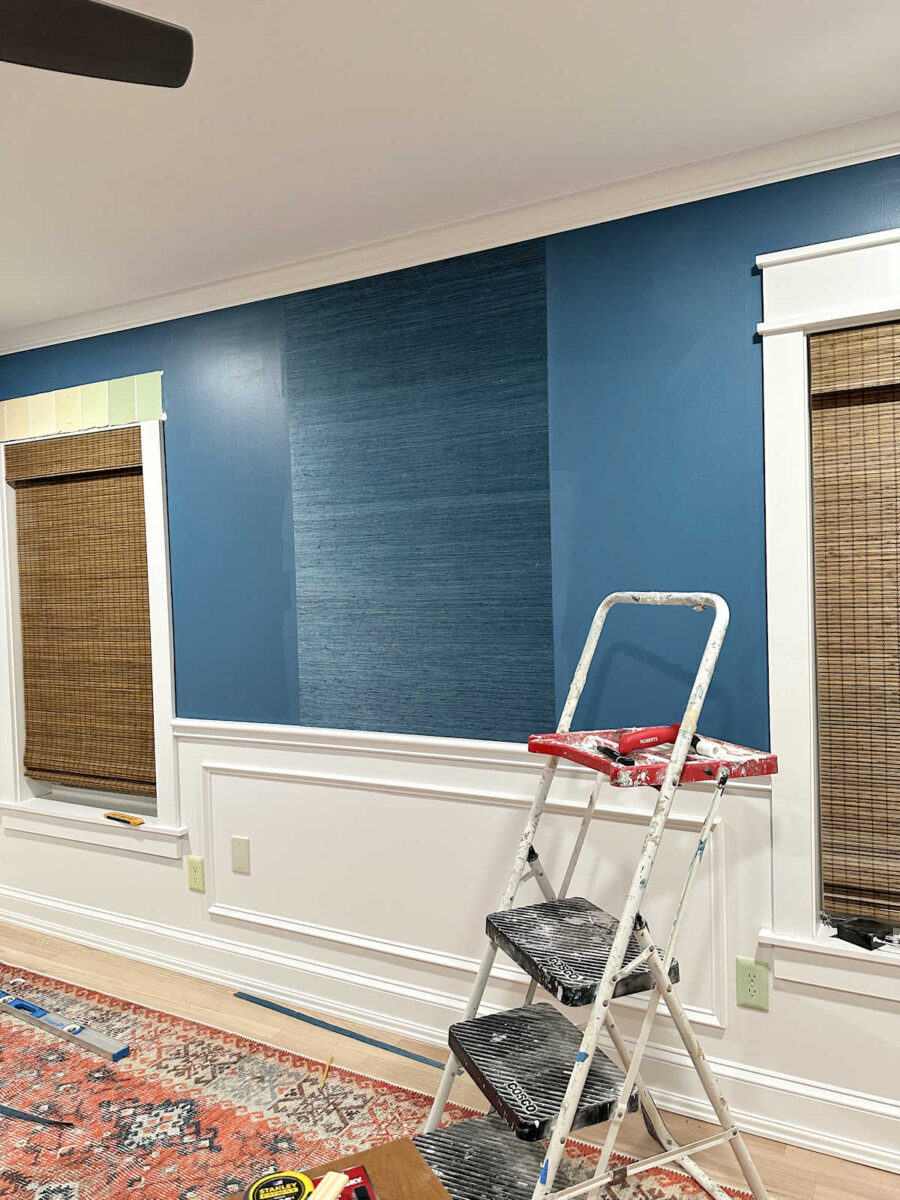
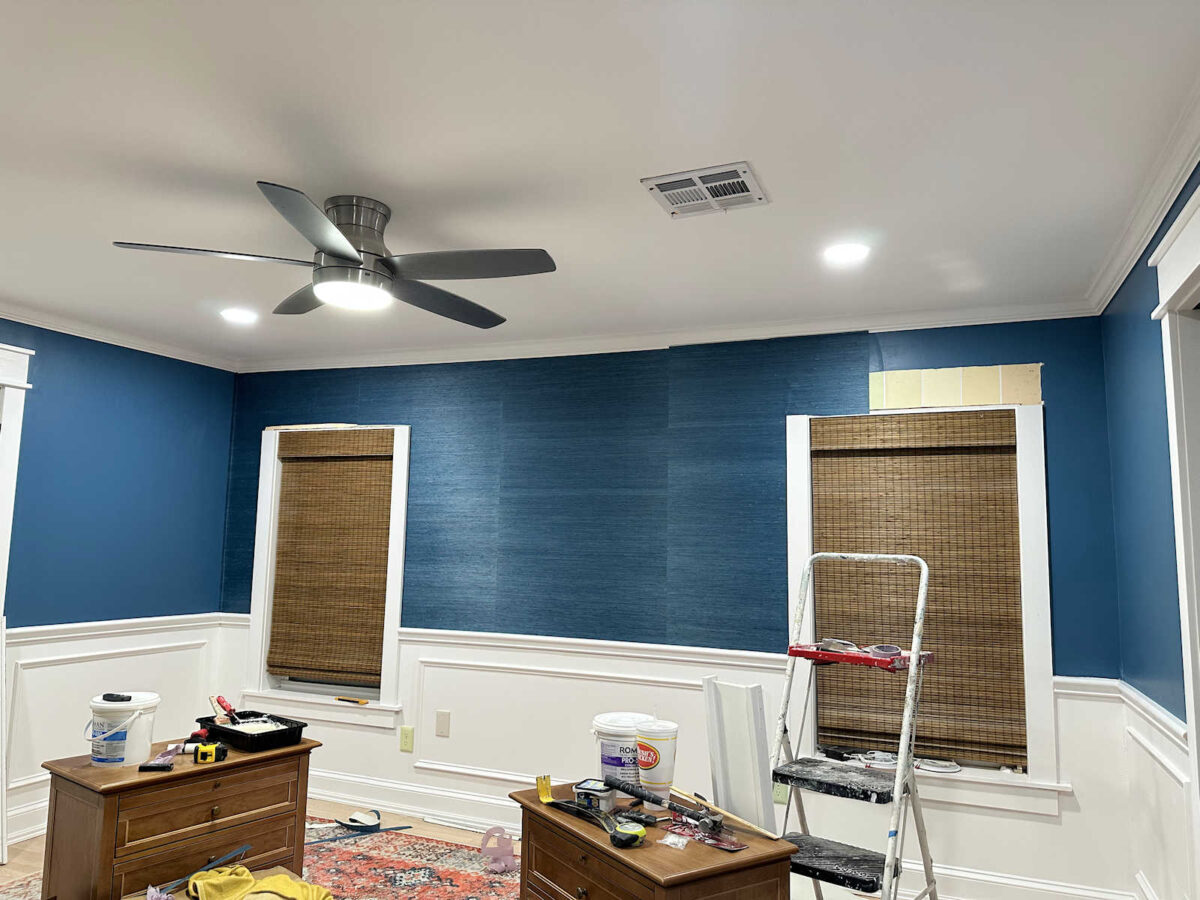
As a result of the seams in grasscloth are seen, you do need to be very conscientious of the place to begin. In the event you’re solely doing one function wall, you wish to make sure that the paper is centered on that wall. You’ll both need a seam proper within the center otherwise you’ll need a full sheet centered within the center. Having your grasscloth off-center on a function wall shall be very noticeable. In the event you’re doing a complete room, take into consideration which wall would be the focus within the room, heart the paper on that wall, and work out from there.
In our bed room, the headboard wall is clearly the focal wall of the room, so I began with one piece centered in the course of that wall after which labored out from there. I had already measured and figured that this wall required 5 items, and I might get 5 cuts from every roll of wallpaper. And since I used to be beginning within the center, I began with the piece marked #3 from that roll.
I utilized the adhesive to the wall (not the again of the paper), utilizing my paint brush to get the adhesive alongside the crown molding and the chair rail, after which I rolled the adhesive onto the center portion of the wall. I had already measured and marked the width of the primary piece on the wall so I knew how extensive to go when rolling the adhesive. After which proper earlier than I put the paper on the wall, I wiped down the again of the wallpaper with a moist rag simply to melt it a bit and make it a bit simpler to work with.
After which I labored out from there, with items #2 and #1 going to the left of that first piece, and items #4 and #5 going to the correct of that first piece.
6. Determine if you wish to work round or take away trim
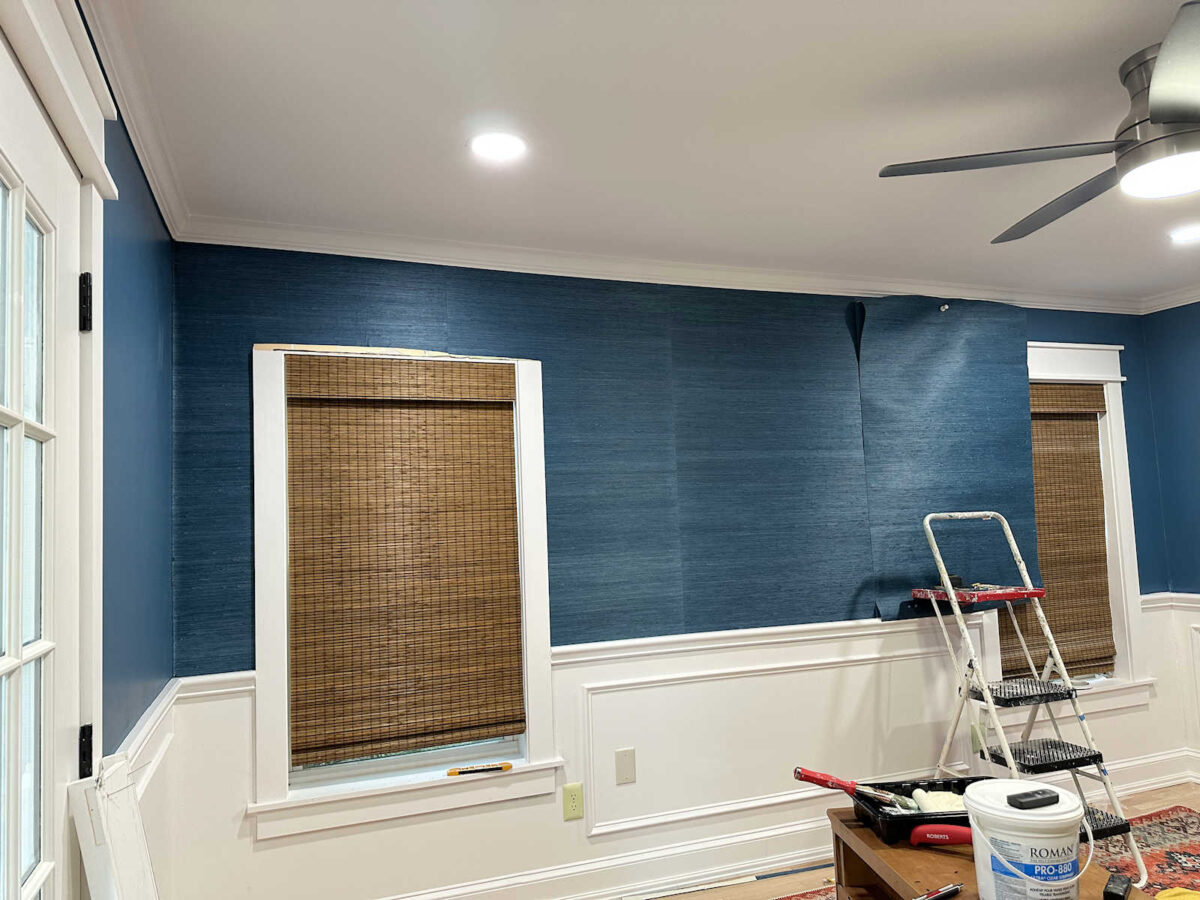
Due to the design of my window and door trim, I made a decision to take away the highest header trim items on all the doorways and home windows as a substitute of attempting to chop round them. However I left the vertical items because it was simple to chop straight traces in opposition to them. If your whole trim is straight with sq. corners, it’s simpler to depart the trim up. In case your trim is irregular like mine is or you’ve got fancy trim above your doorways and home windows, it is likely to be simpler to take away it, set up the wallpaper, after which reattach the trim.
7. Mark plumb traces for every new piece.
When you have a laser degree, this course of shall be simpler and this step shall be pointless. However I don’t have a flowery laser degree, so earlier than putting in every subsequent piece, I measured and marked the width of the subsequent piece from the earlier piece.

After which I used my bubble degree to mark a plumb line on the wall as a information for the subsequent piece. This helped me make sure that every bit was being put in straight and sq. and plumb, as a result of with no information of some kind (both plumb traces drawn or plumb traces from a laser degree), it’s simple for these items to begin getting askew and also you go alongside.

8. Utilizing the “paste the wall” approach
I made a decision to stick the wall as a substitute of the again of the paper as a result of I felt like I had extra management over it. So I used my paint brush to rigorously add paste subsequent to the earlier piece of wallpaper…

After which I added paste alongside the crown molding and the chair rail…

After which I rolled the adhesive onto the middle portion of the wall.

And as I discussed above, earlier than hanging the wallpaper, I used a moist rag to moisten the again of the wallpaper after which hooked up it to the wall.
I primarily used my fingers to easy out every bit, ensuring that there have been no air bubbles trapped beneath, and ensuring to easy out any wrinkles. I didn’t use the curler on many of the items. Once more, my fingers have been my primary instruments for smoothing out the paper and urgent the seams into place. I solely used the curler if I had any cussed bubbles or cussed seams, and I used the curler very selectively solely on these areas.
9. Reverse grasp the wallpaper.
When putting in a stable colour grasscloth wallpaper (i.e., one which doesn’t have a printed design on it), you’ll wish to reverse the route of every piece. In different phrases, begin along with your first piece going up (bear in mind these arrows I drew on the again of every piece?). After which the subsequent piece shall be put in with these arrows happening. On the subsequent piece, the arrows will go up, and the subsequent piece will go down. Proceed this till the entire space is roofed.
10. Trimming the paper
I trimmed the paper instantly slightly than ready for it to dry earlier than trimming. To do that, I used my 10-inch mudding knife to make it possible for the paper was firmly adhered proper down the highest fringe of the chair rail, and the I stored the mudding knife in place to make use of as a information for slicing the paper.
When slicing the paper, you don’t wish to minimize on the facet of the mudding knife subsequent to the wall. You threat tearing the wallpaper when you minimize on this facet.

As an alternative, you wish to minimize on the facet between the mudding knife and the trim.

I additionally used the mudding knife to push the wallpaper into the corners to get actually sharp creases within the corners. To do that, I pressed gently at first till I felt the mudding knife really urgent in opposition to the wall within the nook (this takes some endurance as a result of grasscloth doesn’t wish to fold this manner), after which I elevated stress till I used to be urgent very firmly to get , sharp crease.

After which I lifted up on the knife, repositioned it a number of inches up, and did the identical factor till I had labored my method all the best way to the highest.

In different phrases, I didn’t slide the knife up the wallpaper. In the event you slide the mudding knife up the nook whereas holding stress, you threat the nook of the knife catching on the wallpaper fibers and ripping it. Ask me how I do know. 🙂 And getting the wallpaper into the corners didn’t take only one go from backside to high. I labored with it very patiently, up and down the nook a number of occasions from high to backside, till I bought that sharp crease.
On the backside and high corners the place the wallpaper met the trim, I pressed my mudding knife proper into the nook and folded the wallpaper like proven under to get the wallpaper proper into the nook the place it met the underside trim.

After which I pulled the wallpaper away from the wall, minimize away the surplus utilizing scissors (not the utility knife), and pressed the wallpaper again into the nook.

Eradicating that bulk from the nook allowed me to trim the underside identical to regular whereas getting proper into that nook very simply with out having to cope with further bulk.
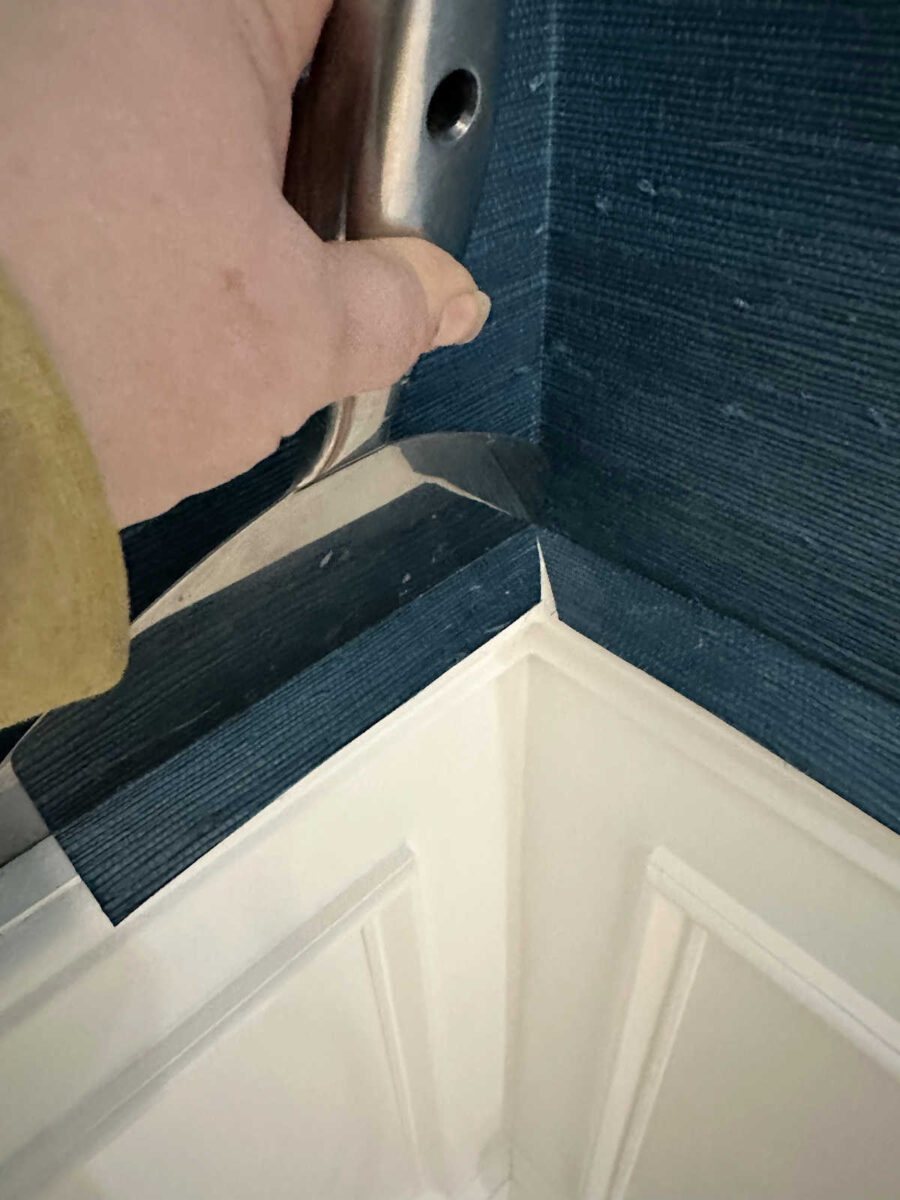
And right here’s the completed nook as soon as it was trimmed…

I did the highest corners in the very same method — press the knife proper into the nook, fold the wallpaper rigorously in order that the knife can get all the best way into the nook, maintain urgent and folding till the knife has pressed the wallpaper proper into the nook, pull the paper away and trim away the surplus, press the wallpaper again into the nook, after which trim as regular.

11. Working round challenges and piecing collectively wallpaper
I can’t anticipate or tackle each problem that you could be come throughout whereas putting in grasscloth wallpaper, however I’ll share this one problem that I bumped into and present you the way I solved it. My closet doorway doesn’t have trim round it, and I wished the grasscloth to wrap round to the door jambs.
It appeared easy till I began engaged on it, after which I spotted that I couldn’t wrap the identical piece of wallpaper round each the facet jamb and the highest jamb. Since seams are so seen on grasscloth, it was crucial for me to take care of my 36-inch widths on the partitions. However by sustaining these 36-inch widths, that meant I might solely wrap the wallpaper onto the highest jamb, or I might wrap it onto the facet jamb, however I couldn’t do each with one sheet of wallpaper. Clearly, I selected to wrap it onto the facet jamb since these are greater and extra seen, however that left me with solely partial protection for the highest jamb. So I ended up trimming the grasscloth alongside the sting, leaving the highest jamb utterly uncovered on this step.
I went forward and hung the subsequent piece of wallpaper to the left of that one, and I did the identical factor — wrap the facet jamb of the doorway with the grasscloth and minimize away what was left of the surplus proper on the nook of the highest jamb. After which I went again with separate items and coated the highest jamb, sustaining the seams the place the 2 primary items meet in order that it seems just like the wallpaper is seamlessly wrapped across the high jamb. So in actuality, these two items overlaying the highest jamb are utterly separate, however they appear to be they’re wrapped round from the wall.
And that’s it! When you have expertise hanging common wallpaper, you shouldn’t have any issues putting in grasscloth. I used to be fairly intimidated by it earlier than I began and even thought-about hiring out the method as a result of I used to be so uncertain of myself. However I’ve had loads of expertise putting in common wallpaper and couldn’t discover anybody in my space skilled in hanging grasscloth wallpaper, so I made a decision to only go for it.
And now, in hindsight, I’m so glad I didn’t waste the cash to rent out this course of. It’s solely barely more difficult than putting in common wallpaper.
And the payoff is so value it! There’s simply nothing like grasscloth in my ebook. Now I have to get our router moved to a different room in order that it’s not distracting from my attractive partitions. 😀

Addicted 2 Adorning is the place I share my DIY and adorning journey as I transform and embellish the 1948 fixer higher that my husband, Matt, and I purchased in 2013. Matt has M.S. and is unable to do bodily work, so I do nearly all of the work on the home on my own. You may study extra about me right here.
 Review – Sewing")


")


