

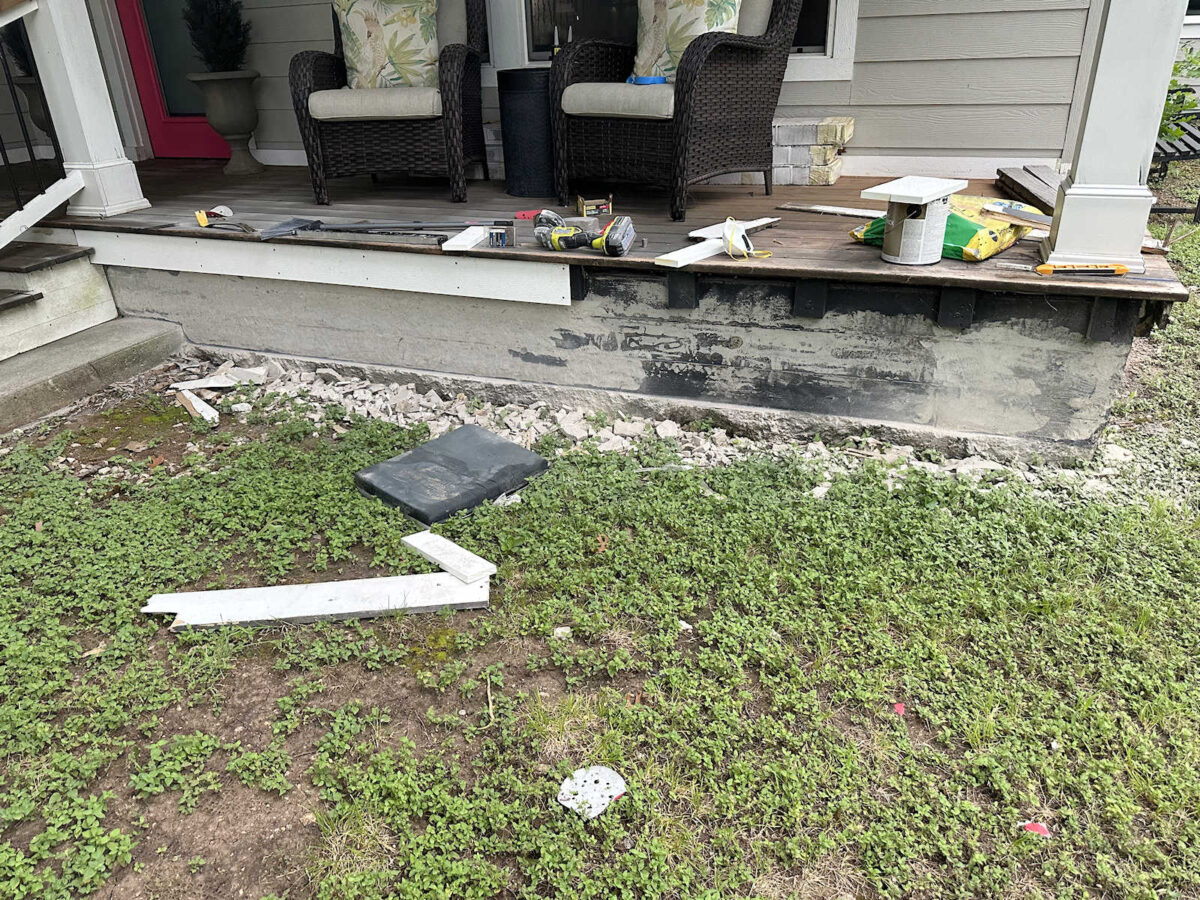
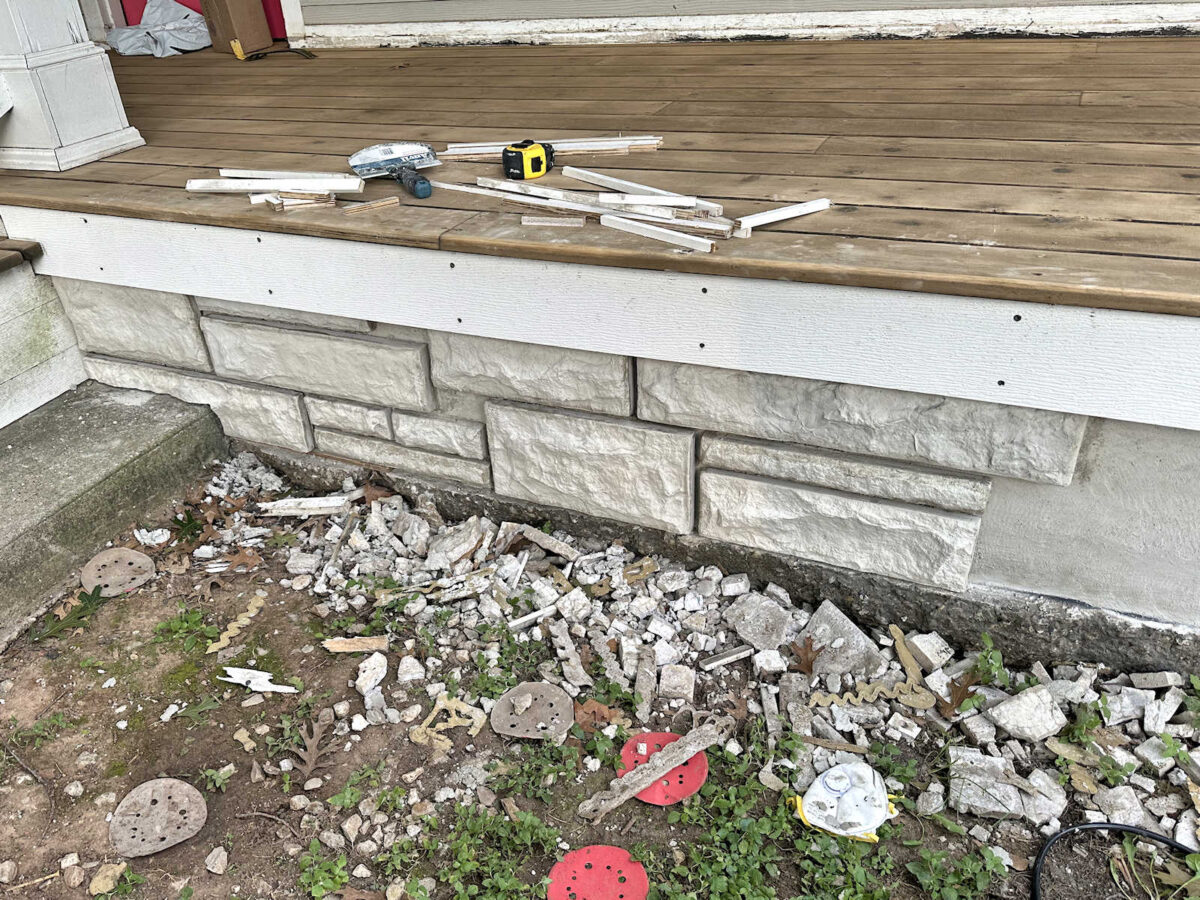
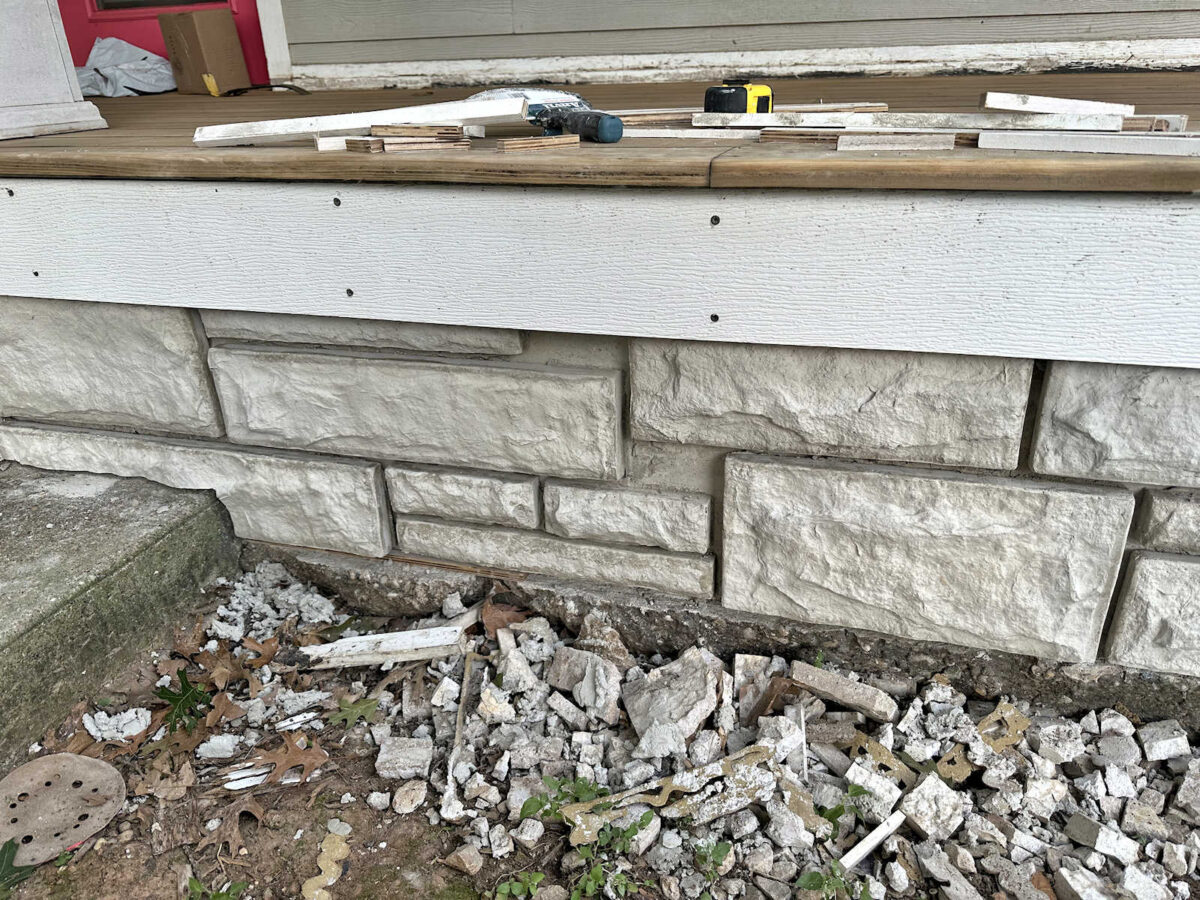
This entrance porch skirting mission has been an extended course of, however yesterday, I lastly bought to the purpose of attaching the fake concrete stones that I made to the skirting space of the porch. I didn’t fairly get midway on the entrance, however I bought fairly near midway. Right here’s the way it’s trying to date…
That is what the skirting space regarded like after I began my work yesterday. I had used my handheld grinder to grind the concrete on the skirting space about midway throughout the entrance. I nonetheless wanted to grind the remaining, however I used to be too anxious to start out attaching the fake concrete stones, so I made a decision to leap proper in. However earlier than I connect the remainder of the stones, I’ll nonetheless should grind down the remainder of the entrance to ensure that all of that paint is eliminated and the entire ridges within the concrete are gone.
To connect the fake stone facade, I used Fast Set Mortar Combine. And let me inform you, the “Fast Set” title is reality in promoting. These items units up very quick, so I blended it up in very small batches. As soon as it begins to set, you possibly can’t add extra water and attempt to skinny it down and make it workable once more. As soon as it begins to harden, you simply should throw any leftovers away and begin with a brand new batch.

I used to be mixing such small quantities at a time that I used this 4-liter bucket from Dwelling Depot and blended the mortar with a handheld kitchen mixer.
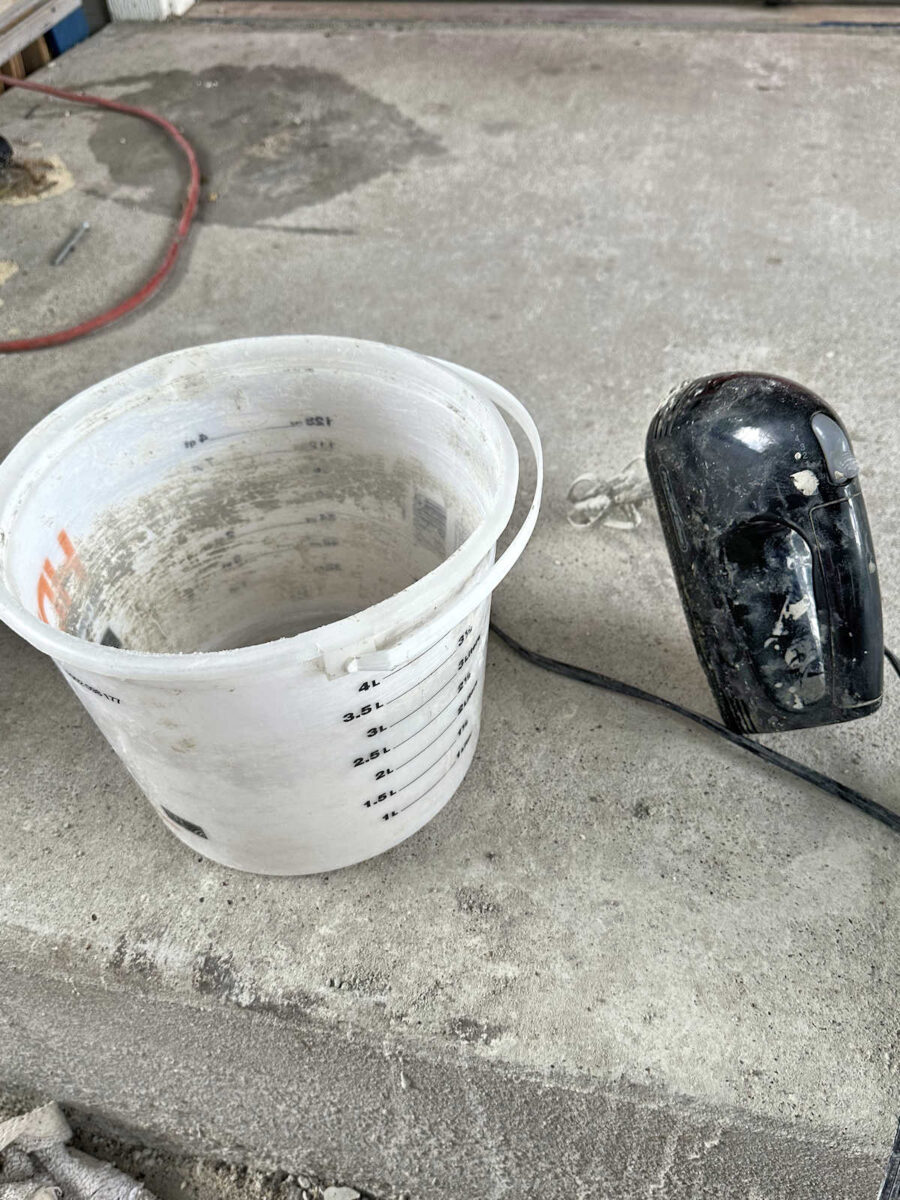
I discovered the laborious means after I was making the fake stones that it’s crucial so as to add the water to the bucket first, after which slowly combine within the concrete or mortar combine. The ratio for the mortar combine is about 1 half water to 4 or 5 components mortar combine. I discovered that one liter of mortar combine and to at least one cup (8 ounces) of water labored rather well for me. Since I used to be mixing the mortar within the carport after which carrying it to the entrance porch every time, by the point I bought it blended, walked to the entrance porch, prepped the stone and the porch space the place the stone would go, and was able to butter the again of the stone, it was the right consistency.
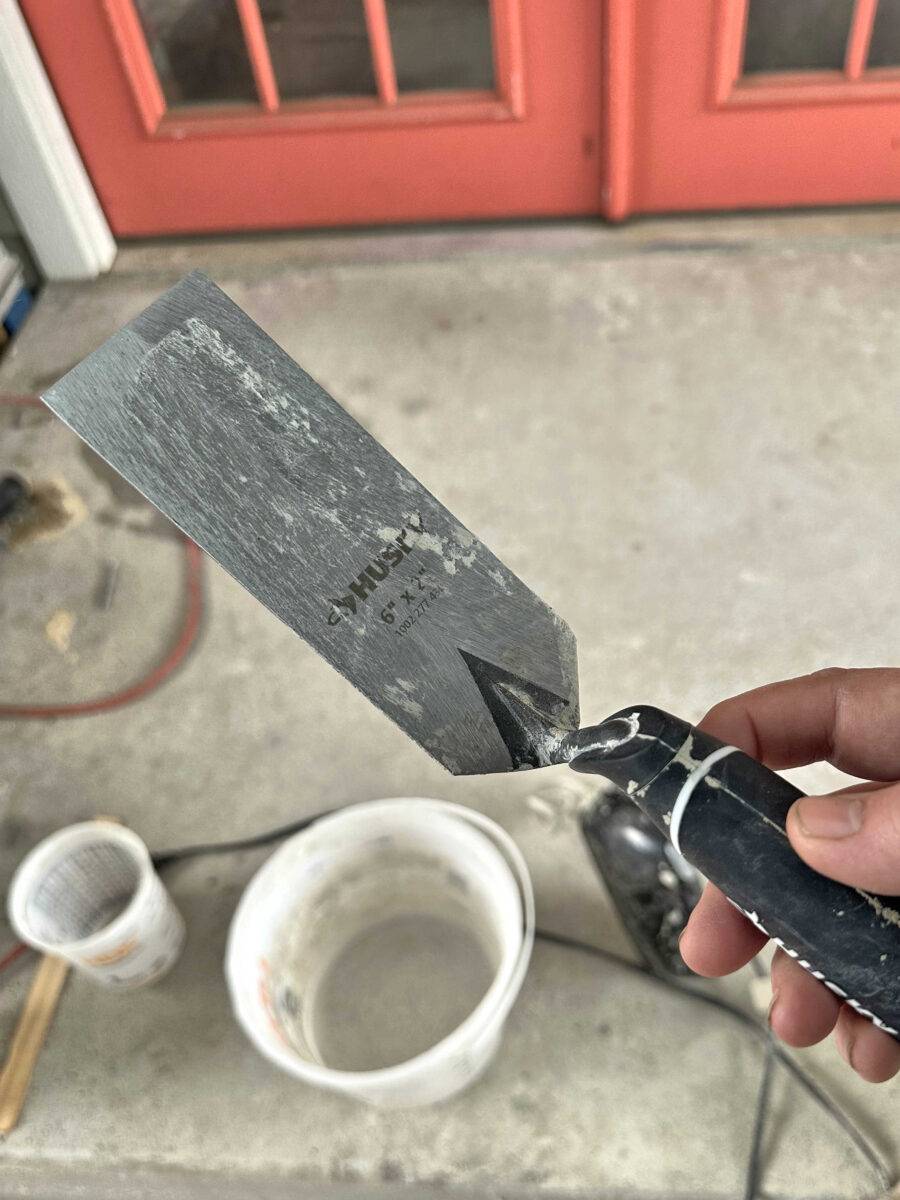
To butter the backs of the fake stones, I used this 6″ x 2″ trowel from Dwelling Depot.
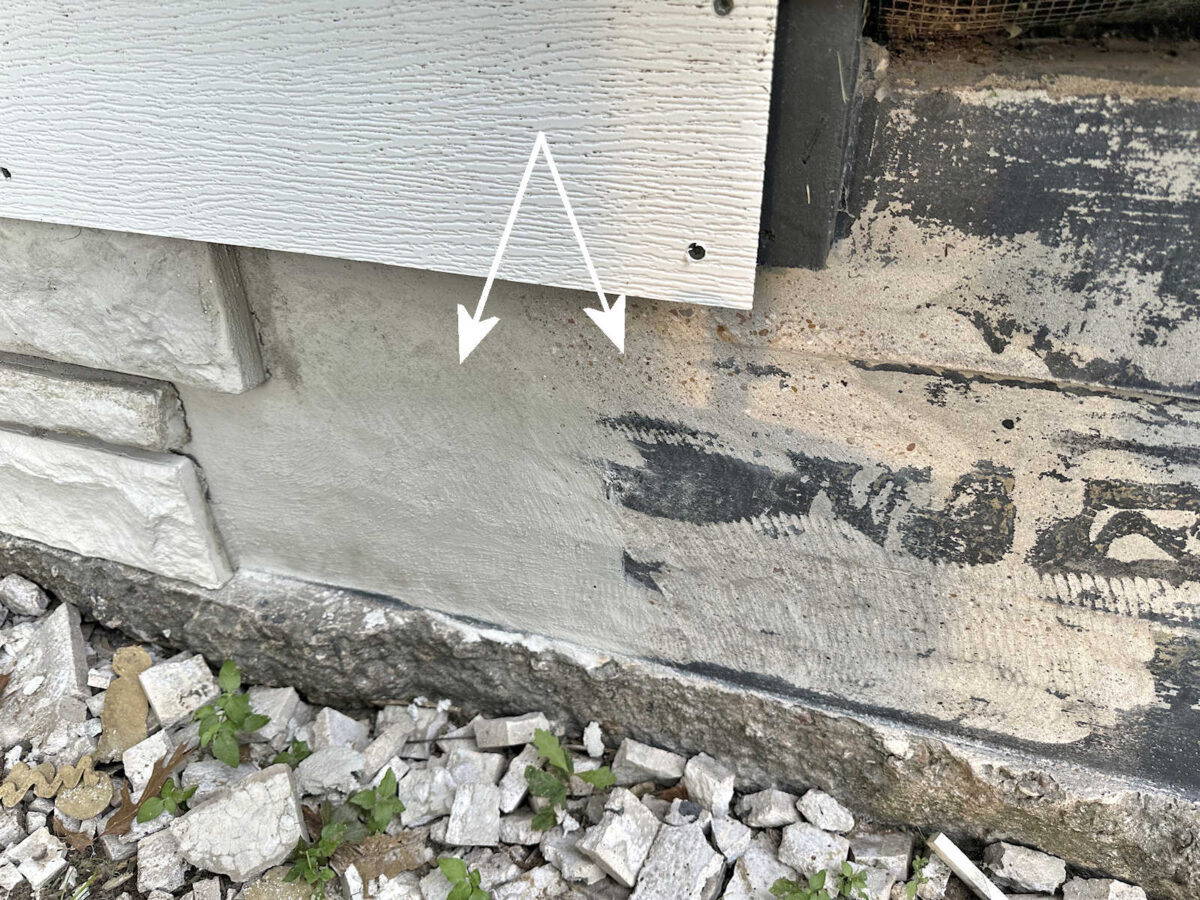
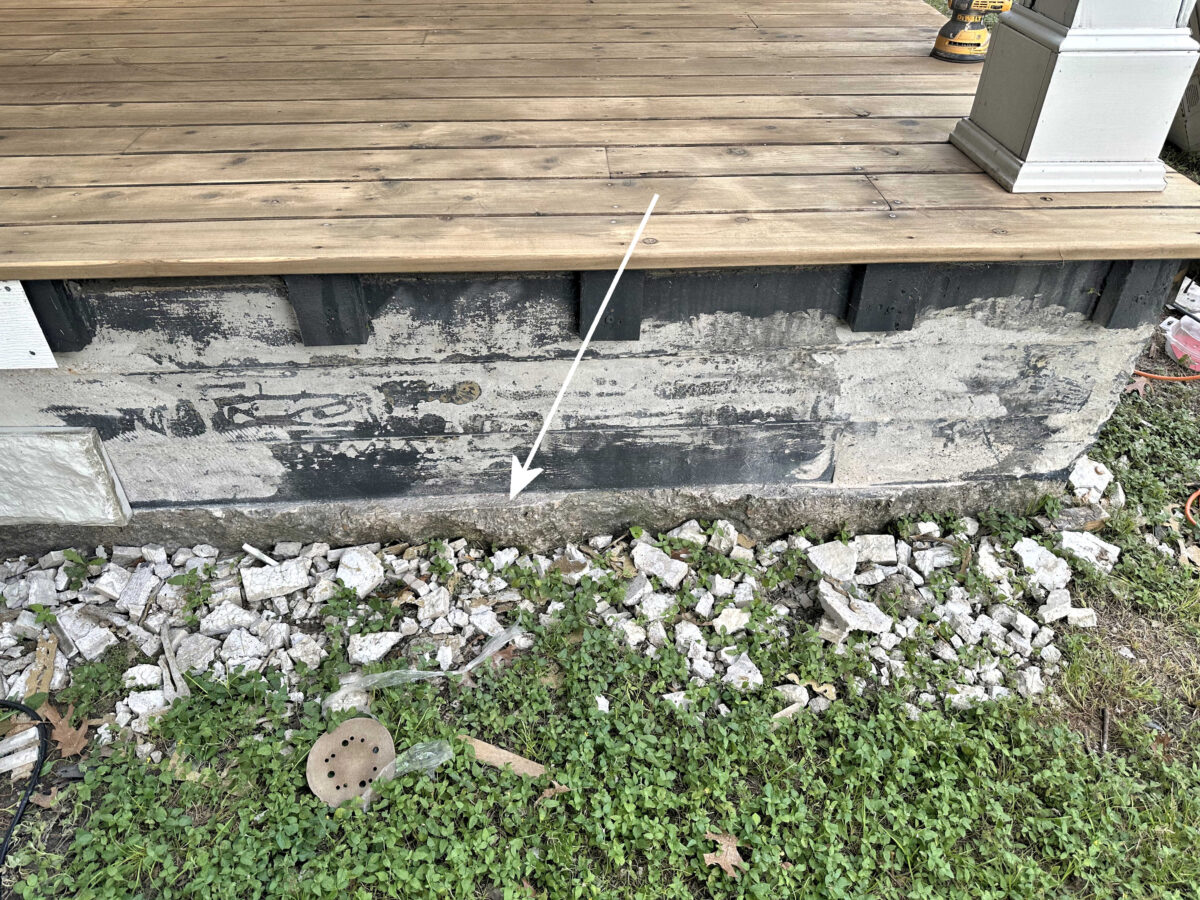
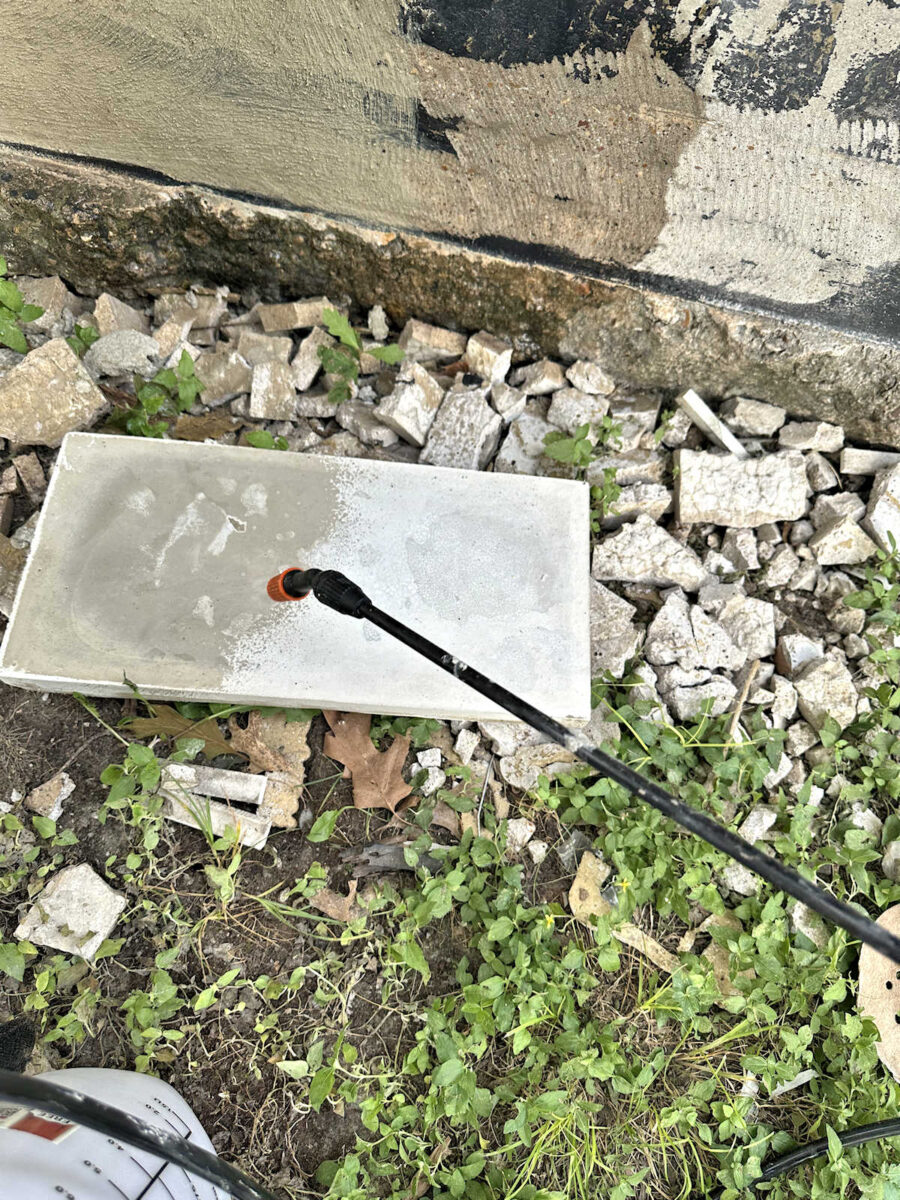
However earlier than I even began mixing the mortar for the stones, I first parged the concrete on the porch. Parging merely signifies that you’re placing an excellent skinny layer of mortar on prime of the concrete. The aim is to fill in any holes and cracks and to clean out any downside areas. First, I sprayed the realm down with water, after which I really used my palms (which I discovered to be a lot simpler and sooner than attempting to make use of a trowel in such a small space) to unfold an excellent skinny layer of mortar combine over the concrete. You may see the distinction under within the space that’s parged and the realm that’s the authentic concrete. You may nonetheless see the mixture within the space that hasn’t but been parged, however you possibly can’t see any mixture on the parged part.
After I was prepared to connect the stones, I really labored from the highest down. I do know this in all probability appears counterintuitive, however the motive I did it’s because these blocks to which the fascia boards connect are all the identical top, and so they’re all degree. In order that made it a lot simpler to simply push the highest row of stones up towards these blocks as a place to begin after which work down from there.
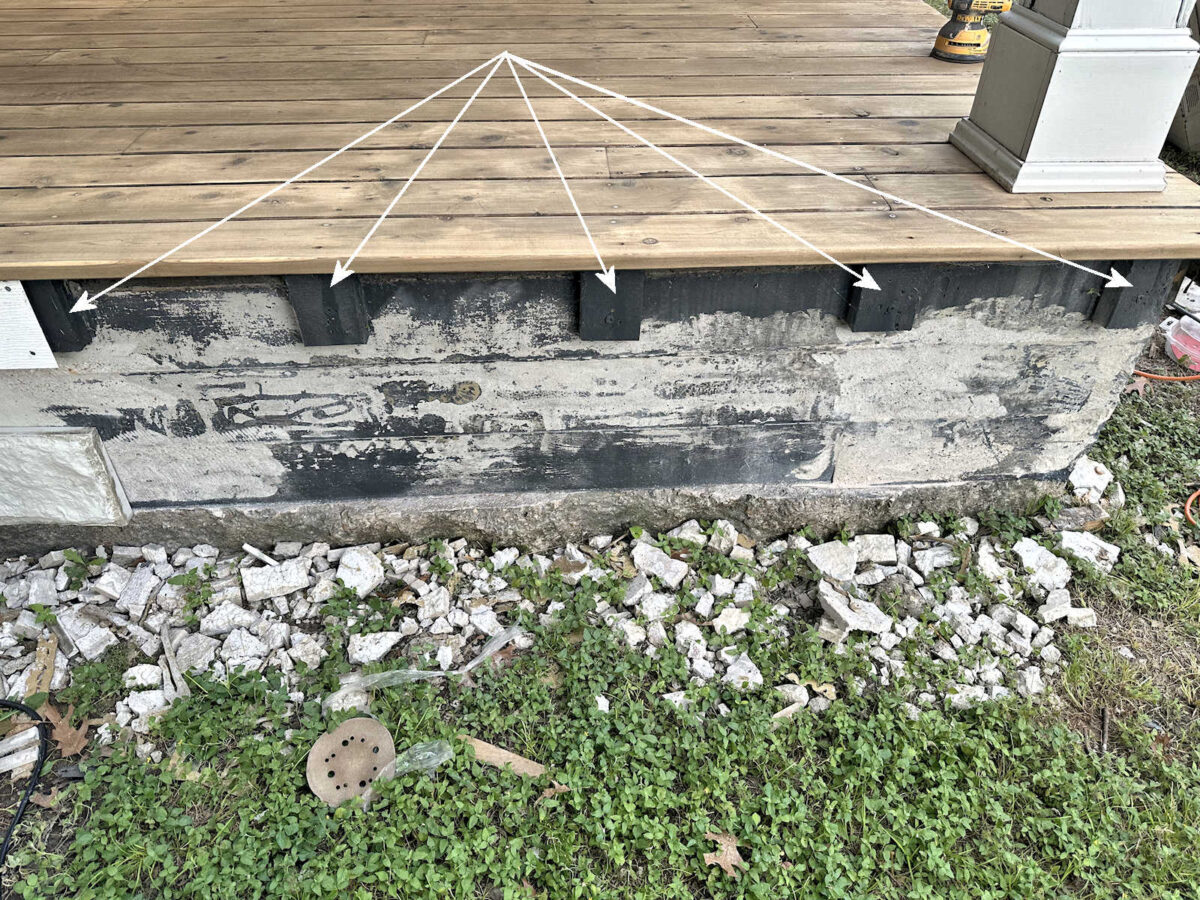
Had I began on the backside and labored up, it might have been extra of a guessing recreation as a result of this ridge on the backside isn’t degree in any respect.
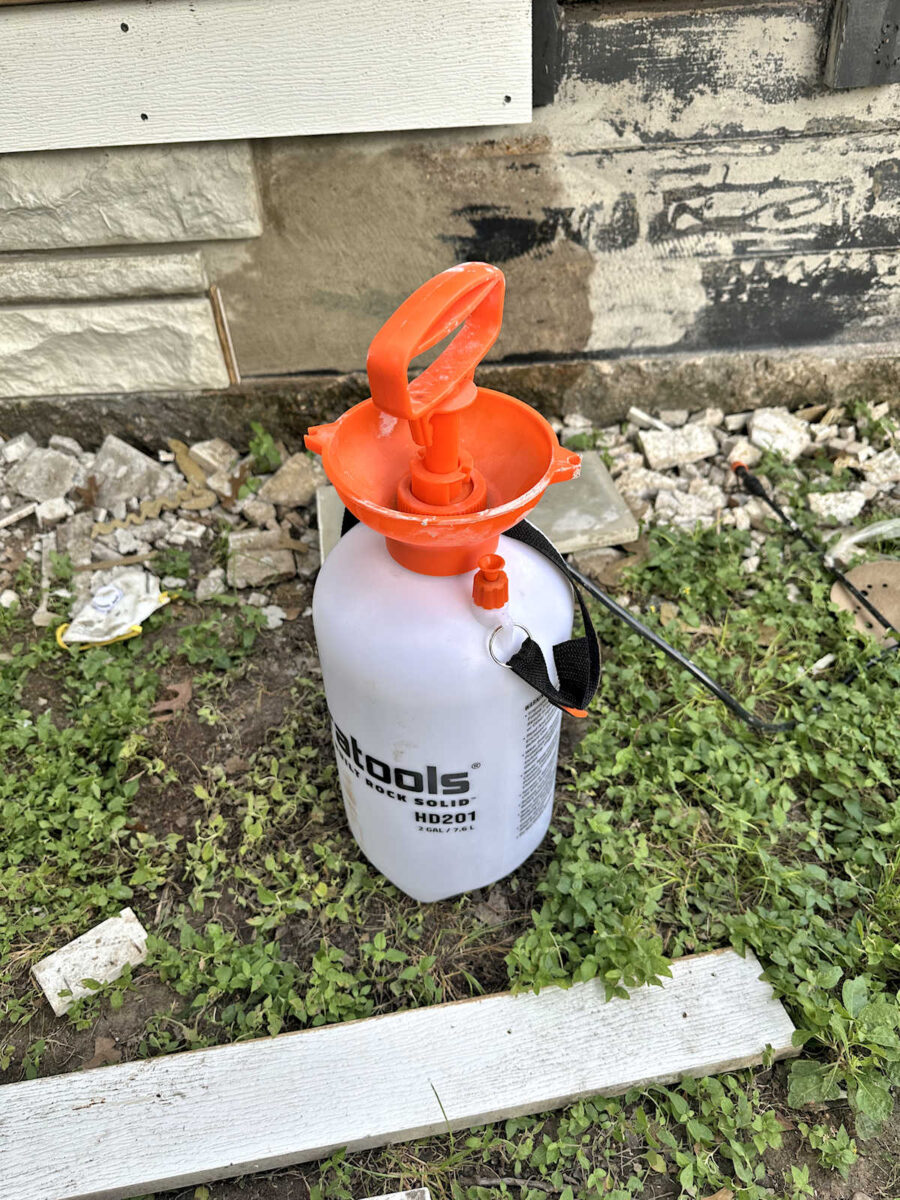
However as a result of the mortar units up so rapidly, working from prime to backside wasn’t an issue in any respect. So right here’s the method I used. After parging the part that had been floor and smoothed utilizing my handheld grinder, I blended up a small batch of mortar. Then I used my helpful tank water sprayer…
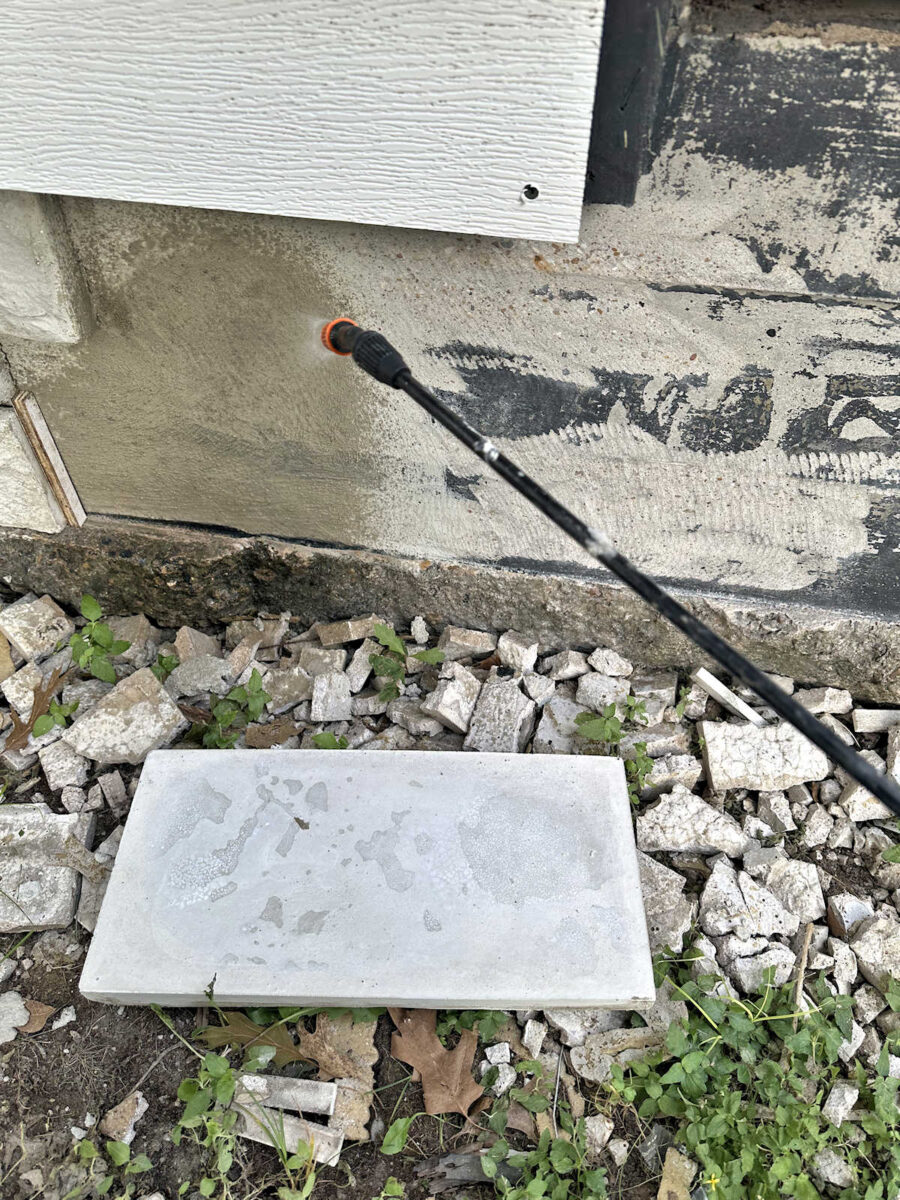
Then I sprayed down simply the part for the subsequent stone…
After which I sprayed the again of the stone as properly…
Then I used my trowel to butter the again of the stone with the mortar combine. I didn’t get an image of this as a result of I needed to work actually rapidly, however I made positive that each little bit of the again of the stone was lined, and if I needed to guess, I’d say I put the mortar was about 1/2-inch thick on the again of the stone, however perhaps only a bit lower than 1/2-inch. Then I pressed the stone towards the skirting and gave it wiggle whereas urgent laborious to ensure that the entire thing was making contact. Then I added my spacers (reduce from 1/2-inch plywood) and braced the stone in place.

In underneath ten minutes, I may take away the spacers and the bracing. That’s how briskly this mortar combine units up. I in all probability may have eliminated them in much less time than that, however I had a reasonably good system labored out. By the point I scraped the additional mortar out of the bucket, cleaned off my trowel, and blended my subsequent batch of mortar, I may take away the entire spacers and bracing on the stone I had simply connected and fasten the subsequent one.
That is so far as I bought yesterday as a result of a part of my workday yesterday needed to be spent going to Dwelling Depot to select up the entire supplies. I had hoped to try this on Wednesday in order that I’d have extra time to work yesterday, however that didn’t work out.
All through the entire course of, I had my map pulled up on my telephone in order that I may make sure that the stones had been occurring in the suitable order.

You may see that I’ve two very small sections don’t have stone on them but, and when you verify the map above, you’ll discover that these are two areas with the asterisks, which signifies that I’ve to chop stones to suit these areas.
One factor that I discovered the laborious means is that I can solely combine up sufficient mortar for one stone at a time because it units so rapidly. It’s slightly annoying, however as soon as I butter the again of a stone, get it set in place, and get the spacers and braces in place, any mortar left over is already too thick. I attempted mixing up a much bigger batch in order that I may do two stones with one batch, however that resulted within the second stone sitting additional away from the concrete than the stones round it.
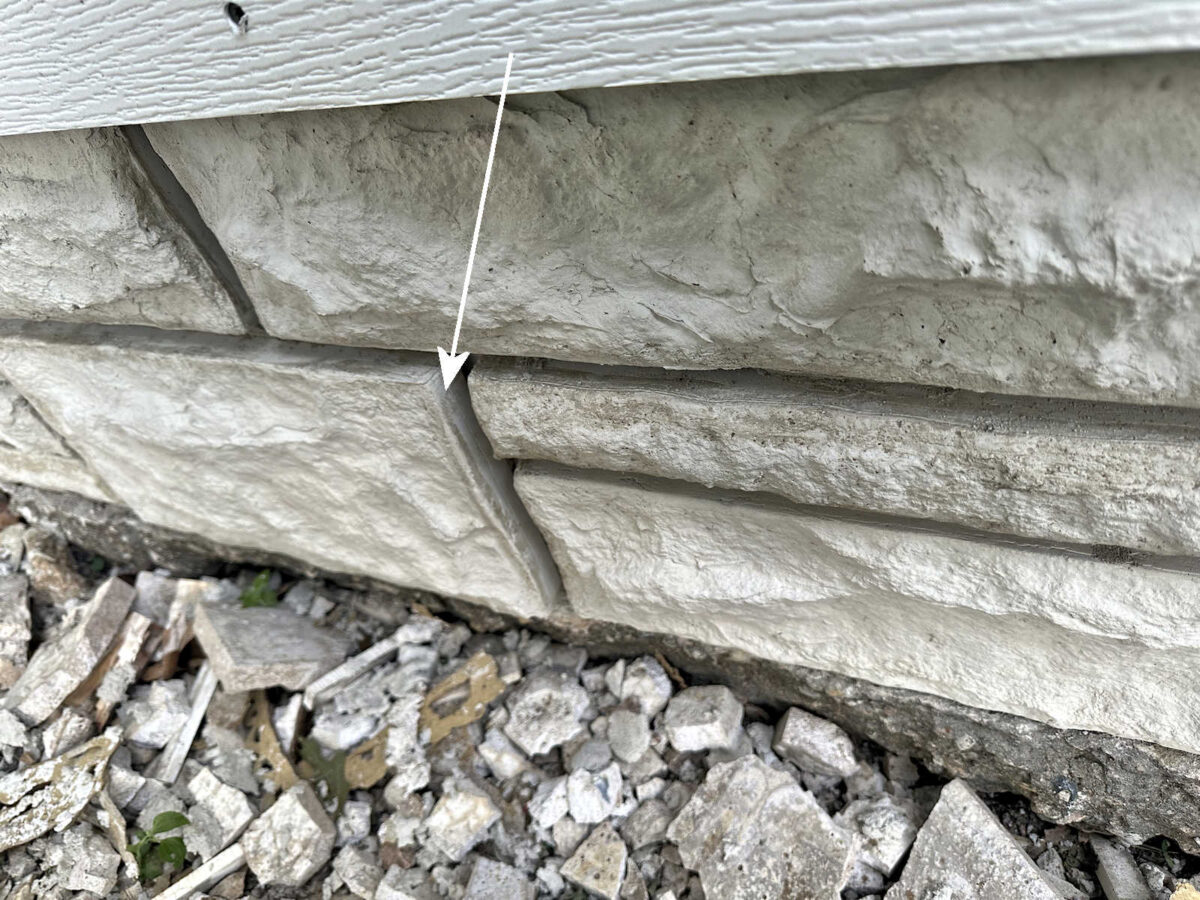
When the mortar is freshly blended, it has a really good, workable consistency that means that you can press the stone in place, and the mortar squishes out from the perimeters of the stone. Then that mortar that squishes out might be instantly eliminated earlier than it units. However as soon as the mortar will get too thick, there’s no mortar squishing out from the perimeters. So I couldn’t press this stone to the concrete as far in as those round it.
It’s not an enormous deal. As soon as I get the areas between the stone mortared, I don’t suppose it’ll be noticeable. However I discovered my lesson the laborious means. I combine a brand new small batch of mortar for each single stone. That makes the method a slower, however the result’s a lot better, and the freshly blended mortar is a lot simpler to work with.
In order that’s the progress to date. I’m actually enthusiastic about the way it’s turning out! I’m going to maintain plugging away on this over the weekend, and we’ll see simply how far I can get earlier than Monday. I’ve excessive hopes that I can get it completed, however I’m holding that aim very loosely. As soon as I get to the wonky nook and should marry the stones on the entrance with those on the aspect of the porch, I anticipate that I’ll run right into a problem that will sluggish me down fairly a bit. However I’m decided to determine it out. I’m too excited in regards to the progress to let a possible future downside get in my means.
I imply, can we simply take a minute and do not forget that I MADE THOSE! I made these fake stones from scratch. I made the textured silicone mats from the stones on our home…

I constructed the molds to suit across the silicone mats…
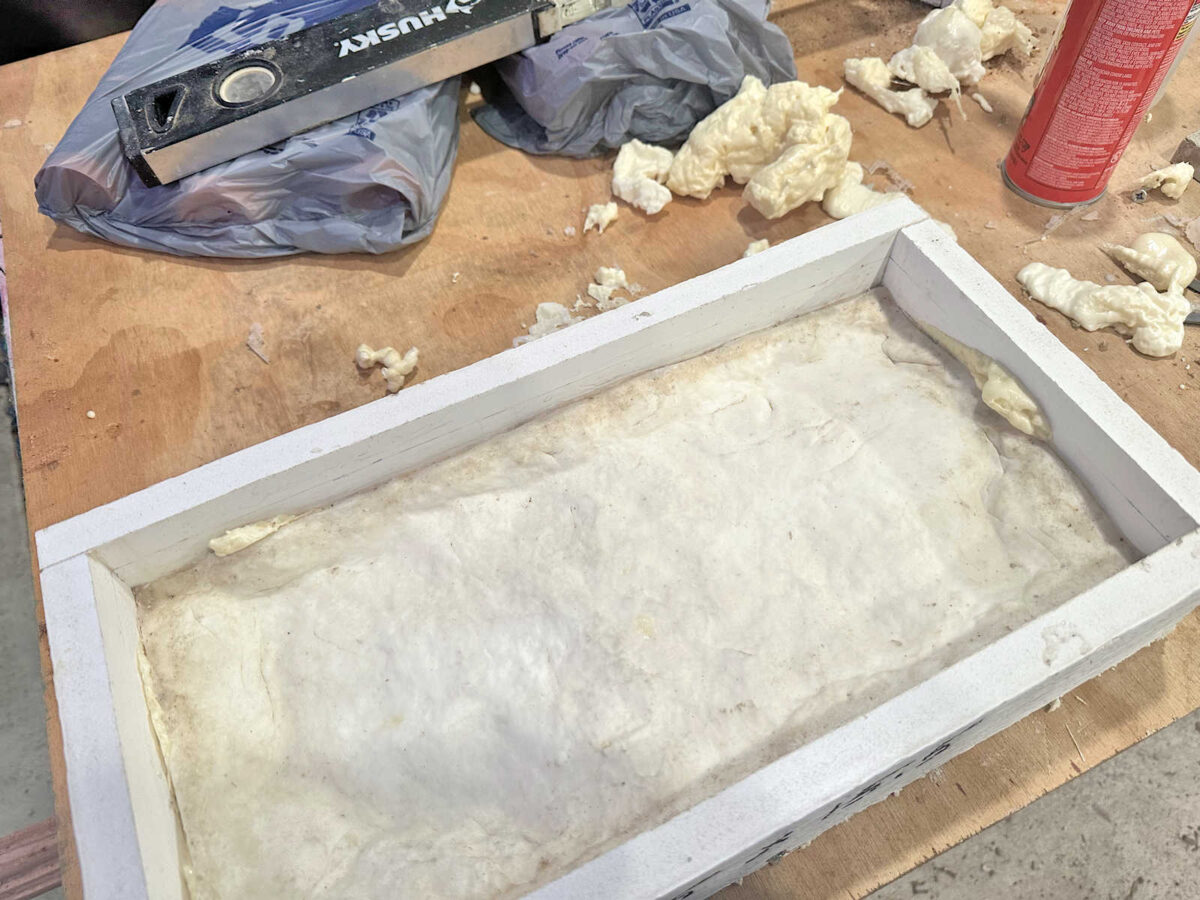
I poured every stone from concrete…
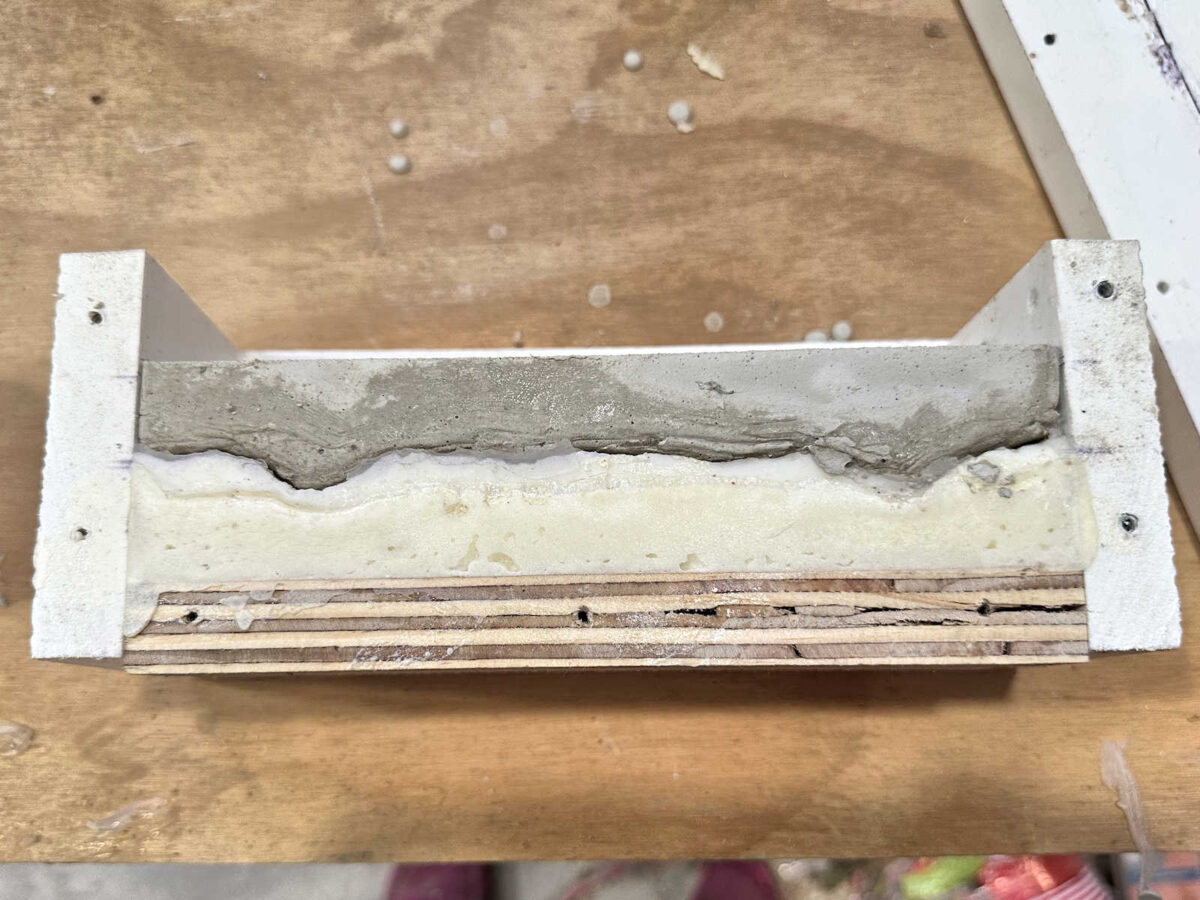
They usually turned out trying virtually similar to the unique stones on our home…
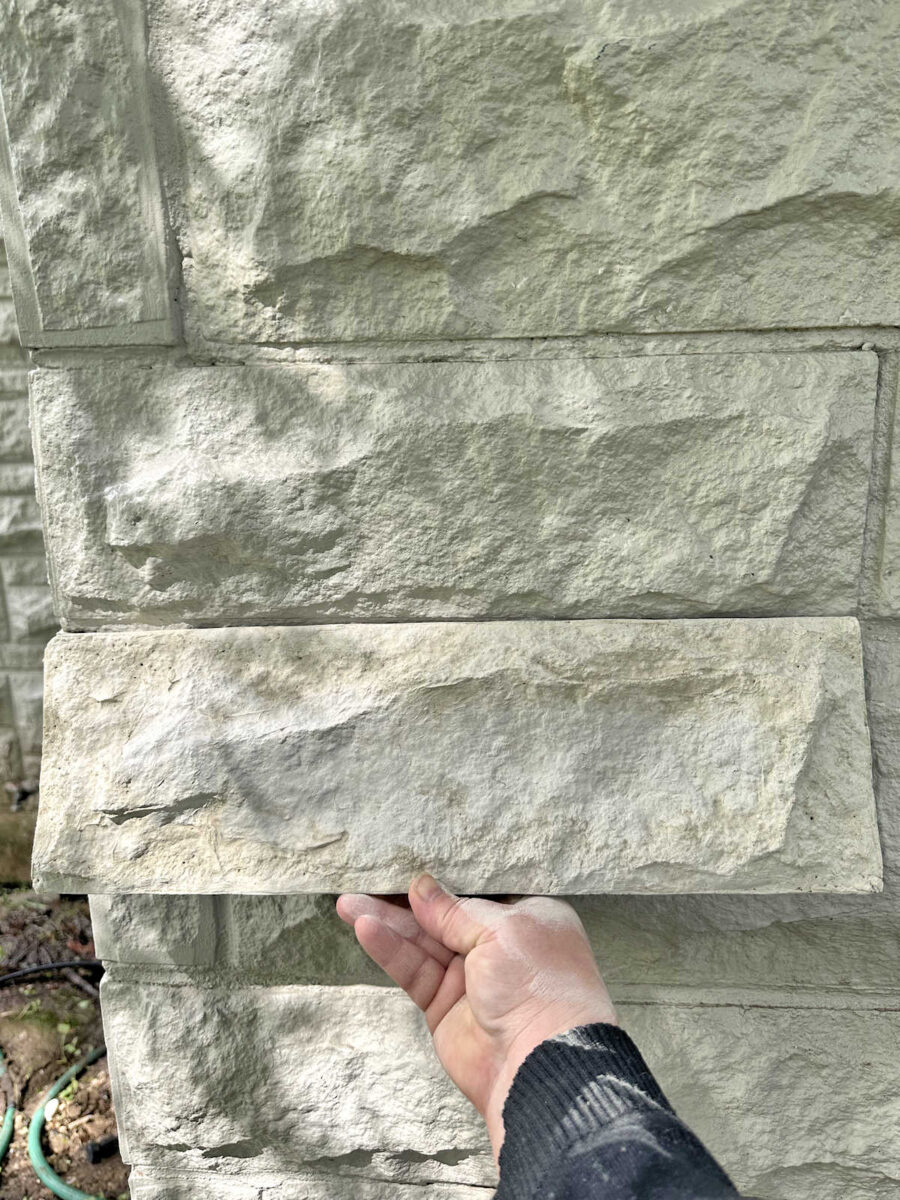
And now, right here they’re on our entrance porch…
My entire plan is definitely working! Is there something extra satisfying than having a grand plan (and one which in all probability sounds fairly loopy to most individuals) and seeing it really come to fruition? Few issues can evaluate to that feeling of satisfaction.
Extra About Our Home Exterior & Yard


Addicted 2 Adorning is the place I share my DIY and adorning journey as I transform and adorn the 1948 fixer higher that my husband, Matt, and I purchased in 2013. Matt has M.S. and is unable to do bodily work, so I do the vast majority of the work on the home on my own. You may study extra about me right here.


")

")


