

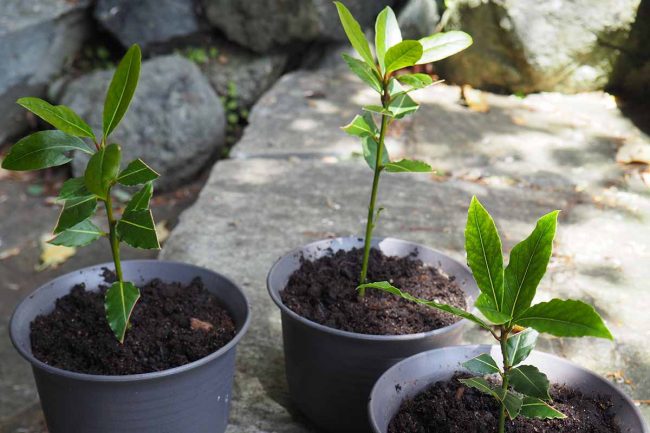
Should you’ve obtained a bay tree (Laurus nobilis) rising in your backyard or in your patio, you’re in for a deal with. Not solely is it a stunning evergreen, however these fragrant leaves are additionally a kitchen celebrity. Whether or not you’re a beginner gardener or a seasoned professional, preserving your bay tree completely satisfied in a pot requires some know-how—particularly in terms of repotting and care. Don’t fear, although; I’ve obtained you lined with this step-by-step information. Let’s dive in and provides your bay tree the adore it deserves!
Why Repotting Your Bay Tree Issues

Bay timber are champs at rising in containers, however they’ll’t keep in the identical pot eternally. Over time, their roots get cramped—think about being caught in a pair of footwear two sizes too small! This “root-bound” scenario can choke their progress, leaving you with a tree that’s lower than thrilled. Repotting is the answer, providing:
More room for roots to unfold out.Contemporary soil full of vitamins.Higher drainage to maintain roots wholesome.
In case your bay tree’s been in its present pot for a few years or seems to be prefer it’s slowing down, it’s time to improve its dwelling.
When to Repot Your Bay Tree
Timing is vital. The candy spot for repotting is spring, proper earlier than the rising season begins. Why? It offers your tree an opportunity to bounce again from the transfer and make the most of hotter climate. Keep away from winter (when it’s snoozing) or peak summer season (when it’s confused). Spring is your go-to season for a easy transition.
The way to Repot Your Bay Tree: Step-by-Step
Repotting may sound difficult, however it’s easier than you assume. Right here’s methods to do it proper:
Step 1: Decide the Excellent Pot
Select a brand new pot that’s 2-3 inches wider than the previous one. Too massive, and the soil stays soggy; too small, and also you’ll be doing this once more quickly. Drainage holes are a should—bay timber hate moist ft!
Step 2: Prep the Pot
Arrange the brand new pot for fulfillment:
Add a layer of gravel or damaged pottery on the backside to spice up drainage.Prime it with a couple of inches of contemporary potting soil. A mixture with compost and a little bit of sand works nice for drainage and vitamins.
Step 3: Free the Tree
Time to get your tree out of its previous pot:
Loosen the soil across the edges with a trowel or your palms.If it’s root-bound (roots circling tightly), gently slide a knife across the inside to launch it.Tip the pot sideways and ease the tree out, holding it by the trunk’s base.
Step 4: Test the Roots
Give these roots a once-over:
Wholesome roots are white or gentle tan. Trim away any brown, mushy, or overly tangled ones with clear scissors to encourage new progress.
Step 5: Place the Tree
Place the tree within the heart of the brand new pot. The highest of the basis ball ought to sit about an inch under the rim—don’t bury it too deep.
Step 6: Add Soil
Fill in across the root ball along with your potting combine. Press it down evenly to take away air pockets, however don’t compact it too exhausting—roots want respiration room.
Step 7: Water It In
Give your tree a superb soak till water runs out the drainage holes. Let it drain fully—no soggy bottoms allowed!
Caring for Your Bay Tree: The Fundamentals
Repotting is simply the beginning. Right here’s methods to preserve your bay tree thriving year-round:
Gentle: Let It Shine
Bay timber love full solar however can deal with partial shade. Indoors? Put it close to a sunny window with not less than 6 hours of sunshine. No solar? A develop gentle can save the day.
Watering: Discover the Stability
Water when the highest inch of soil feels dry—stick your finger in to test. Water completely, however ensure the pot drains properly. In winter, ease up since progress slows.
Fertilizing: Feed Sparingly
Throughout spring and summer season, give it a balanced, slow-release fertilizer (like 10-10-10). Don’t overdo it—an excessive amount of could make it develop leggy as an alternative of leafy.
Pruning: Form It Up
Prune in late winter or early spring to maintain it tidy:
Snip off lifeless or broken branches.Desire a fancy form? Bay timber are excellent for topiaries—get inventive!
Pest and Illness Watch
Bay timber are powerful, however pests like scale, aphids, or spider mites can sneak in:
Test leaf undersides for bugs or stickiness.Deal with with insecticidal cleaning soap or neem oil if wanted.For fungal points, enhance airflow and skip overhead watering.
Winter Care: Chilly-Climate Ideas
Bay timber can deal with down to twenty°F (-6°C), however colder than that? Carry it inside:
Hold it in a cool, vivid spot.Reduce on watering—let the soil dry out extra between drinks.Open air? Wrap the pot in burlap to guard the roots.
Troubleshooting Bay Tree Points
Typically, issues go off observe. Right here’s methods to repair widespread issues:
Yellow Leaves: Overwatering or poor drainage is probably going. Test the soil and regulate your watering.Leaf Drop: Sudden gentle or temperature modifications can stress it out. Hold its spot secure.Sluggish Development: Extra solar or a lightweight fertilizer dose may perk it up.
Bonus: Cooking with Bay Leaves
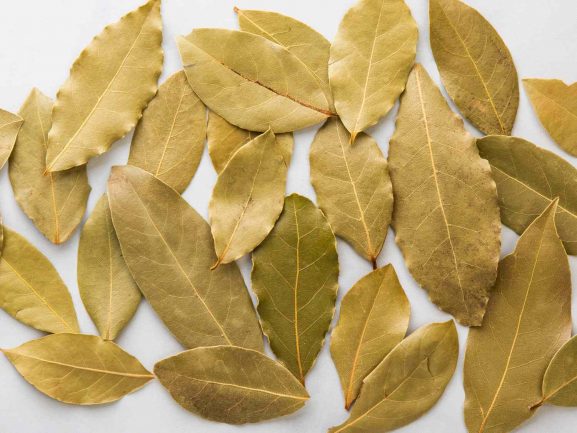
Your bay tree’s leaves are culinary gold! They add a refined, earthy taste to soups, stews, and sauces:
Use contemporary or dried—dried are stronger and extra widespread.Add them early whereas cooking, however take away them earlier than serving (they’re powerful!).Dry your individual by hanging branches in a cool, darkish spot, then retailer in an hermetic container.
Feeling adventurous? Steep a couple of leaves in scorching water for a comfortable bay leaf tea.
Remaining Ideas: A Joyful Bay Tree Awaits
There you go—a full rundown on repotting and caring to your bay tree! With a bit effort, you’ll have a lush, leafy plant that’s able to taste your meals and beautify your house. So, seize that pot, get your palms soiled, and watch your bay tree thrive. Joyful gardening!


