

I’ve lastly began constructing my closet cupboards! I solely obtained two items constructed yesterday as a result of I bumped into a number of issues alongside the best way. They weren’t roadblocks, simply pace bumps.
First, I spotted that I had made a miscalculation when slicing the entire backer boards for every unit. (Ugh, I’m going in charge that on pushing by way of with my work after I wasn’t feeling nicely over the weekend.) After which my 16-guage nail gun stopped working, so I needed to make a visit to Residence Depot and purchase one other nail gun. Additionally, some warped plywood and unlevel flooring gave me challenges that I needed to work by way of.
However at the very least I made some progress! And now that I’ve my system labored out, I’m hoping that the remainder will go quicker. So let me present you ways I constructed my closet cupboard items.
First, I used my 16-guage nail gun with 1.5-inch nails and nailed the items collectively to type the edges, high, and backside of the unit. To start out, I needed to discover one thing to lean the primary lengthy facet towards in order that I may get them nailed collectively.
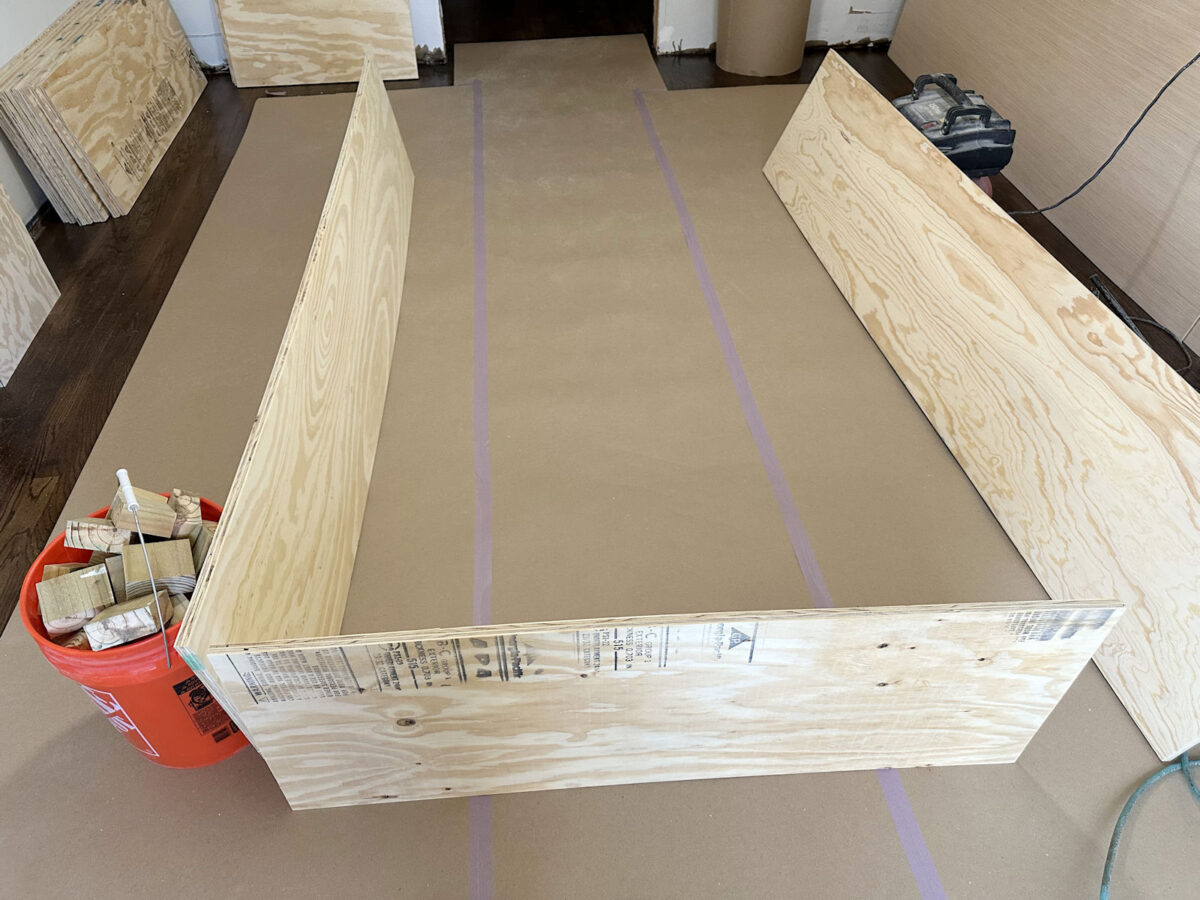
As soon as I had the primary two items nailed collectively, the opposite two had been simpler. I put them collectively in order that the shorter high and backside items of the unit had been nailed into the sides of the longer facet items.

And it was at this level that I spotted my mistake with the backer boards. I had meant to simply place the 1/4-inch plywood on the again of the body and nail it into place. However I spotted in a short time that I had minimize the backer board to the size of the lengthy facet items, and it wanted to be the size of the facet items PLUS 1.5 inches to cowl the sides of the highest and backside items. Ugh. I didn’t need to purchase all new 1/4-inch plywood at $28 a sheet for eight items, so I needed to modify my plan on the fly.
Since I couldn’t add plywood to the size, my resolution needed to contain slicing plywood off of the width in order that the backer board would match nested utterly contained in the outer body. However then I wanted one thing to nail the backer board to. So I used my desk noticed and ripped down some further 1″ lumber that I had readily available to three/4-inch broad, and I nailed these strips across the backside (which is definitely the again facet of the unit) into the body items utilizing 1.25-inch 16-gauge nails.

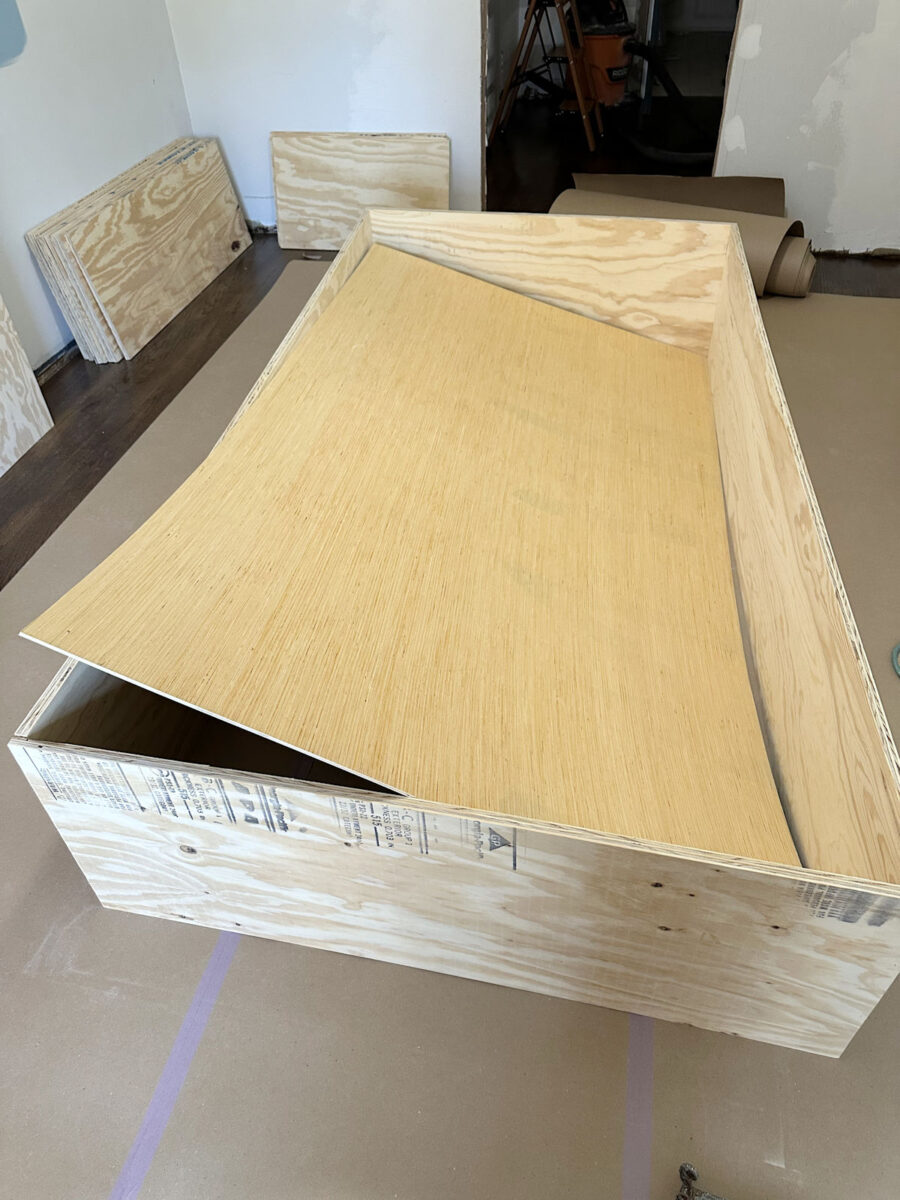
After which I used my round noticed with a information to chop off the surplus 1.5-inch strip from the width of the backer board, and I positioned the backer board on high of the strips I had simply hooked up.
The lengthy sides of the plywood body had been somewhat bit bowed, so earlier than nailing the backer board to the strips, I minimize a spacer from some scrap lumber to the width of the unit and positioned it within the center to push the bowed items aside to the proper width. After which I nailed the 1/4-inch plywood backer board into place utilizing 3/4-inch 18-guage nails.
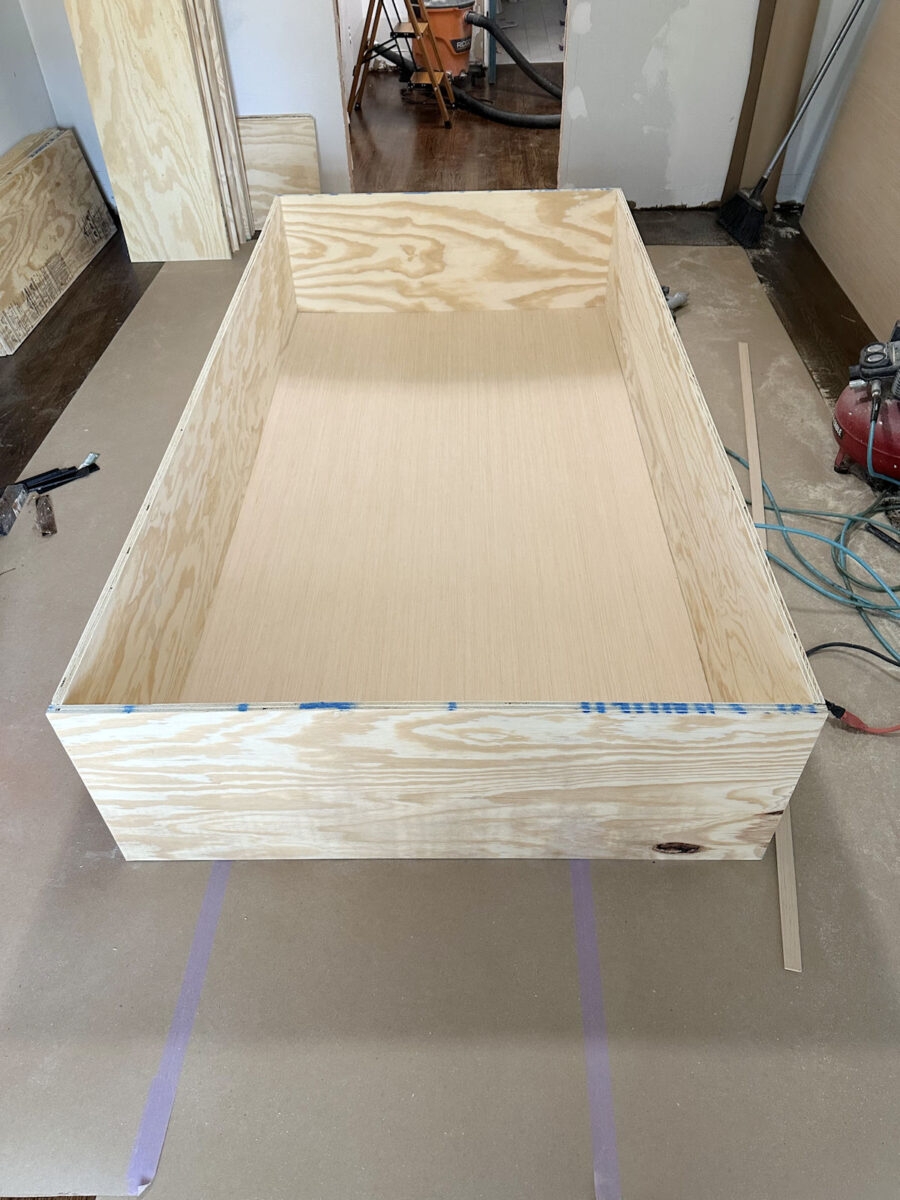
After the backer board was in place and I had checked the corners to make certain they had been sq. and nailed the backer board to the strips, I then went again and secured the facet items (which had solely been hooked up to one another with a number of 16-gauge nails thus far) to one another utilizing Spax #8 1.5-inch cupboard screws.
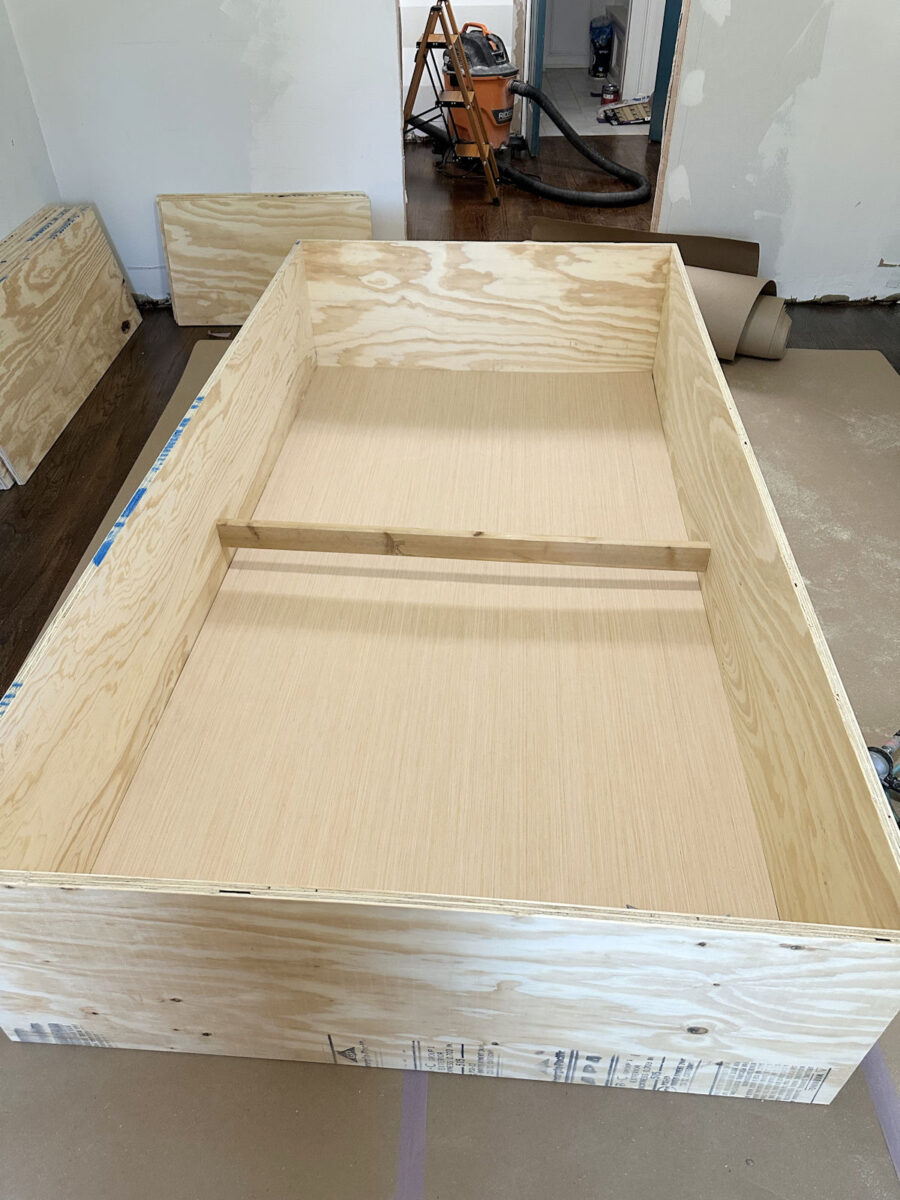
Subsequent, I sat the unit upright and nailed a spacer board into place in the course of the again to offer somewhat extra stability to the 1/4-inch plywood backer board. I nailed this into place utilizing 2.5-inch 16-gauge nails by way of the edges of the unit and into the ends of that board. After which from the opposite facet, I tacked the backer board to that strip of wooden utilizing 3/4-inch 18-gauge nails.

I very rigorously slid the unit into place towards the wall, making an attempt to not rip the paper or scratch the ground. Because it seems, it actually wasn’t as heavy as I anticipated it to be. And that was an excellent factor, as a result of the subsequent step was to tip the unit over and fasten the toes. That is the one a part of the entire thing that I hooked up utilizing wooden glue, and I used 5 toes per unit.
The toes are simply 2×4’s that I minimize to 2.75″ lengthy utilizing my miter noticed. So I positioned wooden glue on the highest of two toes, tipped the unit up and held it into place with one hand in order that it was a number of inches off the ground, and used my different hand to slip the toes into place, one on entrance and one on again. After which I went to the opposite facet, put glue on two toes, lifted that facet up a number of inches with one hand, and slid the toes into place with my different hand. And at last, I positioned a fifth one within the entrance heart of the cupboard. I made positive the entrance toes had been lined up completely with the entrance fringe of the cupboard as a result of these toes are what I’ll nail the underside trim to after I begin trimming out these items. As soon as all 5 toes had been underneath the unit, I used my hammer to faucet them into place precisely the place I wished them, after which I nailed them into place utilizing 2.5-inch 16-gauge nails by way of the underside piece of the unit and into the sides of the two×4 toes.
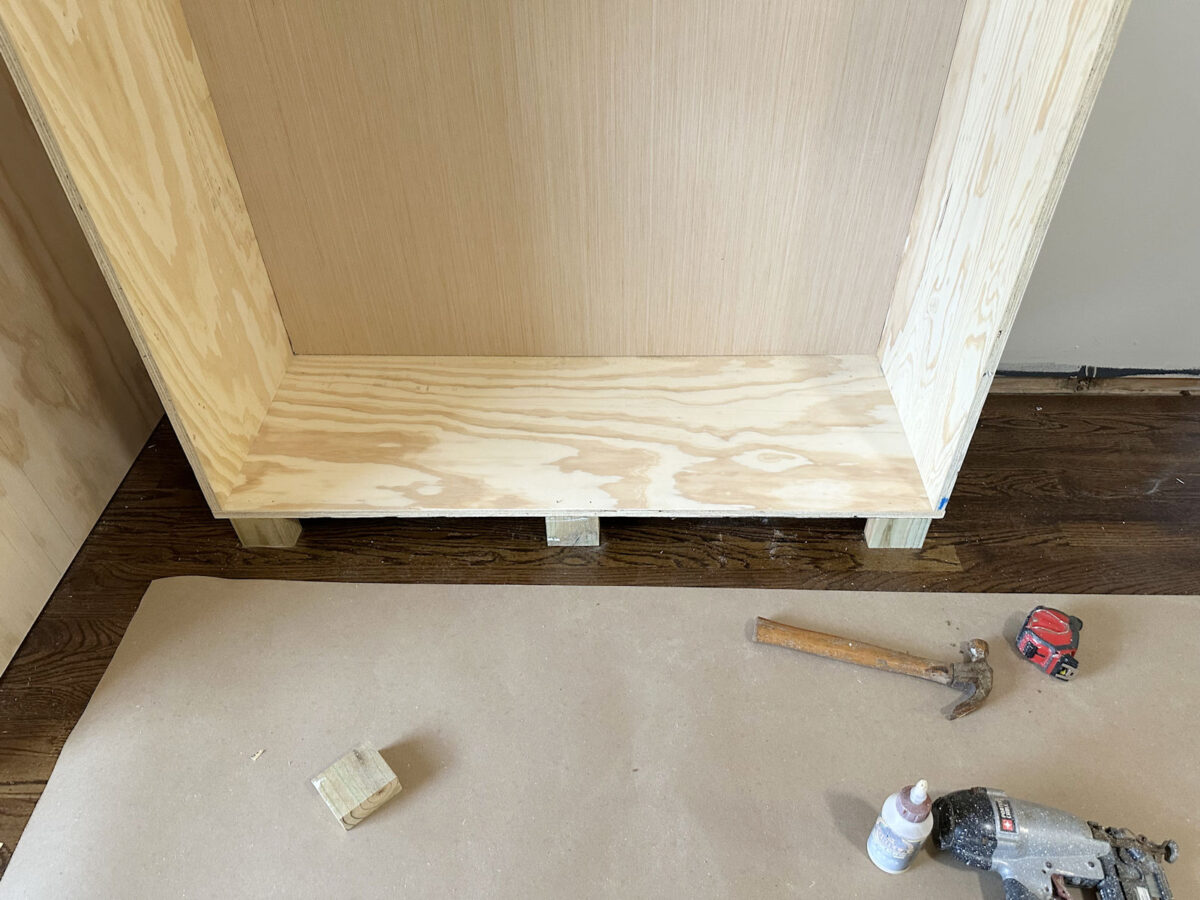
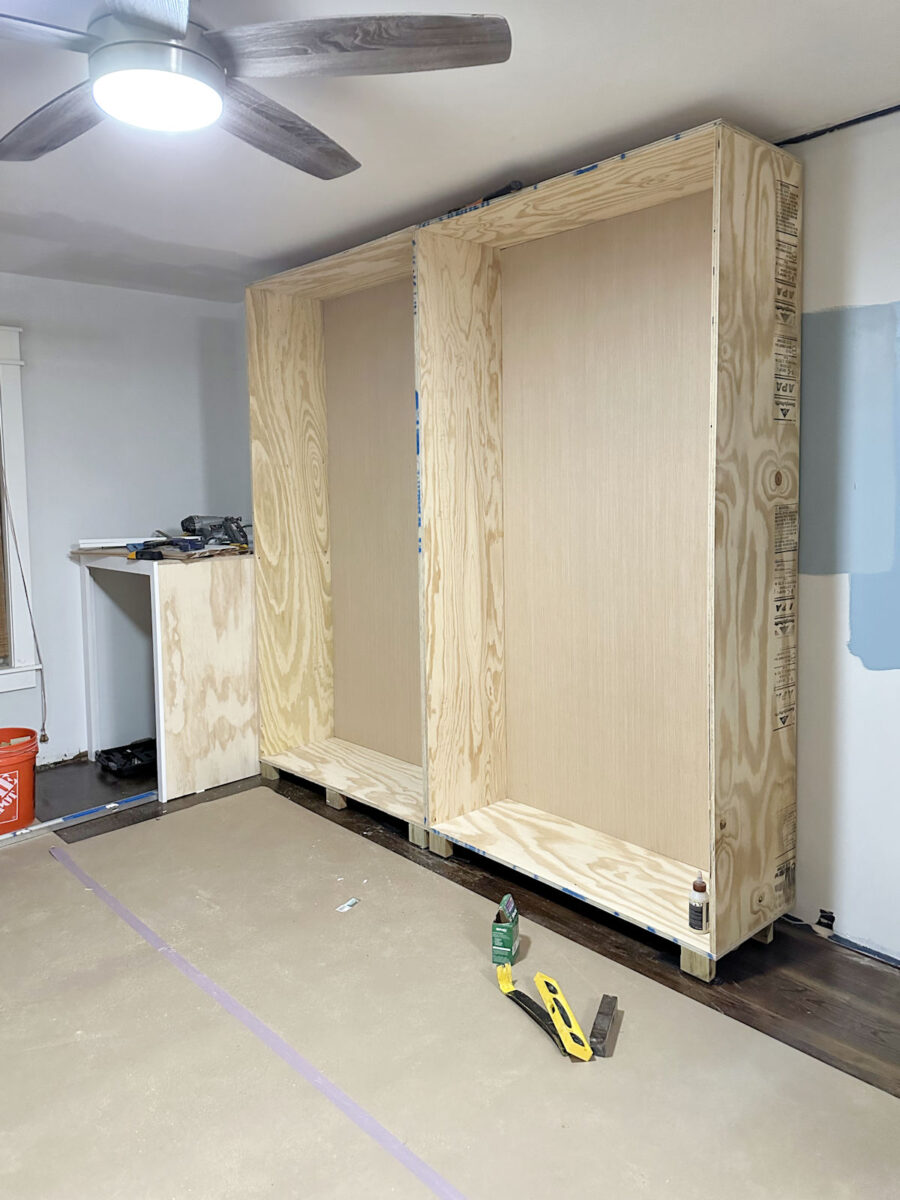
So right here’s what the fundamental construct seemed like when it was completed.
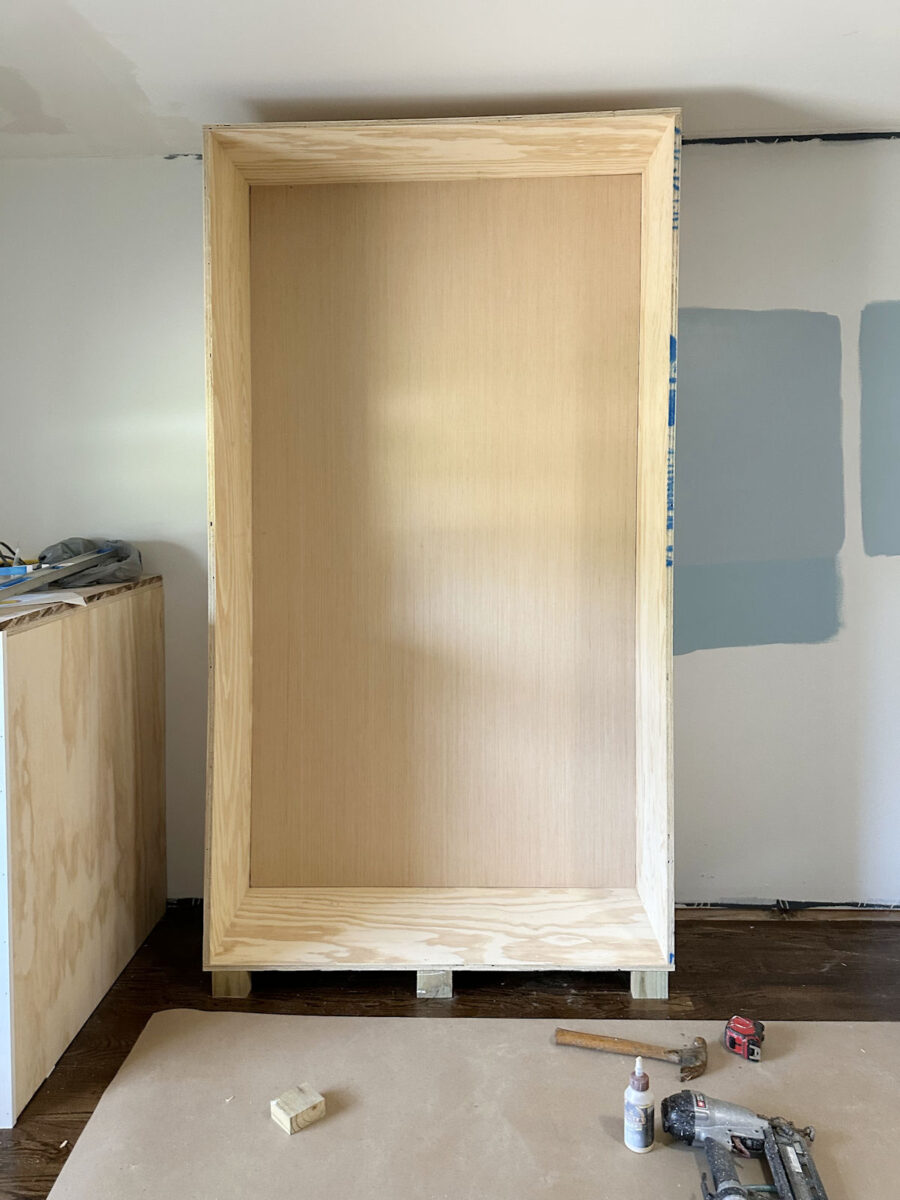
You possibly can see that the lengthy sides are nonetheless somewhat bit bowed, however I wasn’t anxious about it. As soon as all the pieces was in place and all of the items had been hooked up, I knew that might be taken care of. So I scooted the unit up towards the washer cupboard and screwed these to cupboards collectively utilizing Spax #8 1.5-inch cupboard screws. I made positive that I obtained the large unit as plumb as attainable earlier than screwing it to the washer cupboard. And because the washer cupboard was sq., plumb, and stage, screwing these two items collectively took the bow out of the left facet piece of the tall unit.

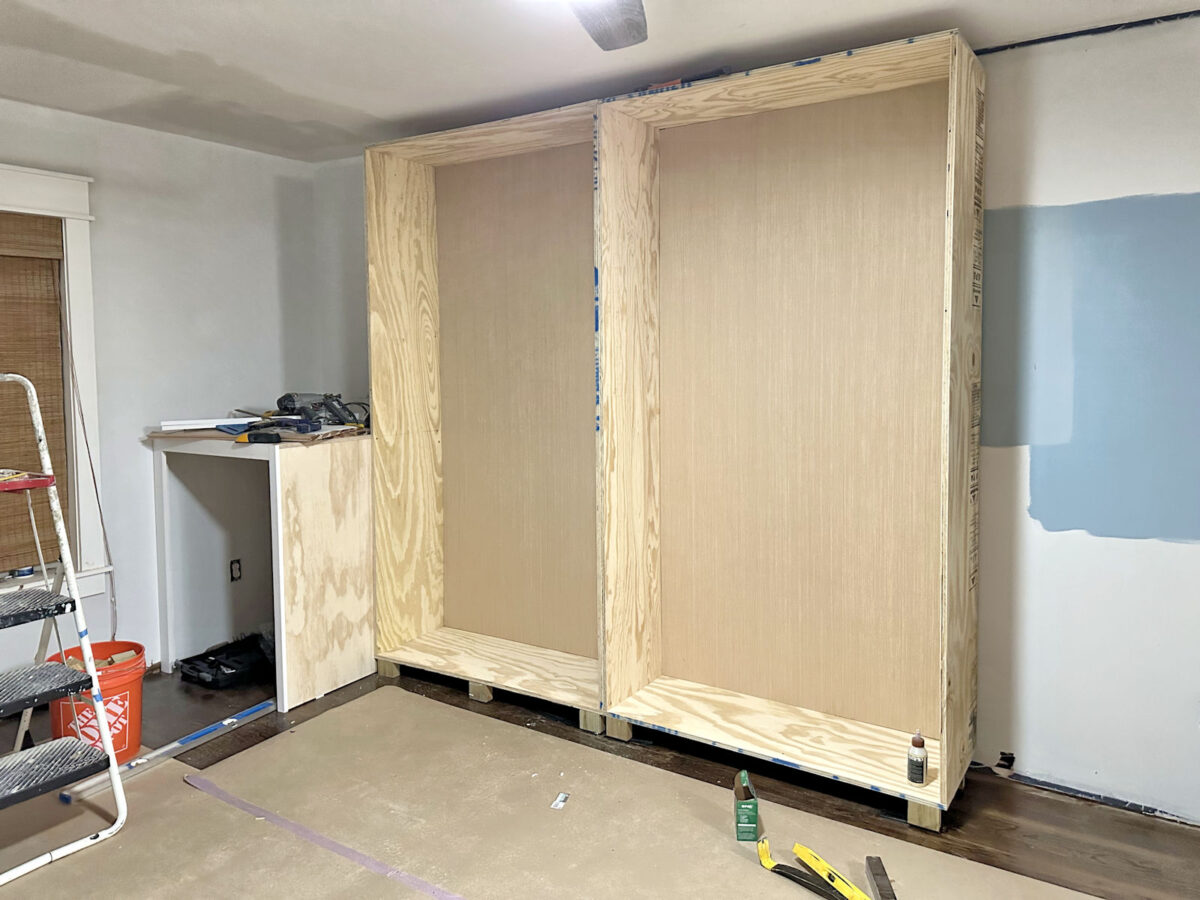
I constructed the second unit the very same approach, after which after I pushed it subsequent to the primary unit, the 2 weren’t fairly assembly up like they need to. So this took some work to get these two items to suit collectively like they need to. First, I needed to shim the toes on the second unit. After which it took fairly a little bit of pushing and pulling and wrestling with these items to get them to line up.
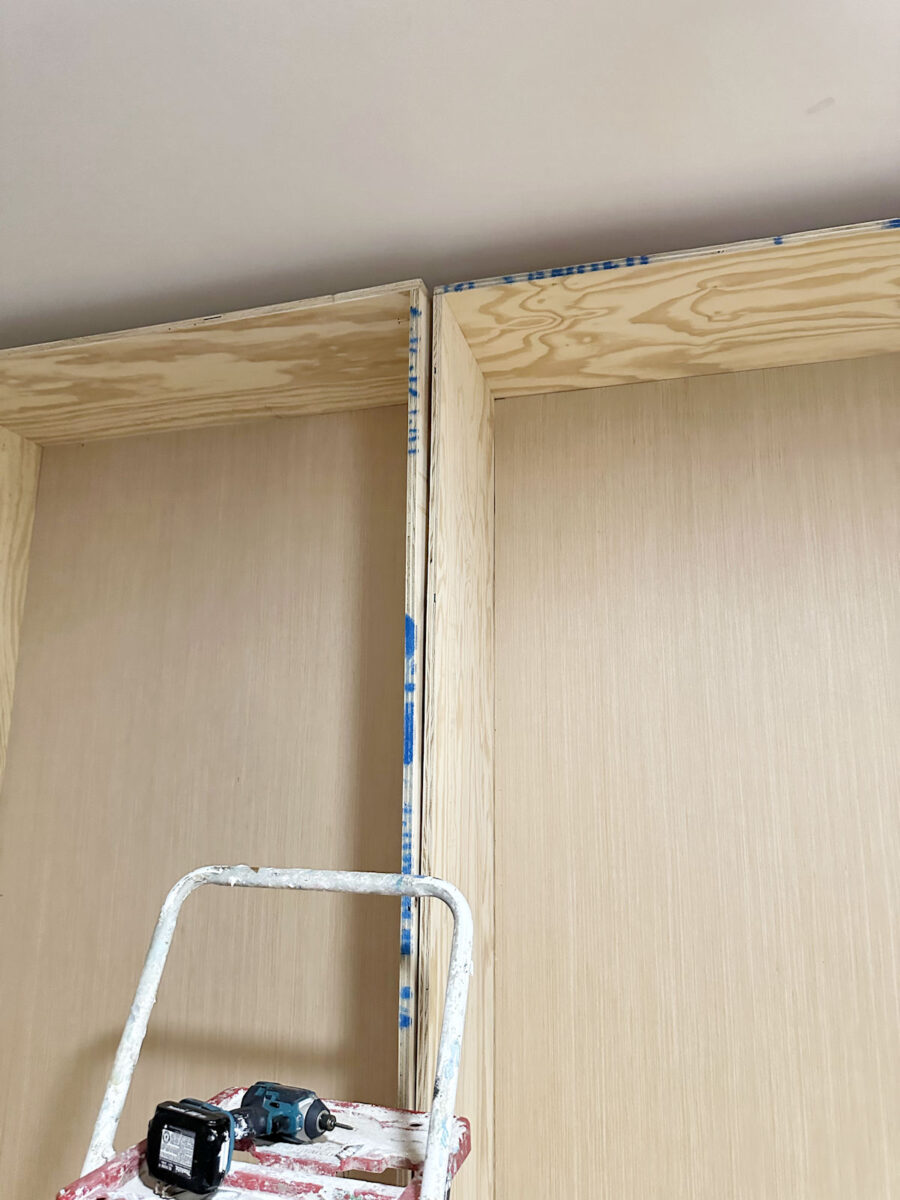
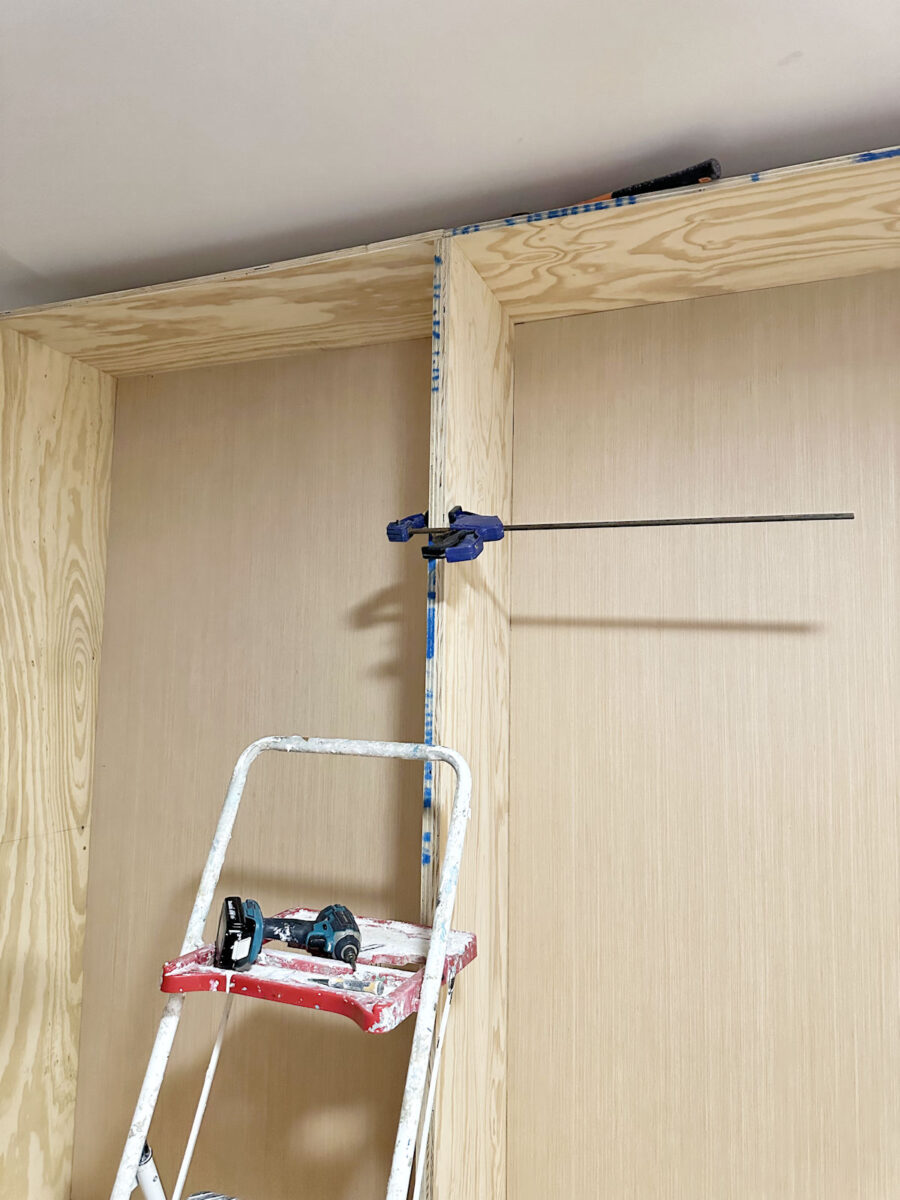
I really began on the backside as a result of it was simpler to get the underside corners to line up. As soon as I obtained the underside corners lined up and flush on the entrance with one another, I screwed the cupboards collectively on the backside utilizing the Spax cupboard screw. With the underside corners secured to one another, I used to be in a position to get the highest corners lined up and clamped in order that I may add extra screws to safe them to one another.
In order that’s so far as I obtained yesterday. I’ve two extra items to construct for this facet of the room, and I’m hoping I can at the very least get these achieved in the present day. I do have to go away the home for a few hours this afternoon, so it received’t be an uninterrupted work day. Which means my progress may be a bit slower in the present day, however I’m going to do my perfect to get the opposite two items for this facet of the room completed earlier than I am going to mattress tonight.
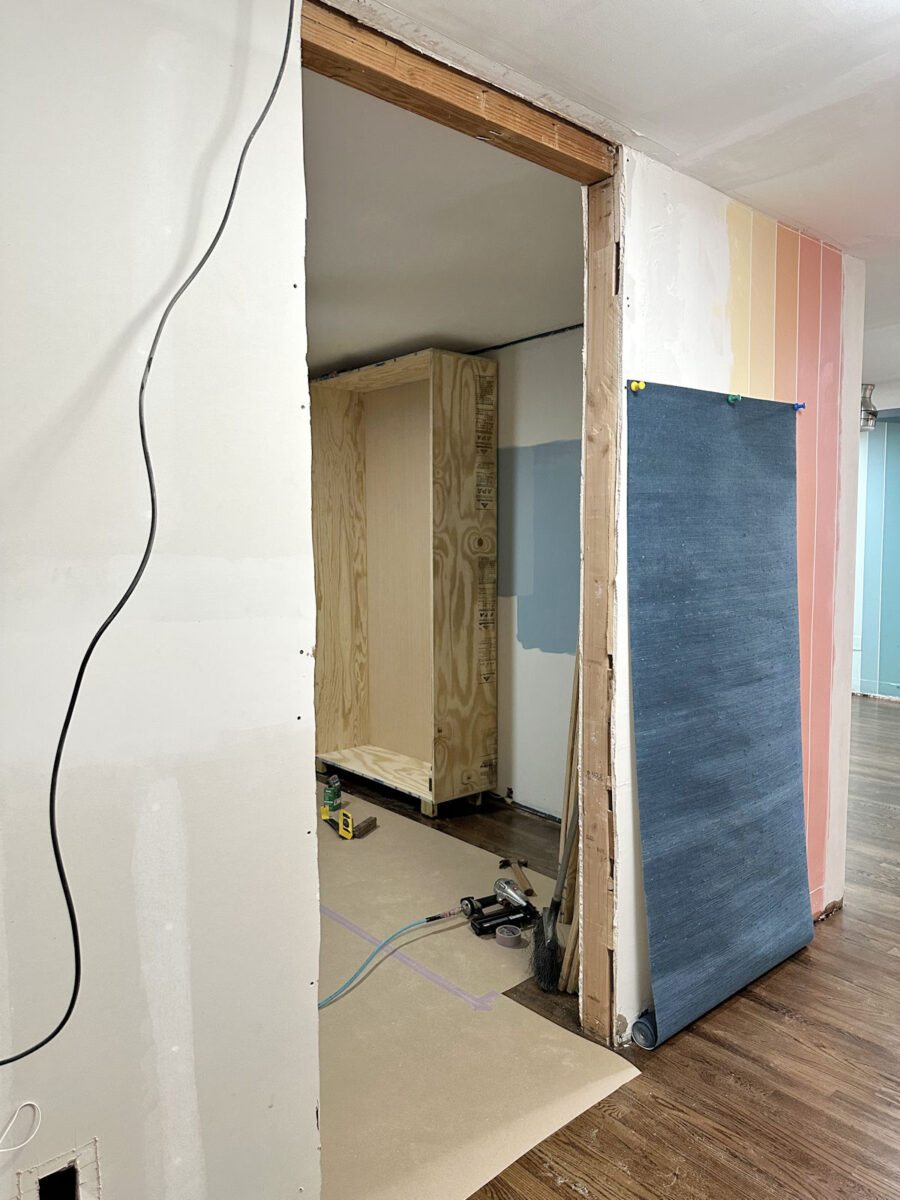
And right here’s a glimpse of what you see when standing within the doorway to our bed room suite. I adore it when a plan comes collectively. My complete purpose was to have the wallpapered unit seen from the bed room suite doorway, and there it’s. I wished it positioned in order that it wouldn’t be obscured by the facet of the cupboard on the doorway wall and in order that the beautiful wallpaper can be seen from the bed room suite doorway. We’ll have to attend and see the way it appears to be like as soon as that doorway wall unit is in place, however I feel I could have completed my purpose.
In order that’s the progress. Extra to return tomorrow. We’re lastly to the enjoyable stuff, y’all! After all, the magic occurs after I begin attaching the entire trim and molding, however I’m simply so completely satisfied to lastly be to the constructing stage!
The A2D Each day:

Addicted 2 Adorning is the place I share my DIY and adorning journey as I rework and embellish the 1948 fixer higher that my husband, Matt, and I purchased in 2013. Matt has M.S. and is unable to do bodily work, so I do nearly all of the work on the home on my own. You possibly can be taught extra about me right here.


")


