

Progress continues to be gradual on the bed room lobby partitions, however the excellent news is that my hand is nearly utterly healed. The place the ache was initially a couple of 7 on a scale of 1 to 10, This morning, it’s a couple of 2. I’ve regained full mobility of my fingers, so doing the large jobs like reducing and putting in trim is now straightforward once more. However I noticed in a short time yesterday that doing issues that require fantastic motor expertise, like sanding the wooden filler on the entire nail holes, was nonetheless fairly painful. However this morning, I went into the lobby to do some bit extra sanding, and instinctively, I picked up the sandpaper with my proper hand and began sanding. It took a few minutes for me to appreciate I used to be truly sanding with my proper hand with no ache. In order of this morning, it seems like I’m totally again in enterprise.
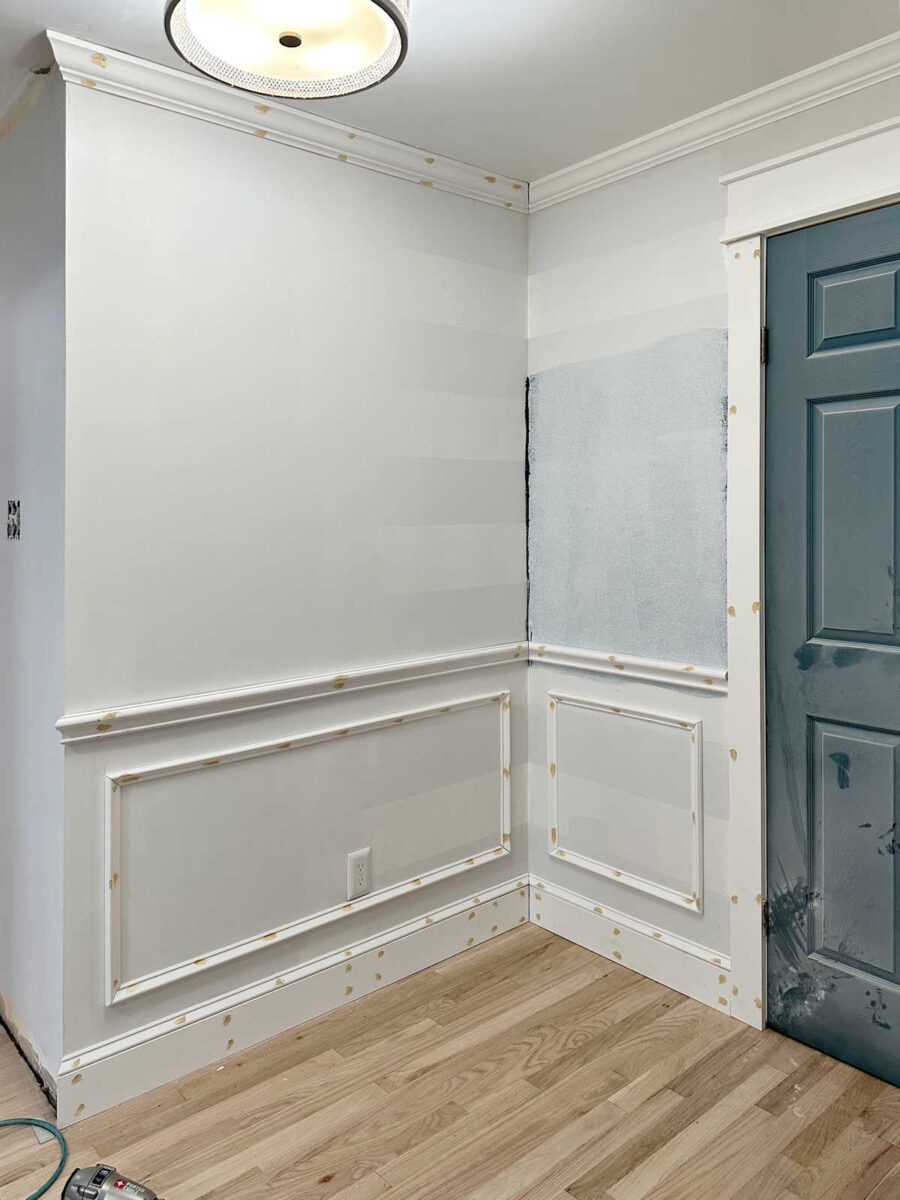
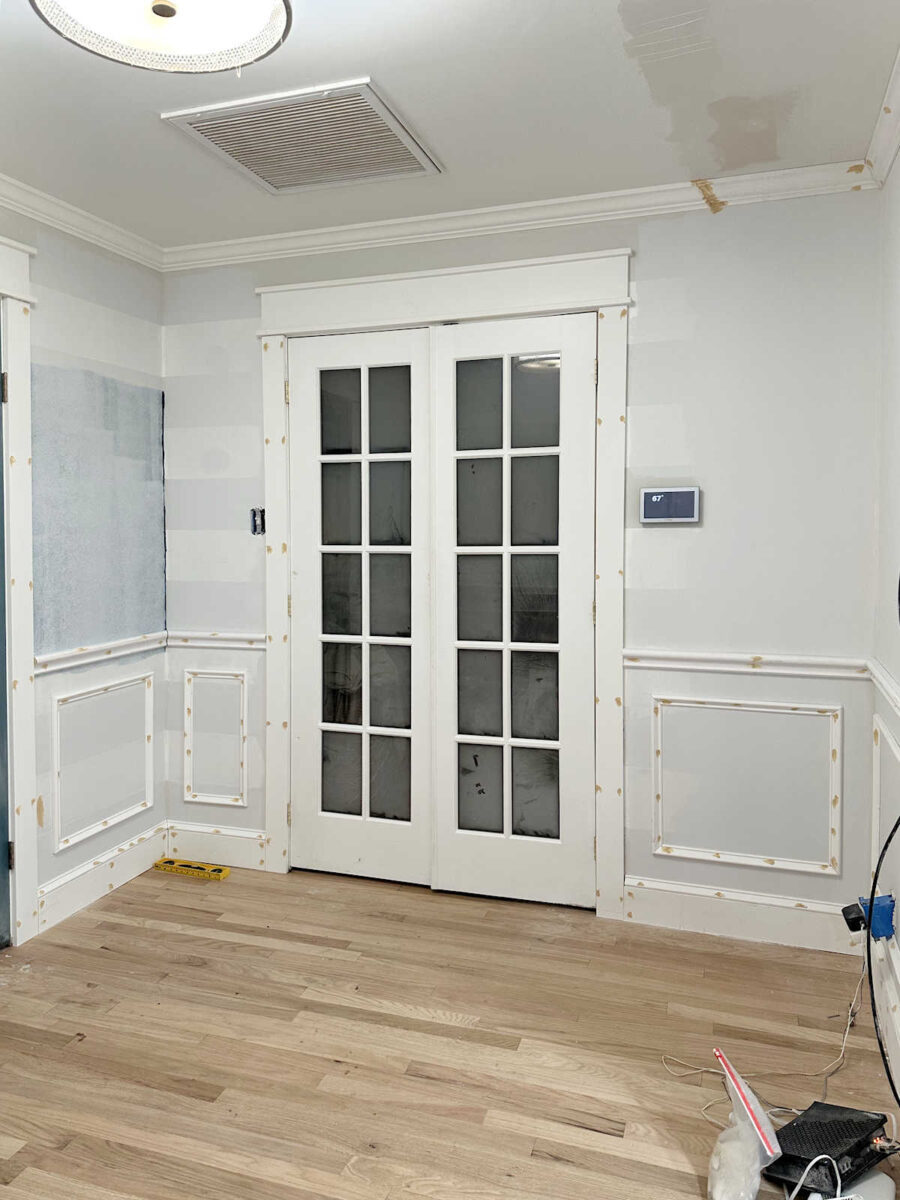
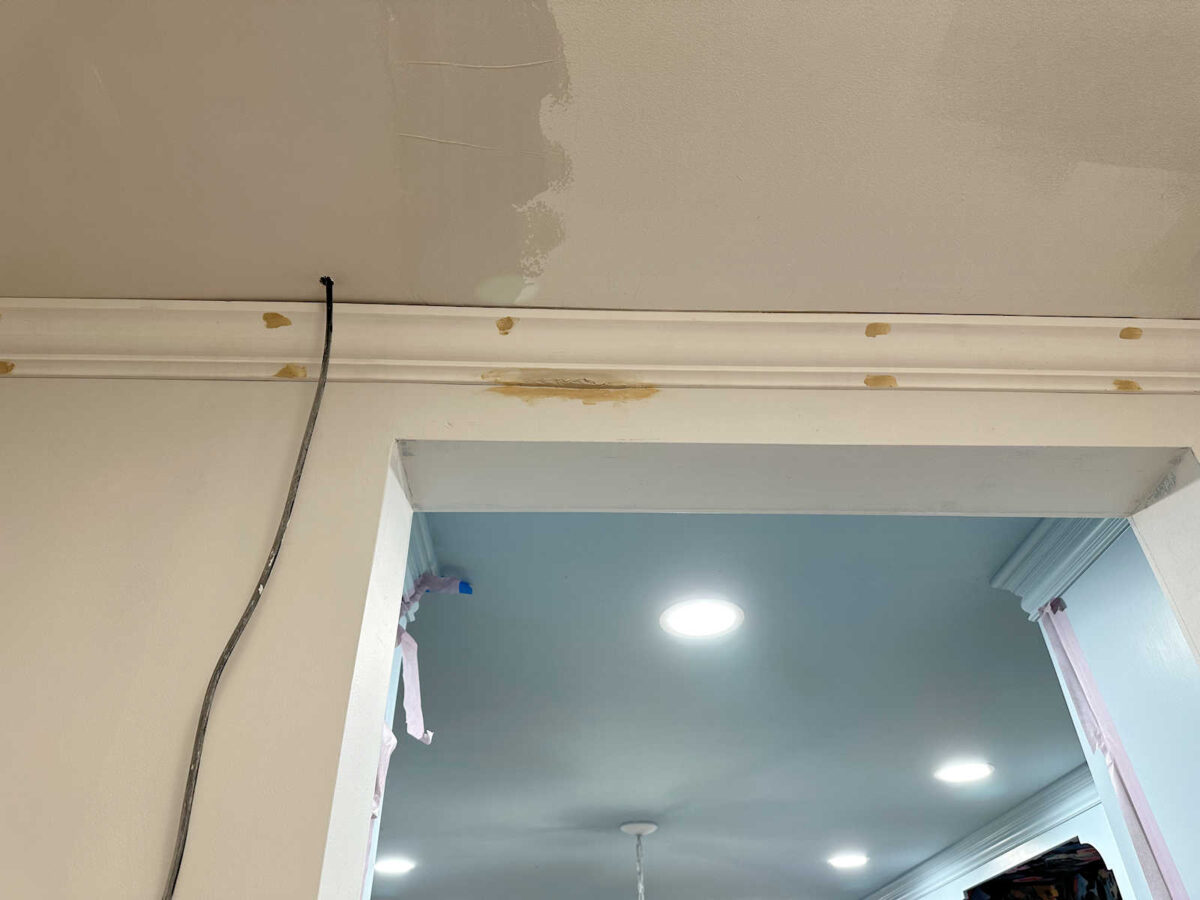
With that mentioned, right here’s the progress. I’ve the entire image body molding and the crown molding put in within the lobby. I didn’t take away any of the crown molding that was already there, even on this space the place the crown molding stopped wanting the nook the place it had as soon as wrapped across the built-in cupboard that was right here. As soon as it’s all sanded clean and painted, that joint received’t be noticeable.
I’m actually happy with how this image body molding turned out, and I’m very glad I made a decision to go along with one rectangle on every wall no matter how broad the wall is.
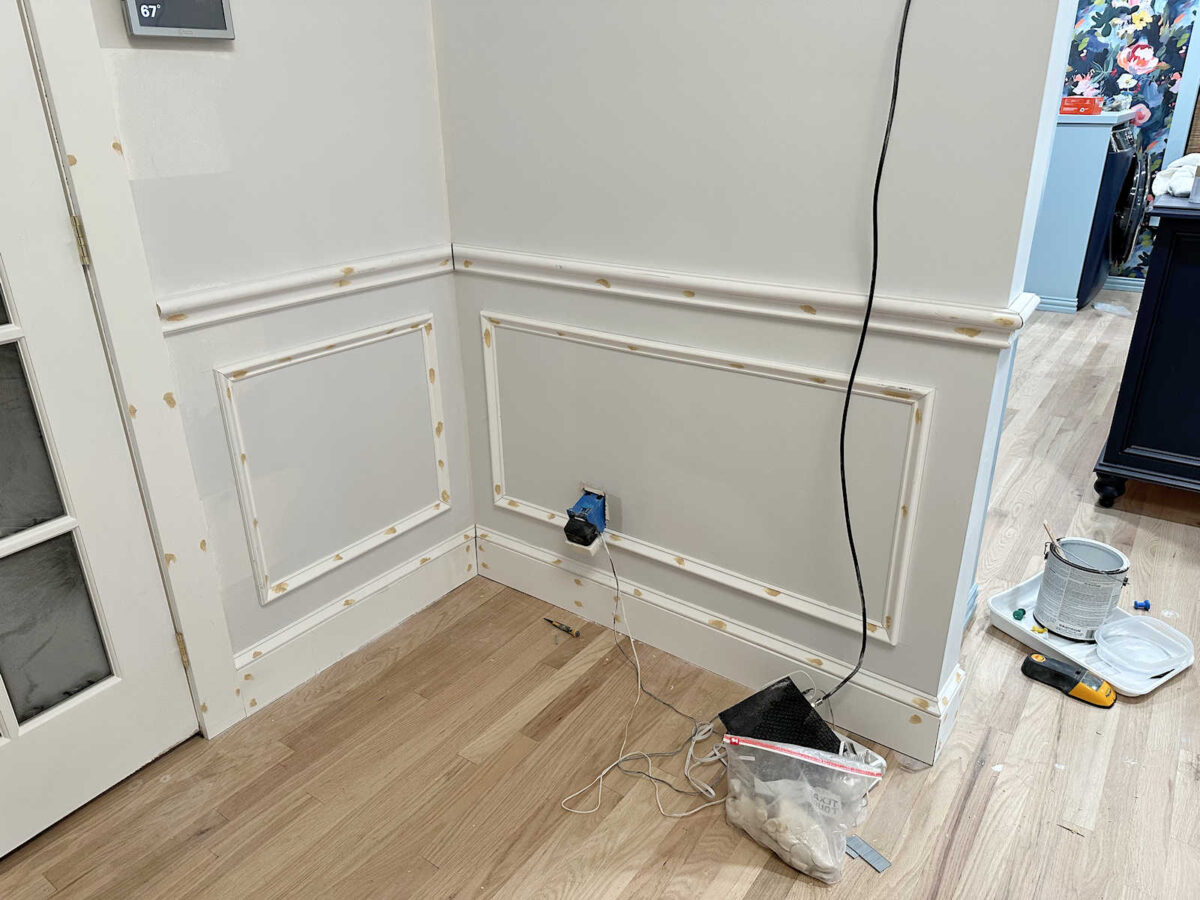
I feel if I had tried to interrupt up these wider areas into smaller rectangles, it might have appeared too busy. I’m aiming for colourful however calm, not busy.
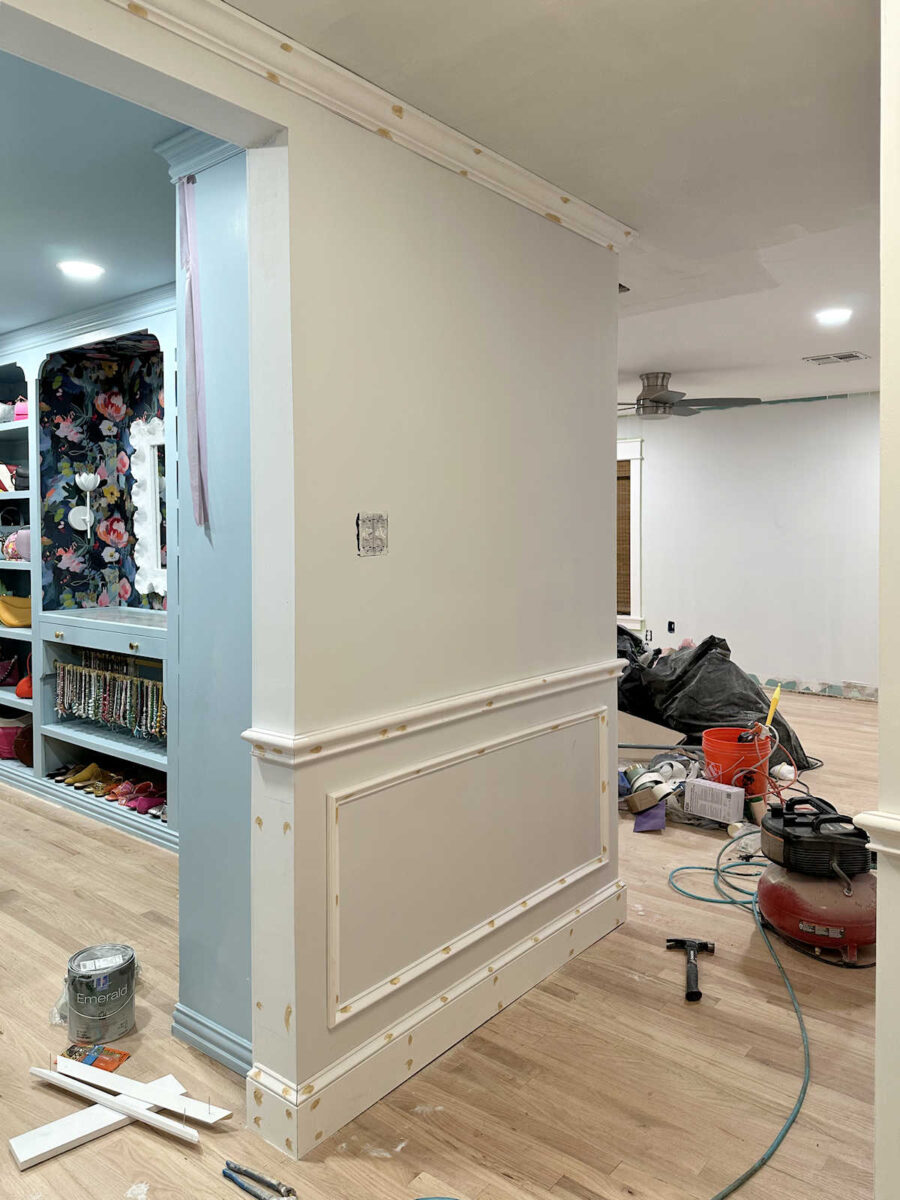
And, after all, it all the time has to undergo this stage the place it seems just like the molding has rooster pox with the entire nail holes stuffed with wooden filler.
Lots of people use caulk for the nail holes, and that’s a wonderfully fantastic choice. It’s additionally a lot sooner and simpler. The rationale I do wooden filler as a substitute is as a result of I discover that caulk shrinks just a little bit because it dries and leaves barely detectable divots the place every nail is. I like that I’ve extra management over wooden filler as a result of, whereas it shrinks additionally, I can construct it up a bit to account for the shrinkage after which sand it completely clean.
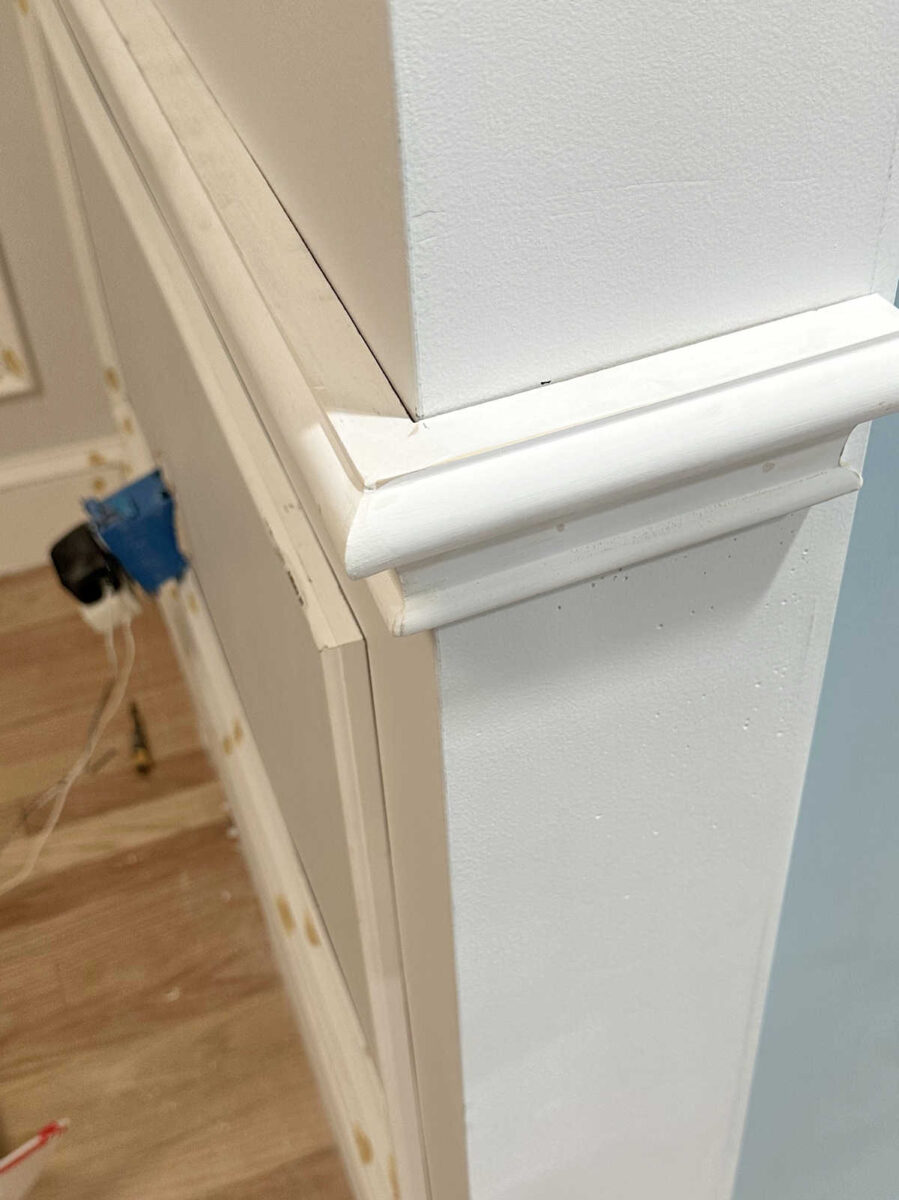
On this trim, I bumped into two issues. First, after I bought out the longest piece of crown molding for the lobby, I observed that someway a big chunk of it had been damaged off. That needed to have occurred in transport as a result of there’s no method I might have missed that within the retailer. It was about 5 – 6 inches lengthy, and about half an inch into the crown molding at its deepest level. I didn’t wish to discard that piece as a result of trim isn’t low-cost, and I couldn’t minimize that part out as a result of then I wouldn’t have had sufficient crown molding to complete the lobby. So I made a decision to go along with it and discover a technique to restore it.
I may kick myself for not taking an image of it earlier than attempting to restore it, however you’ll be able to see right here that I began off attempting to fill it with wooden filler. It was a large number.
The opposite downside I had was with the chair rail on the proper of the doorway into the walk-in closet. Once more, I forgot to take an image of the earlier than, so I attempted to recreate what I used to be working with utilizing these scraps. The rationale it didn’t come collectively is as a result of that door jamb is clearly not sq., so my items that have been minimize at good 45-degree angles didn’t meet. And this one was unhealthy, however I used to be nonetheless assured that I may disguise it someway. It appeared one thing like this…
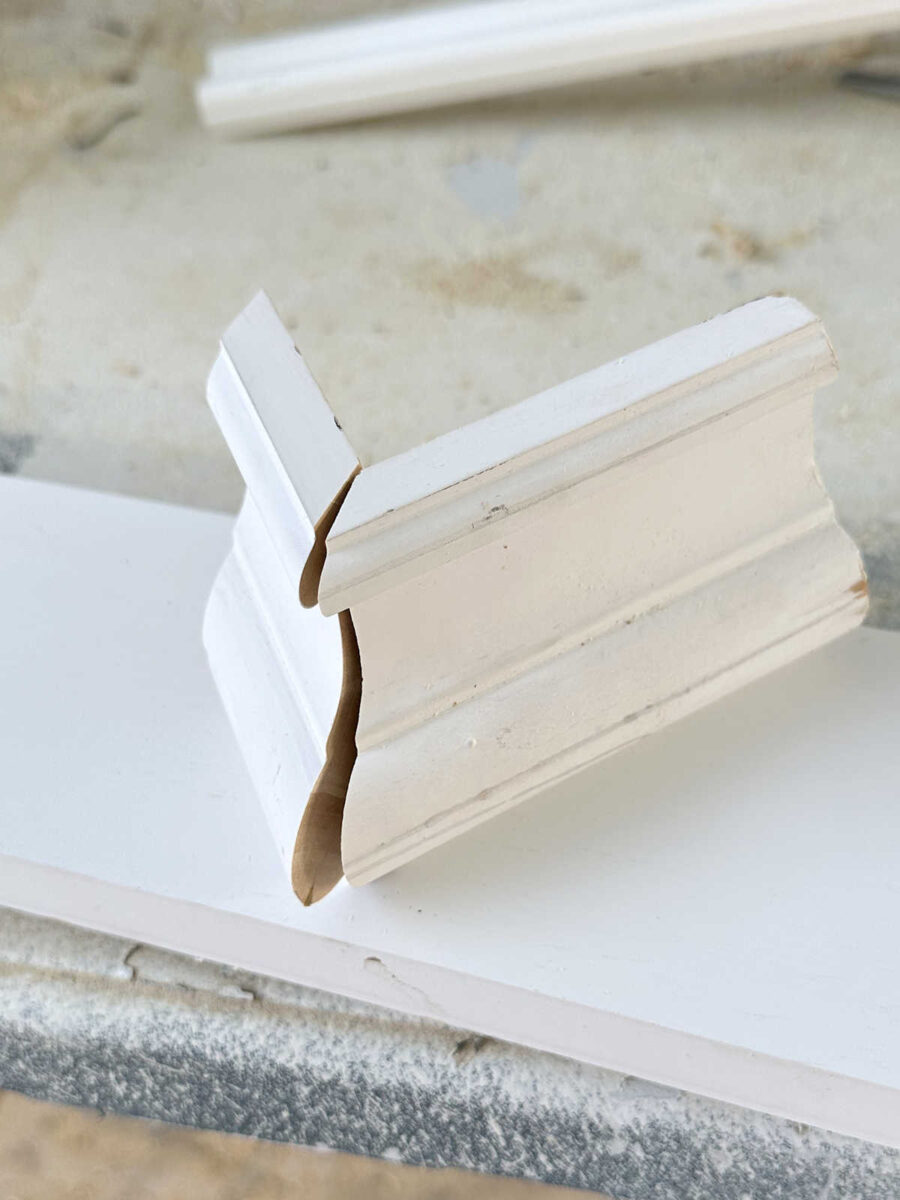
In order I used to be attempting to repair the crown molding with wooden filler, I assumed to myself, “I simply want I had one thing that was much less moist and extra moldable.” After which it dawned on me. I DO! I simply made a chandelier out of a product similar to that! Air dry clay match the invoice! I wasn’t positive that it might work, however I made a decision to provide it a strive. I pushed it into the crack after which molding it as a lot as I may with moist fingers, however I wasn’t attempting to make it look good at this level as a result of air dry clay sands superbly. Right here’s what it appeared like after I left it to dry in a single day.
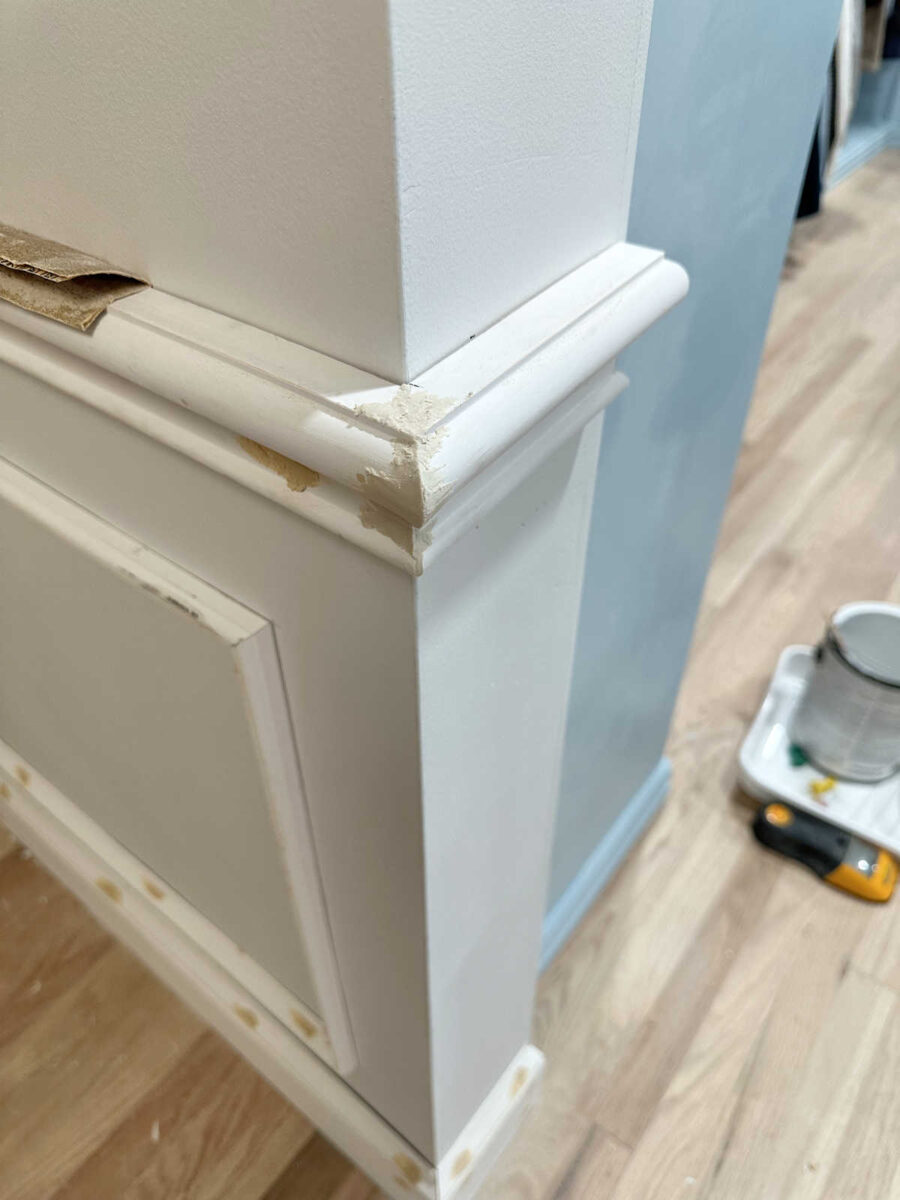
Right here’s one other look. You possibly can see that it’s positively not good. Similar to I do with wooden filler, I needed to construct it up a bit to permit for shrinkage because it dried.
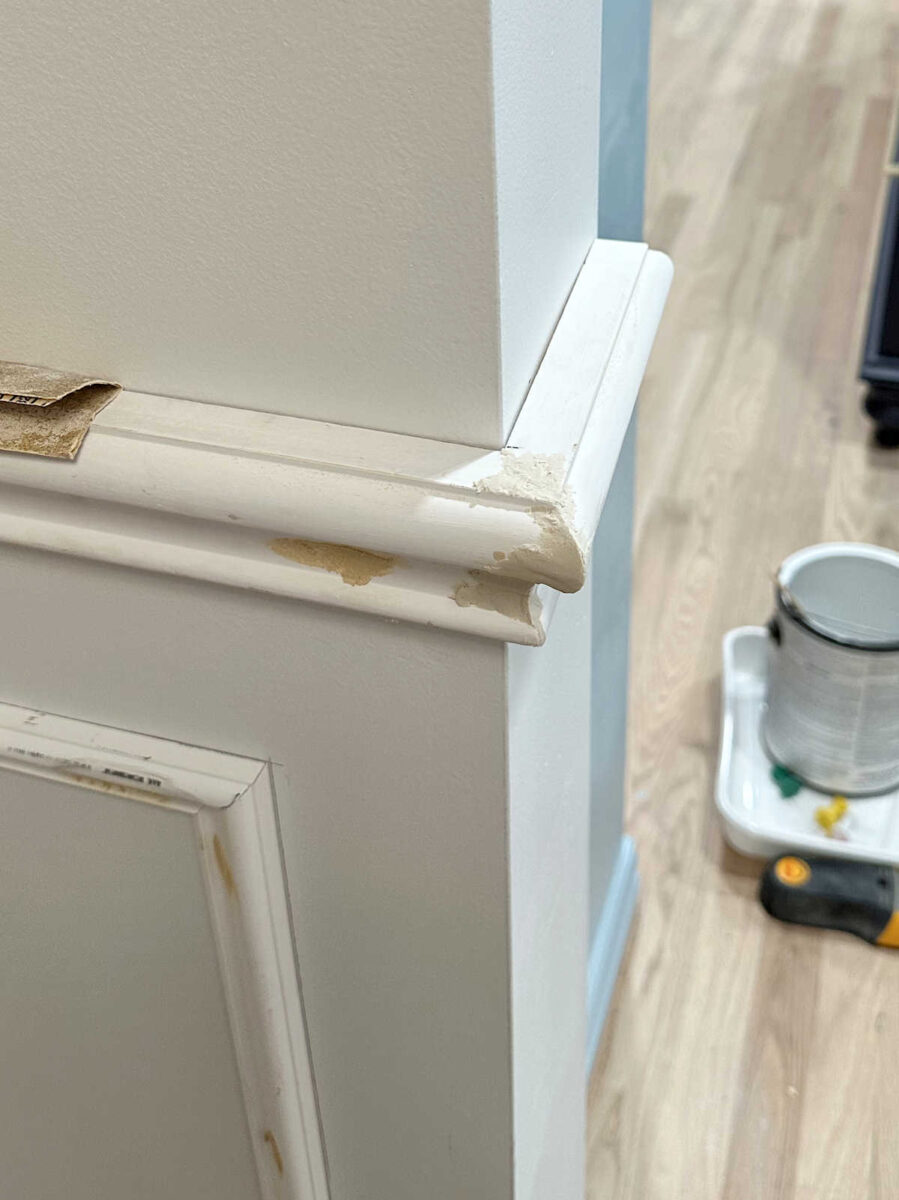
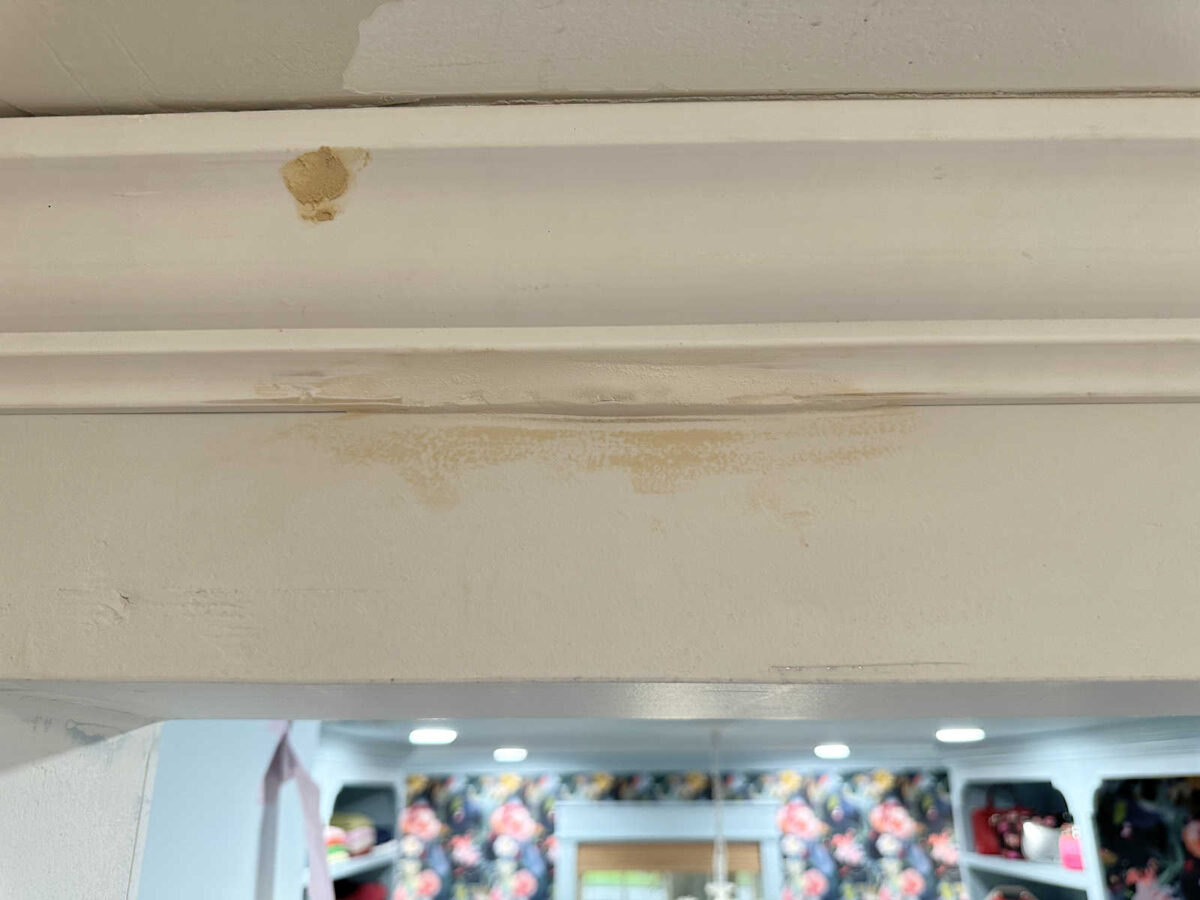
After which this morning, I sanded the dried air dry clay. Simply take a look at this!
Y’all!!! I can’t even consider how good that turned out!! Air dry clay is my new secret weapon for near-perfect trim. Oh, I so want I had taken an image of this earlier than I crammed it in. You’d be much more amazed. You’ll simply must belief me after I say that the hole on the trim on the very furthest level from the wall was possibly as massive as 1/4-inch, however definitely no smaller than 3/16-inch.
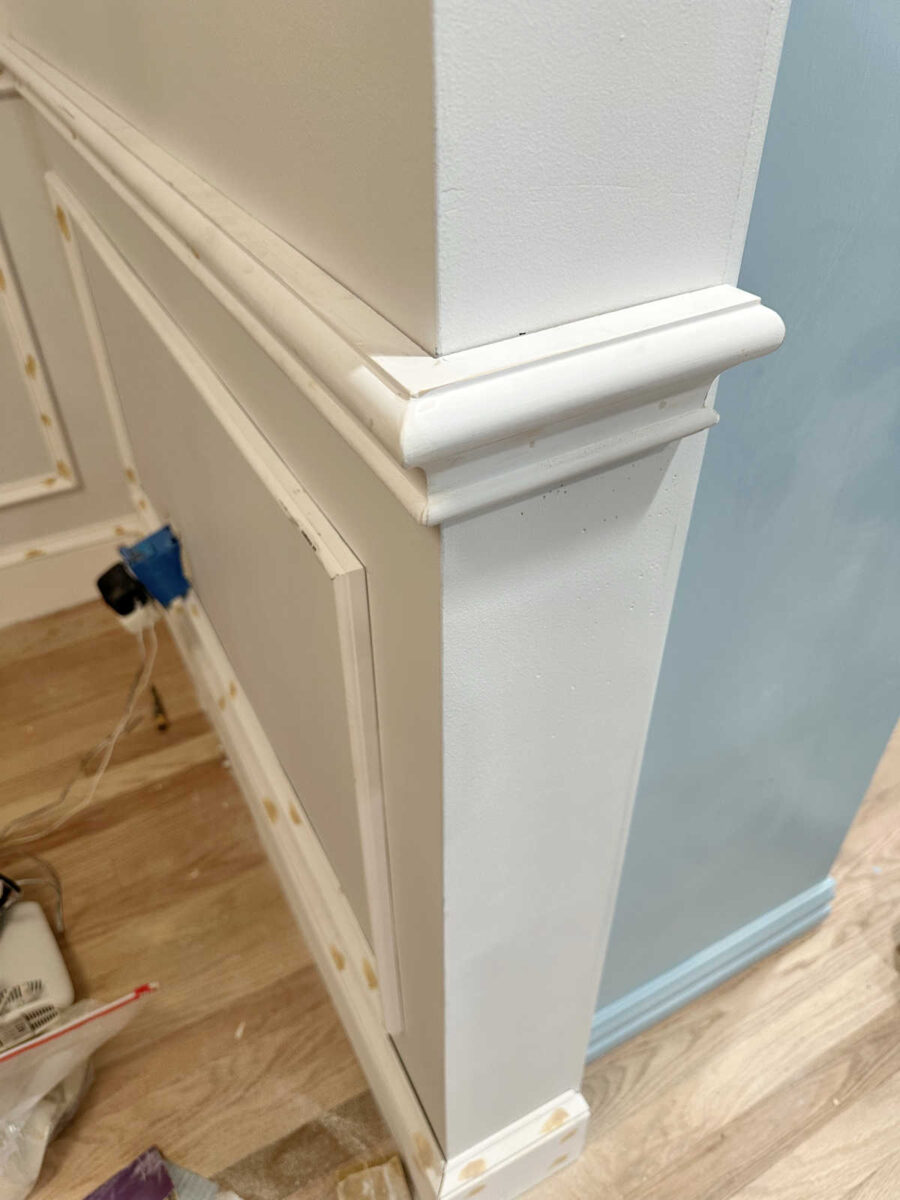
So I dug out the wooden filler that I had used to attempt to restore the crown molding, and I changed it with air dry clay as properly. This one was a lot deeper than the one on the chair rail, in order I began sanding it this morning, I noticed that it’s not utterly dry but. It’ll want one other day earlier than I can sand it completely clean, so it’s nonetheless wanting a bit tough. However as soon as it’s utterly dry and sanded clean, you’ll by no means know that there was an enormous 5-inch-long, 1/2-inch deep chunk of trim ripped off of this crown molding.
I want I had found this years in the past. I’m not a end carpenter, so my trim is all the time imperfect, and I’m all the time having to fill in cracks and joints with wooden filler. However no extra! My product of selection for this any more will likely be air dry clay. It takes just a little longer to dry than wooden filler, however it’s a lot simpler to mildew, and it’s additionally just a little bit simpler to sand than wooden filler. I’m positive I’ll have many extra makes use of for it as soon as I begin putting in the trim within the bed room, so I’ll make sure you get earlier than photos after I use it once more.
Extra About Our Grasp Bed room


Addicted 2 Adorning is the place I share my DIY and adorning journey as I transform and beautify the 1948 fixer higher that my husband, Matt, and I purchased in 2013. Matt has M.S. and is unable to do bodily work, so I do nearly all of the work on the home on my own. You possibly can be taught extra about me right here.


")

Considering My Next Steps – Addicted 2 Decorating®")


")
")

")

