

I’m slowly however certainly checking off tasks from my punch checklist for the walk-in closet. Yesterday, I completed up sanding the patched areas on the ceiling drywall, primed the ceiling, put in three of the 4 closet hanging rods, and painted the ceiling.
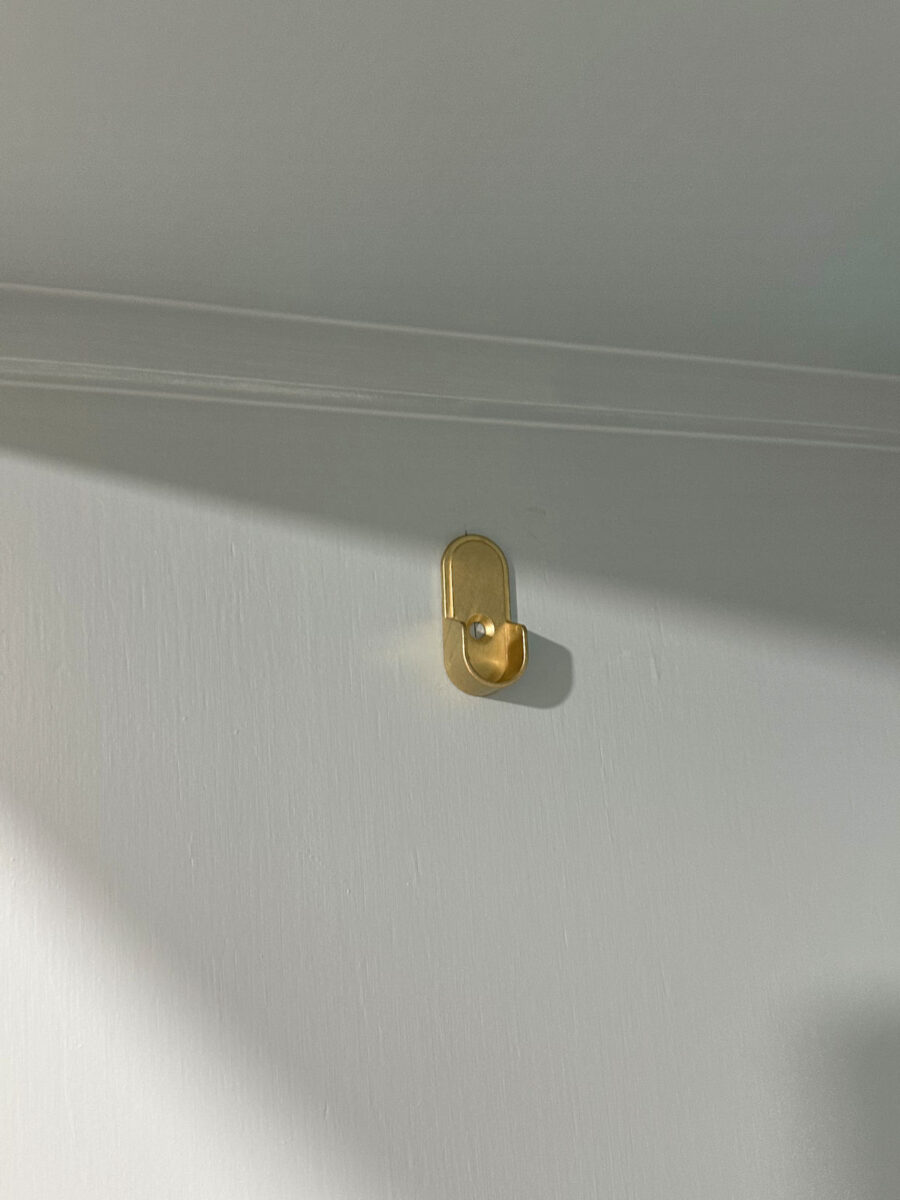
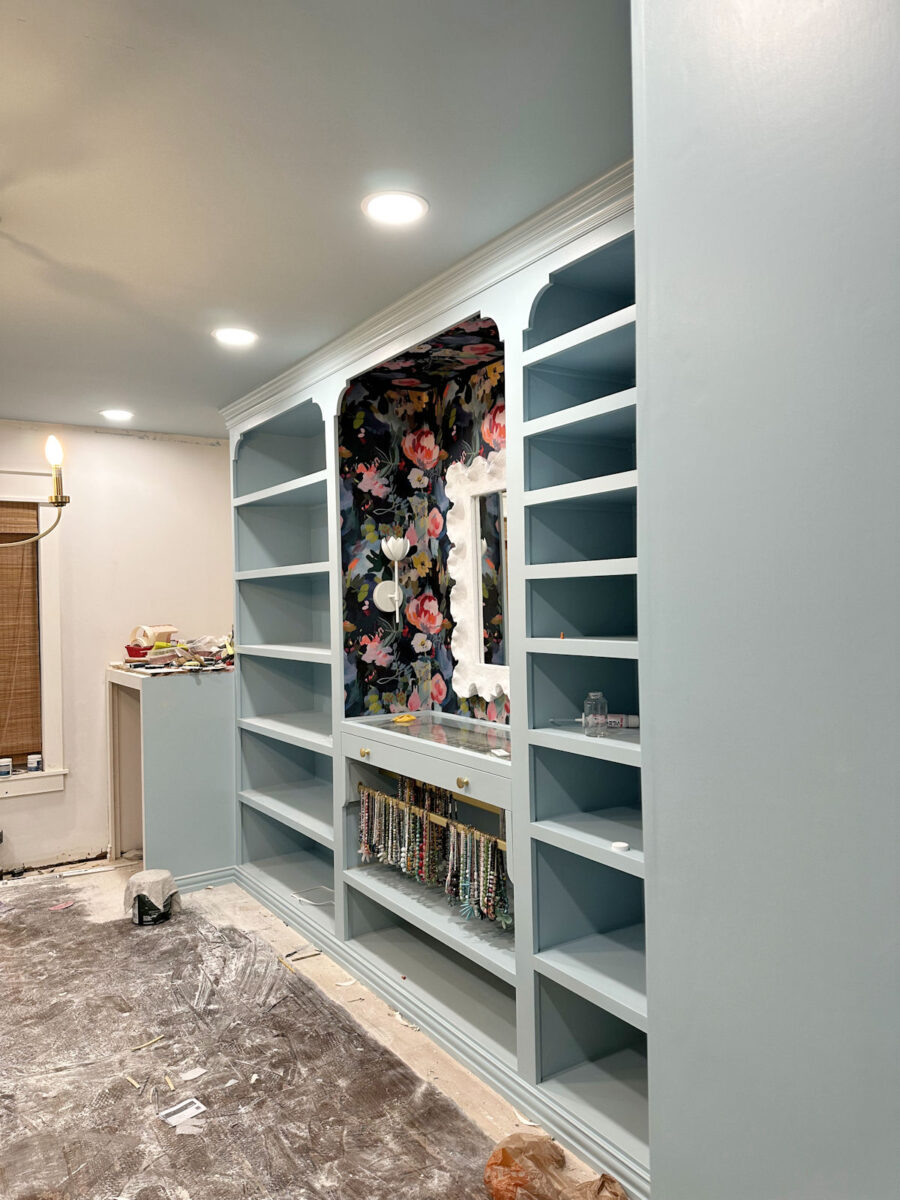
I’ll begin with the closet rods. I completely love how these matte gold rods look in opposition to the blue cupboards!
Putting in these rods was fairly easy. They got here with these mounting brackets which have these 5mm pins on the again, after which they’re held in place with a screw within the center. (Please excuse my gross arms. I all the time say that you must by no means belief somebody who claims to be a DIYer and has clear arms and ideal fingernails. 😀 )

To put in these brackets with the pins, I marked the place I wished them to go inside the cupboards.

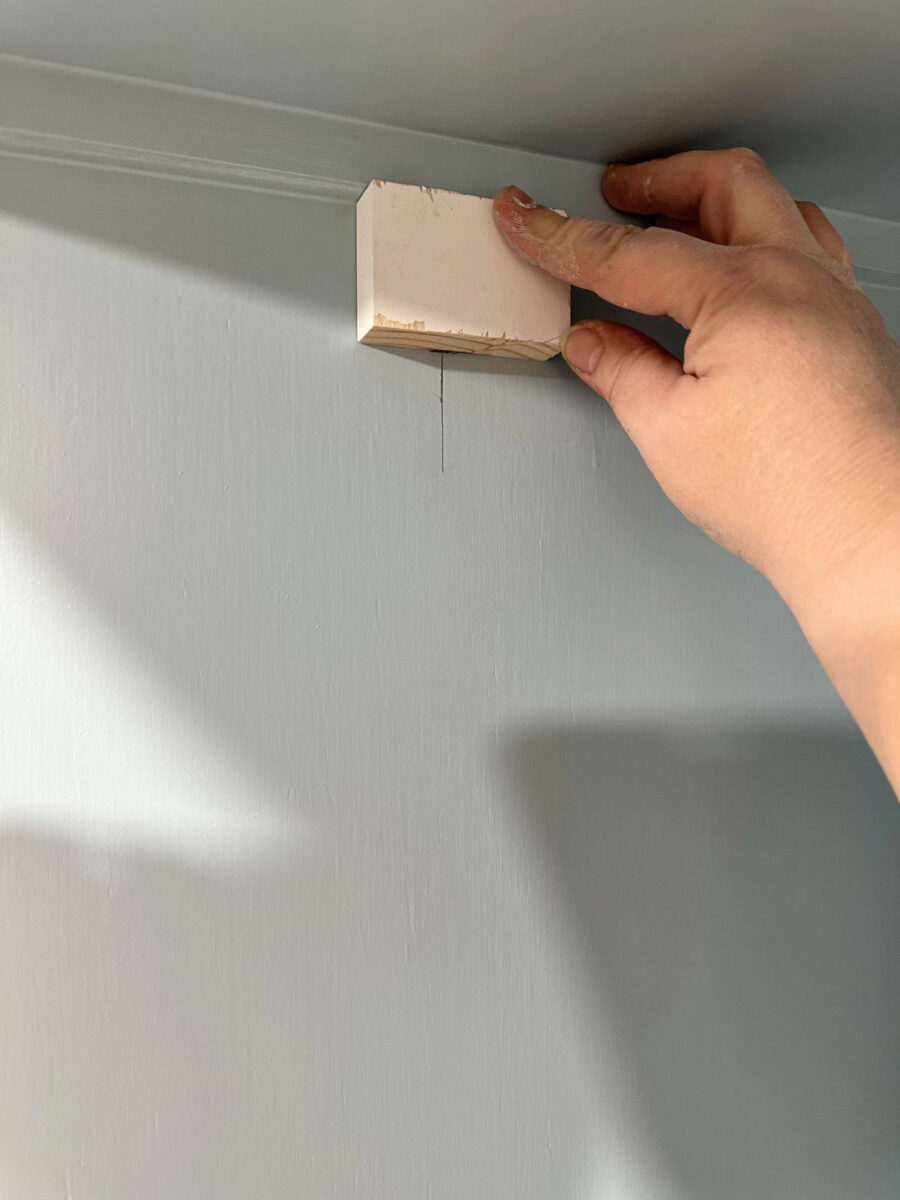
However right here’s my first tip. When you’re putting in a number of gadgets that every one have to be put in on the similar top/distance, reasonably than utilizing your tape measure to mark and measure the position for every one individually, lower scrap items of wooden to make use of for this course of. I wished all of my brackets to be 8.5 inches from the again of the cupboards, and 1.75 inches from the brace for the shelf above it. So I lower two items of scrap wooden. I lower the primary to eight.5 inches, and used that to rapidly mark the vertical line for my brackets…
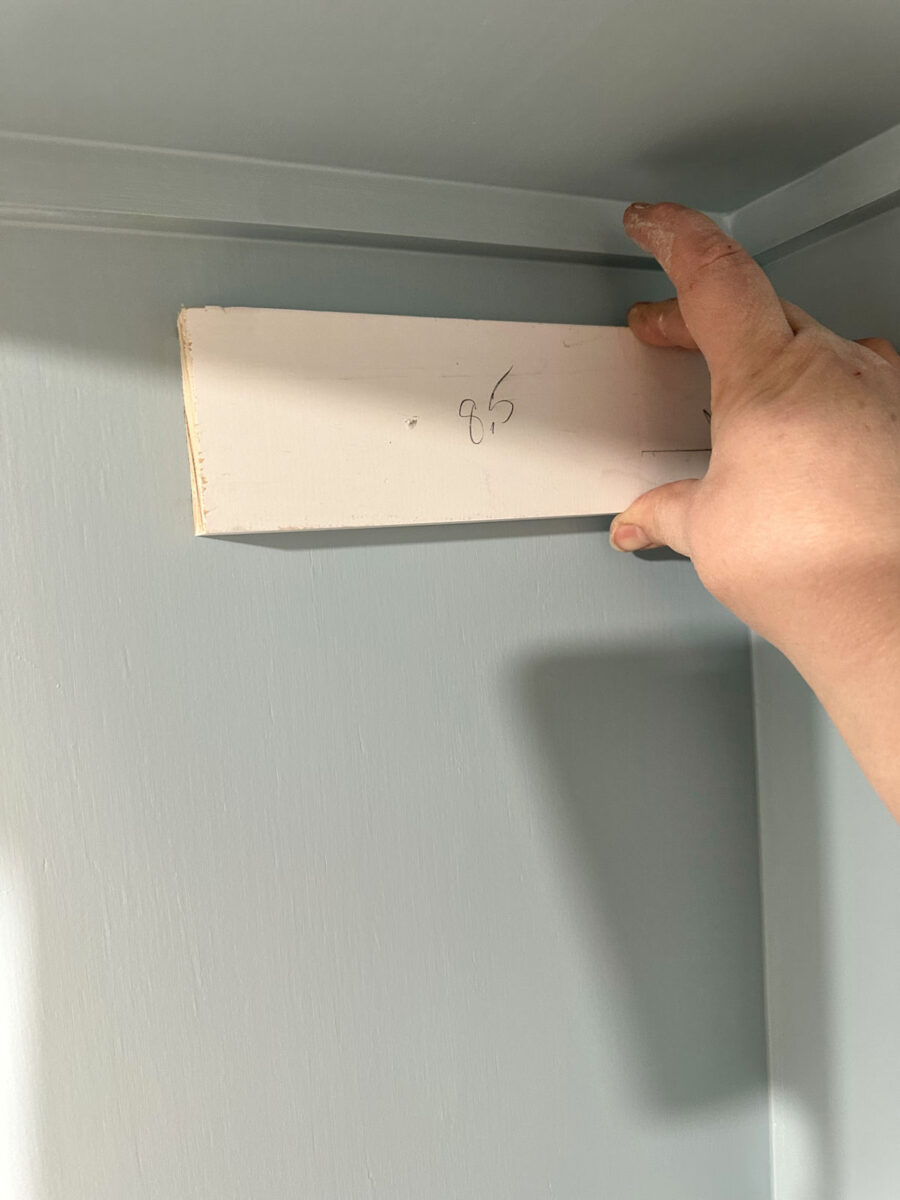
After which I lower one other piece of scrap wooden to 1.75 inches to rapidly mark the gap from the shelf brace above it.
That method, I don’t should rely on my accuracy in utilizing a measuring tape for every mark, which is sweet, as a result of typically I make errors in my measurements. It is a foolproof strategy to get the entire measurements precisely proper, and it goes a lot sooner.
And right here’s my second tip. When it’s worthwhile to drill holes for one thing like these mounting brackets which have pins in them, and people holes have to be in very exact locations, don’t attempt to measure and mark that spacing utilizing a tape measure. Simply use one thing like paint or lipstick on the backs of the pins and press that to the wall or cupboard the place it’s worthwhile to drill the holes. For these, I used the darkest lipstick I’ve (and infrequently put on).

After which I lined up the highest pin to the purpose the place my two marks crossed, and lined up the underside pin on the vertical line, after which I knew precisely the place I wanted to drill the holes. No guesswork. No measuring with a tape measure and hoping that I received the measurements precisely proper.

Every one match completely as a result of the marks got here immediately from the pins on the bracket.
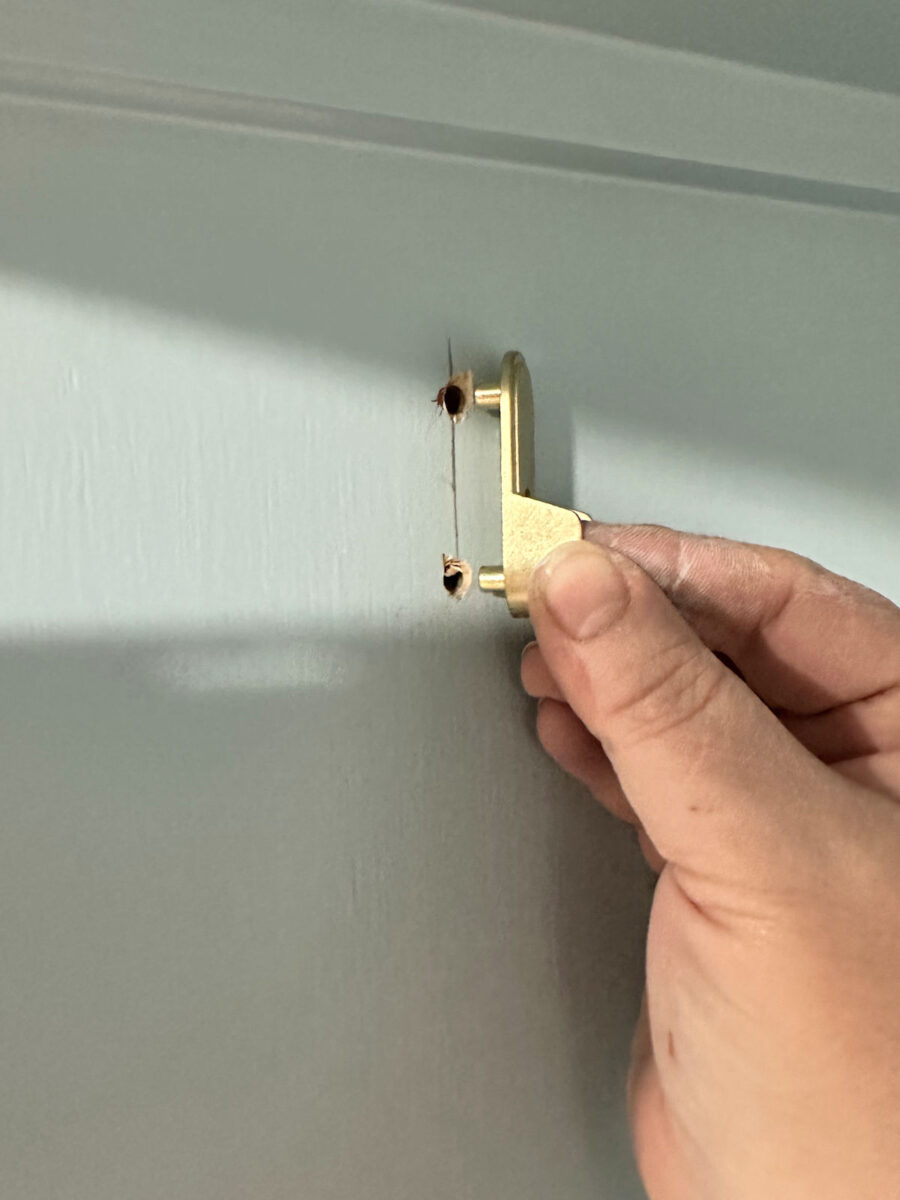
So I very simply pushed that bracket into these completely spaced holes, after which I used to be in a position to safe it with the screw that was supplied with the bracket.
I’m all about taking the guesswork out of processes that I have to repeat time and again and discovering methods to repeat these processes that don’t depend on me utilizing a tape measure to mark every particular person placement. And doing it this manner makes the method go a lot sooner.
So the excellent news is that that course of went very easily. I received the brackets put in for all 4 rods, and I received three of the 4 rods lower and in place.

The unhealthy information is that there was no such foolproof methodology for chopping the bars. Every one was a barely totally different measurement, so I needed to measure, mark, and lower them individually. And on the final one, I managed to chop it one inch too brief. 😢

No drawback. I can simply order a brand new one, proper? Mistaken. They’re out of inventory on the one I would like. *Sigh* After all they’re. I’m so pissed off with myself for this. Measure twice, lower as soon as, proper? I didn’t do this, and now I don’t fairly know what I’m going to do. I can’t discover a strategy to contact the vendor on Amazon to see when or in the event that they’ll have extra, so I could should likelihood it with one other model. I can’t imagine I did that. I needed to lower a complete of six rods for this closet, and I managed to do 5 of them good and tousled on the final one.
However I needed to put that out of my thoughts and never obsess over it, as a result of I wanted to maintain shifting ahead on this room. I used to be decided to get the ceiling utterly completed earlier than I went to mattress final night time. And I did! As I discussed in a earlier put up, I made a decision to paint drench this room with the Sherwin Williams Billowy Breeze that I used on the cupboards. So all the things besides the wallpapered areas and the ground would be the similar shade.
After I went to mattress final night time, the ceiling was nonetheless utterly moist from the second coat of paint. However right here’s the way it regarded early this morning after all the things was dry.
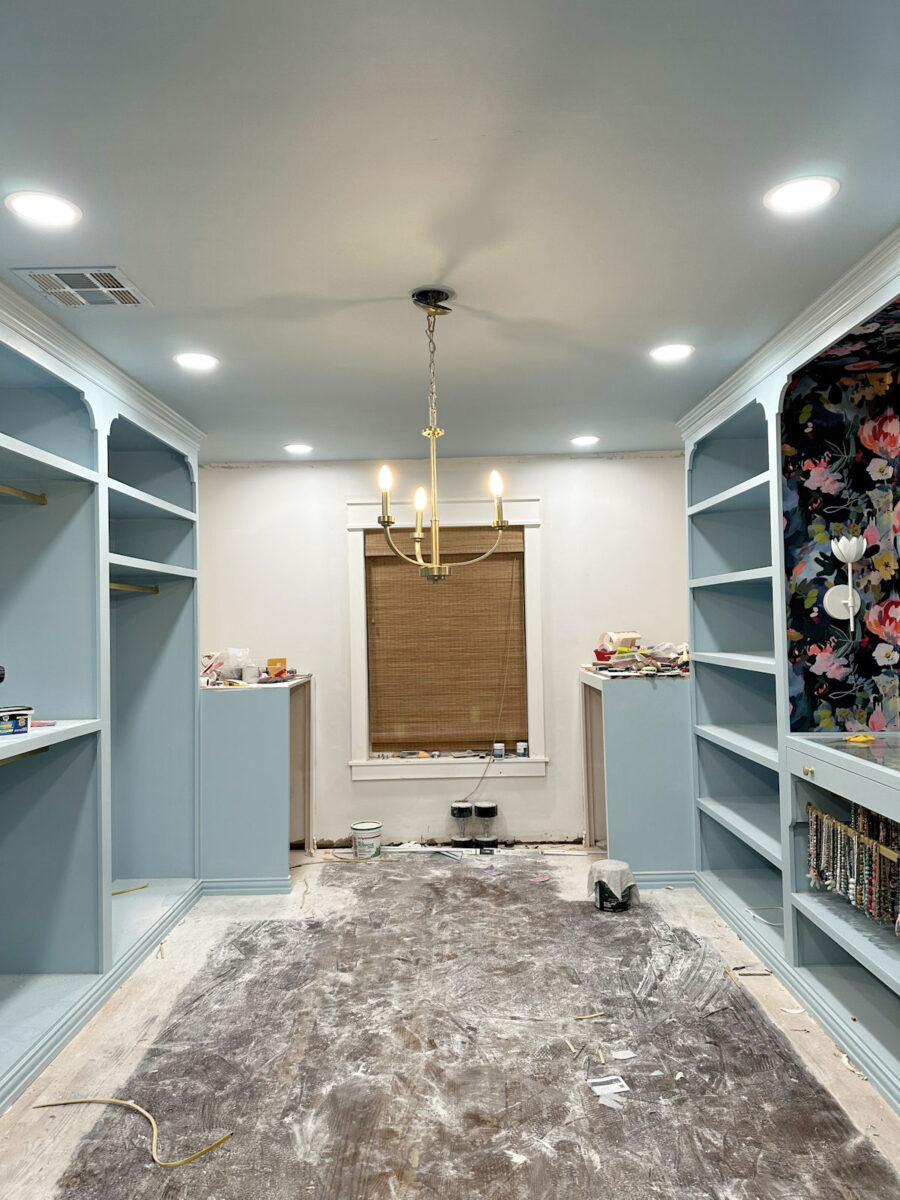
I used a satin sheen on the cupboards and flat on the ceiling.
It’s really type of exhausting to inform that the ceiling is blue except you possibly can see it subsequent to the white partitions.

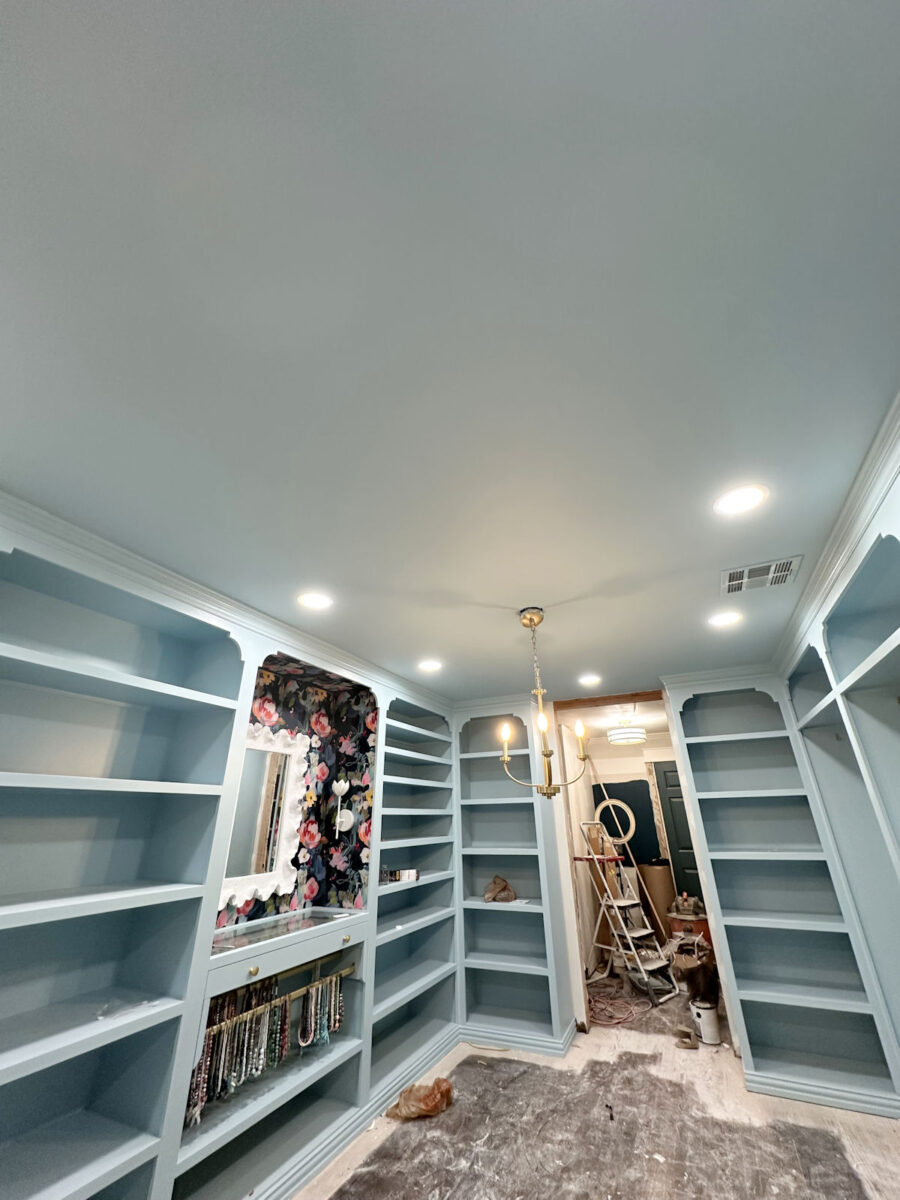
However I’m actually pleased with how this turned out. Drywall is my least favourite factor to do, and I’m not nice at it. So after I needed to do repairs on the ceiling, I actually tried to take my time and never rush via that course of in order that I might get it as easy as doable. A professional might have carried out it significantly better than I did, however even at that, I actually don’t suppose that anybody would discover the repaired areas.

I feel that appears fairly darn good! After all, utilizing flat paint helped. If you wish to disguise imperfections, flat paint is the best way to go.
Right here’s a reminder of what the ceiling regarded like a few days in the past…
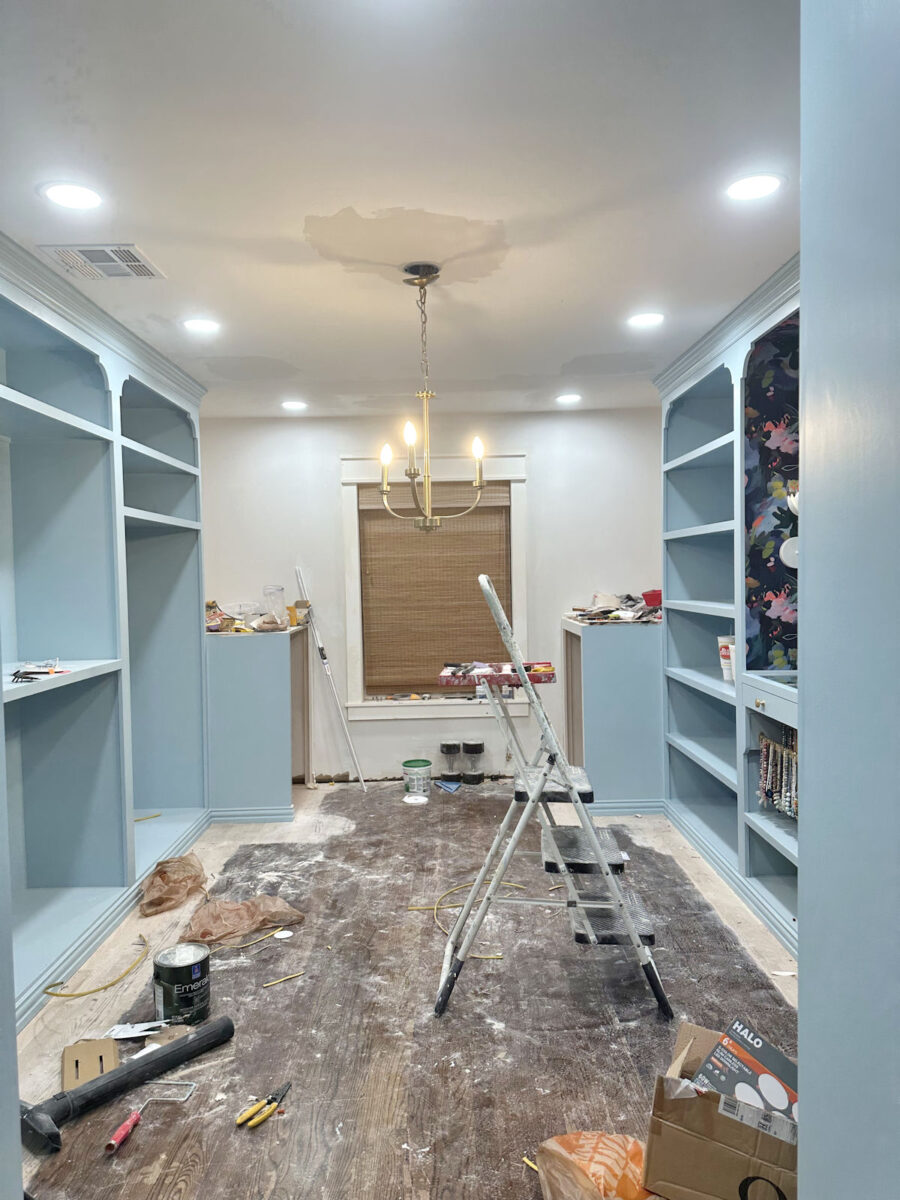
And right here it’s completed…
I’m not a drywall professional, however I’m fairly pleased with how that turned out.
I ought to point out that it appears to be like just like the room is slightly darker now with the darker ceiling, however I don’t actually suppose it’s. I had turned down the brightness on the lights as a result of it was hurting my eyes to work on the ceiling with the lights turned as much as full brightness. I forgot to show them again up all the best way earlier than taking the images this morning. With them turned to full brightness, the room continues to be very brilliant.
In order that massive undertaking is completed! New lighting…test. Repaired ceiling…test. Primed and painted ceiling…test. Closet rods put in…3/4 of a test.

That’s a fairly ceiling, if I do say so myself. 😀

Now the problem will likely be to see if I can get this room, the lobby, and the bed room cleaned up by the point I’m going to mattress tonight. If I can, I’ll be at Residence Depot very first thing tomorrow morning to lease the sanders for the ground. I’m not going to emphasize over it, although. I’ll strive my hardest, but when I simply can’t get it carried out, I’ll end the clear up tomorrow, after which lease the sanders very first thing Friday morning. However both method, these flooring are about to get sanded. I’m so excited to get this darkish stain off of the flooring and see how these rooms are going to look with mild, brilliant flooring!

Addicted 2 Adorning is the place I share my DIY and adorning journey as I transform and adorn the 1948 fixer higher that my husband, Matt, and I purchased in 2013. Matt has M.S. and is unable to do bodily work, so I do the vast majority of the work on the home on my own. You’ll be able to study extra about me right here.
")


