

Final Friday, I used to be positive that I’d get the studio facet steps completed over the weekend. That didn’t fairly work out for 2 causes. First, I made a decision to take a day without work to loosen up and never take into consideration home initiatives, so I misplaced an entire day of labor. I selected air con and stress-free over working within the sizzling solar. 😀 (These facet steps are within the direct daylight nearly all day lengthy.)
However the second cause is the primary cause. I needed to do extra analysis and studying earlier than I pushed ahead with my plan simply to make it possible for I used to be constructing steps that will stand the take a look at of time. And I’m so glad I took the time to try this as a result of, based mostly on what I learn, I ended up making a reasonably vital change to the design of the steps.
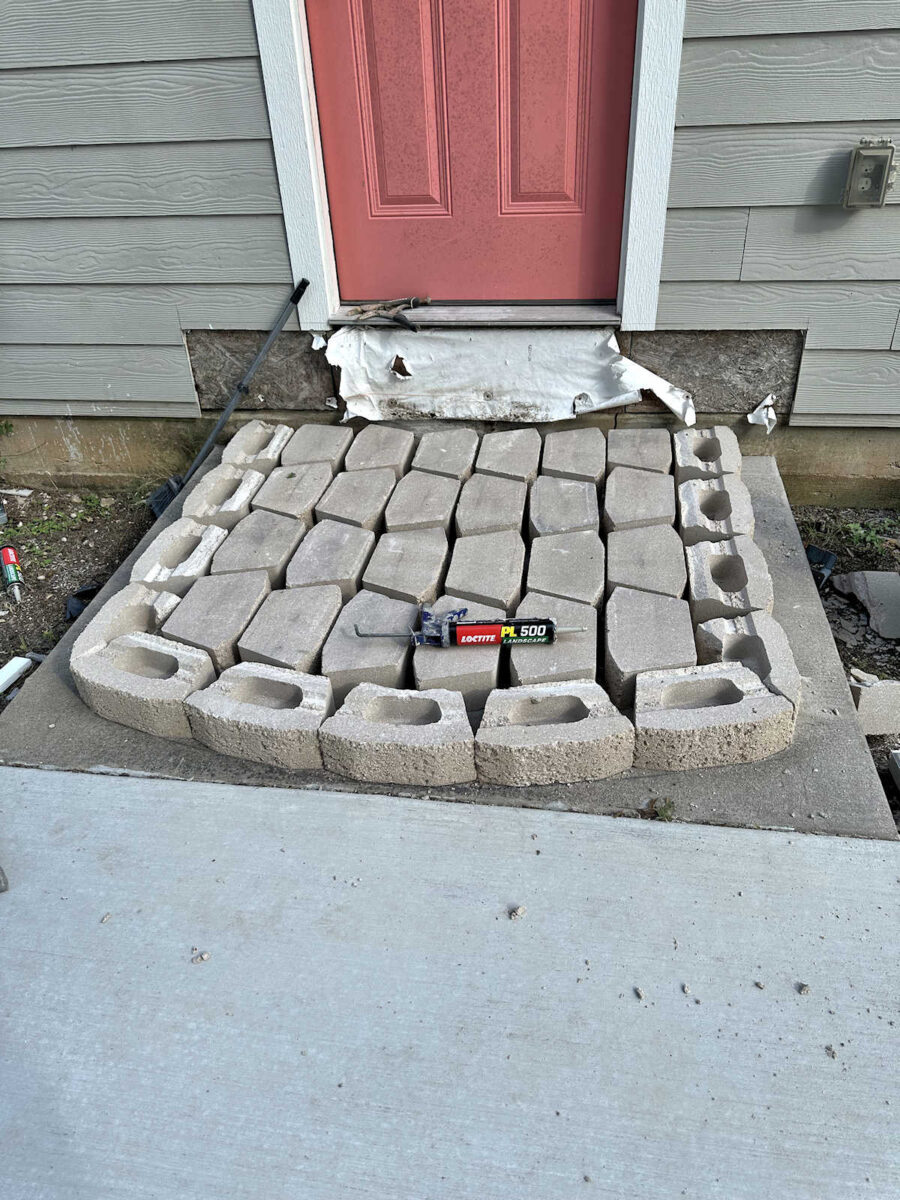
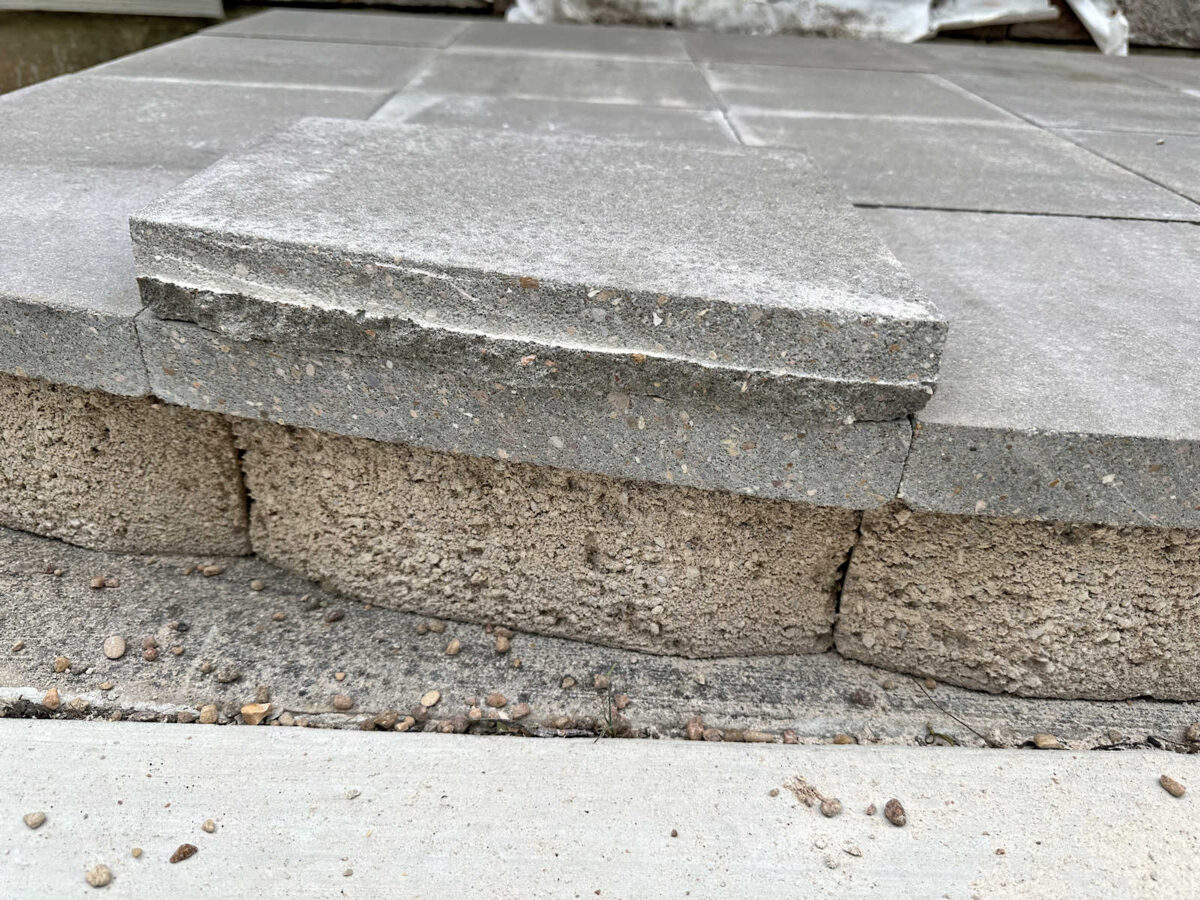
My authentic plan was to chop the retaining wall blocks for the inner helps in half and simply use these to assist the 4 corners of every concrete paver. This was the final image I confirmed of that plan, however I took the image earlier than I acquired to the purpose of chopping the retaining wall blocks in half.
In order you possibly can see, if I had reduce these supporting retaining wall blocks in half to make use of as helps on the corners the place the pavers meet, that will have left the middle of every paver unsupported.
However earlier than I began chopping these blocks in half to proceed with my plan, I made a decision to do a bit extra analysis to see if this was one of the simplest ways to go about this. So I sat down at my pc and began googling. First, I needed to understand how a lot weight 12″ x 12″ x 1.5″ concrete pavers can maintain. This was the Google AI response: “A regular 12 x 12 x 1.5-inch concrete paver can usually maintain between 3,000 and eight,000 kilos of distributed weight, offered it’s absolutely supported by a flat, correctly compacted base.” It’s that final half that clearly acquired my consideration — absolutely supported by a flat, correctly compacted base. Clearly, that’s how pavers are usually used. They’re used flat on the bottom over layers of leveled and compacted gravel and sand. And I do know they’re very robust when used that means as a result of we now have random concrete pavers round our property which are in good situation and appear like they’ve been there for many years.
Subsequent, I requested how a lot weight they’ll maintain in the event that they’re suspended and solely supported on the 4 corners. Right here’s the reply I acquired: “If suspended and supported solely at its 4 corners, a typical 12 x 12 x 1.5-inch unreinforced concrete paver will fracture below a central level load of solely 150 to 350 kilos.” That’s clearly an issue, and that meant that my authentic design needed to change. Thank goodness I hadn’t but reduce these retaining wall blocks in half, and not one of the inner helps and not one of the concrete pavers had been glued down but.
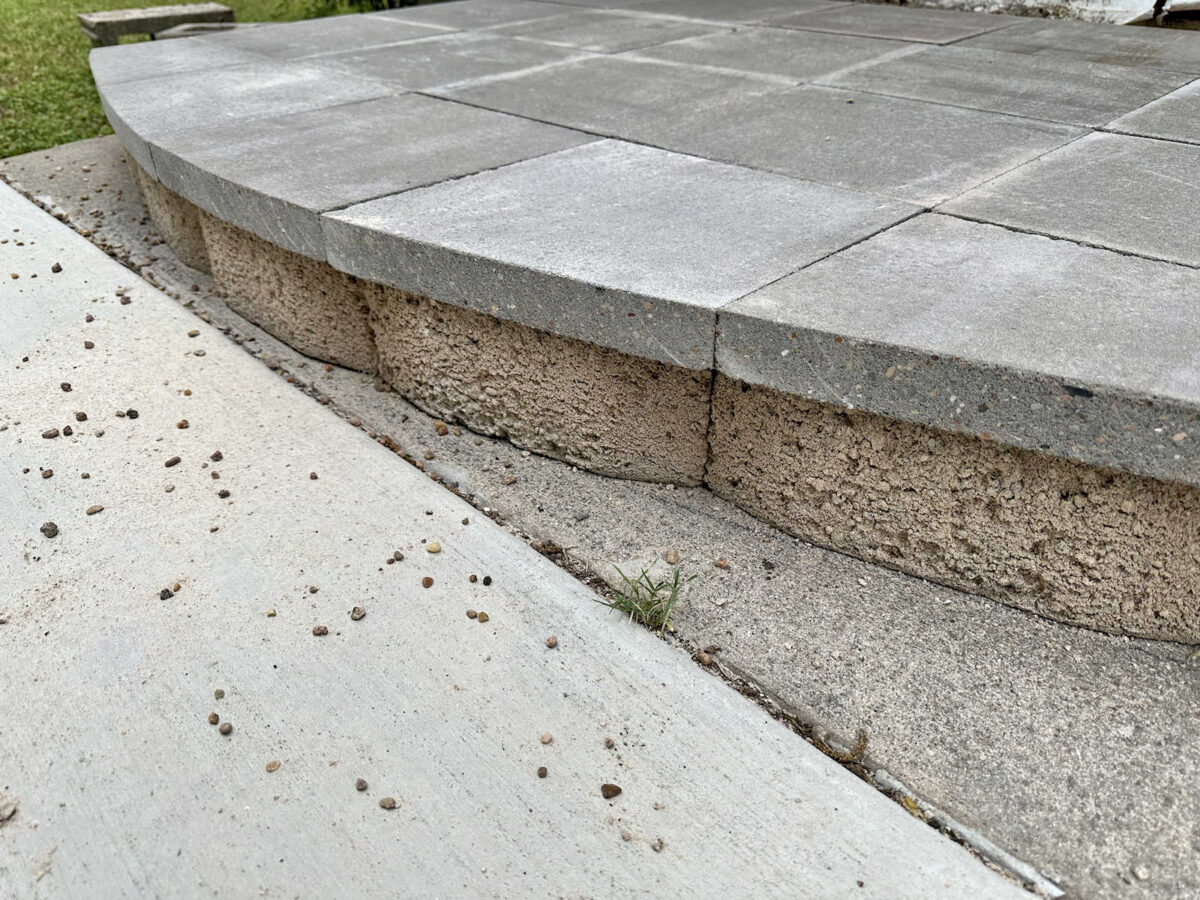
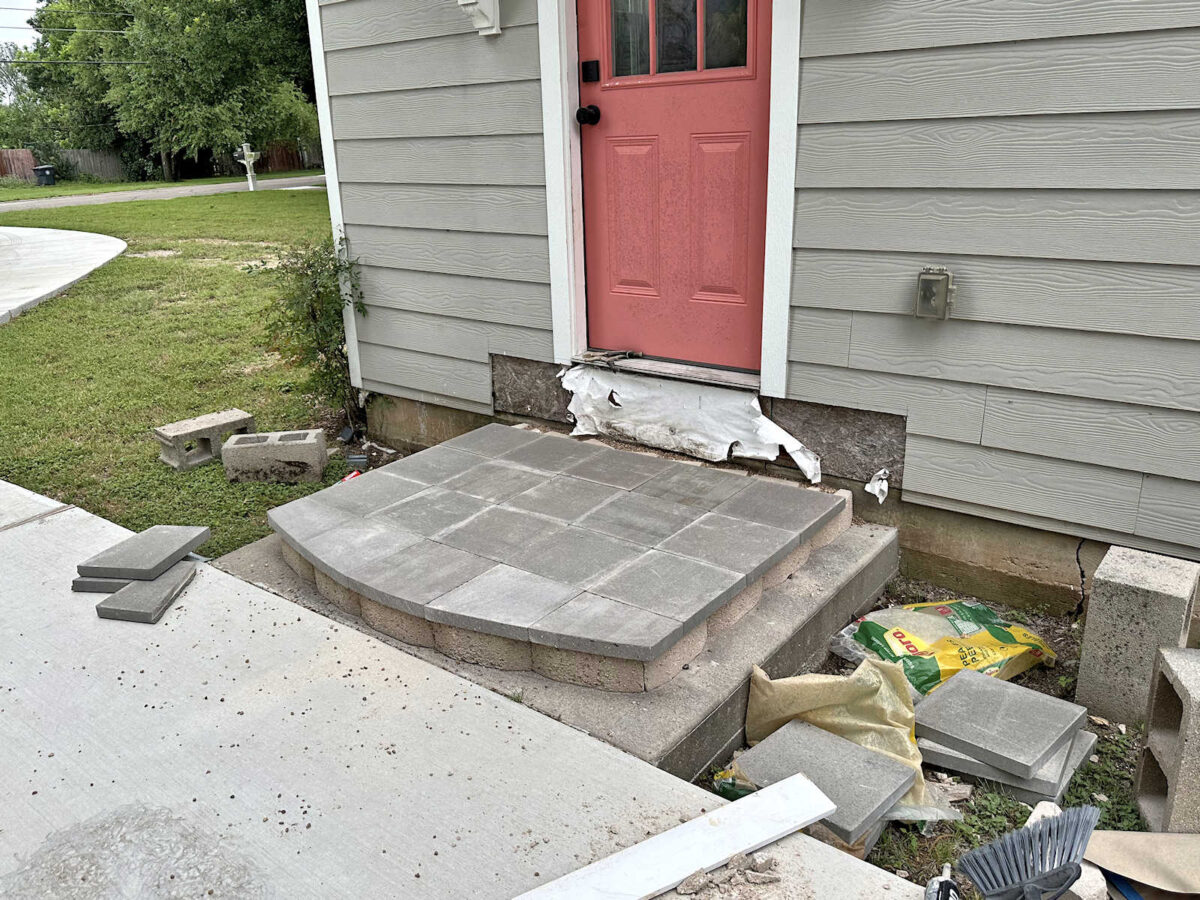
So again to the drafting board I went. With a view to present the wanted assist for the pavers, I ended up filling up all the cavity contained in the perimeter blocks with as many blocks as I may slot in there, with solely small areas between them. I nonetheless needed to reduce that again lip off of every one in order that they might lie flat on the concrete pad, and as soon as I acquired them organized, I glued them down with the identical Loctite PL 500 polyurethane adhesive that I used for the perimeter blocks. It actually didn’t add an entire lot to the worth since these blocks are solely $2.37 every.
After giving the adhesive a little bit of time to set, I crammed in the entire cracks with pea gravel. I had deliberate to make use of paver gravel, however that gravel is just a little larger than pea gravel and I didn’t suppose it will match into the smaller cracks. Pea gravel was the right measurement to get into each single crack. I packed it down in addition to I may utilizing varied instruments that will match into these small cracks, after which I brushed the surplus away, ensuring that there was no gravel on the tops of the blocks.
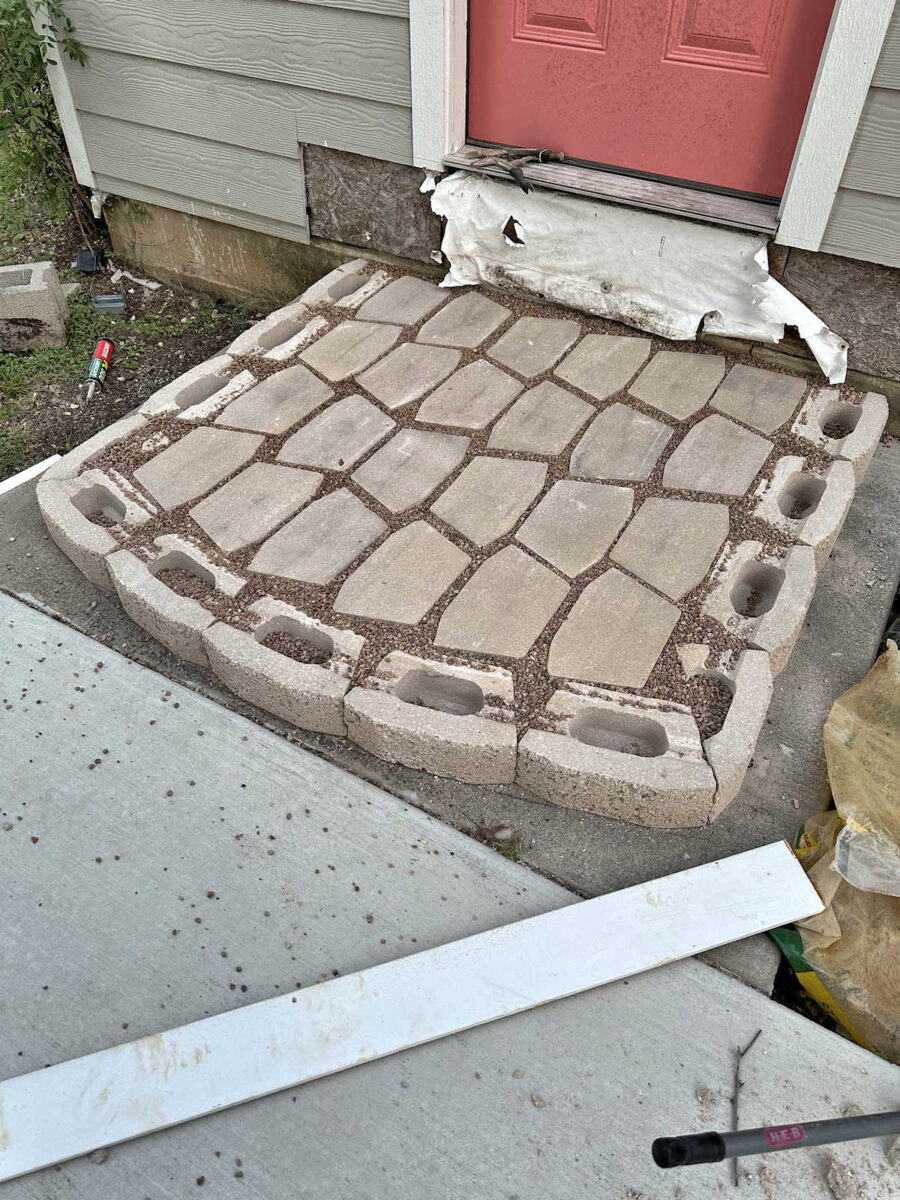
I didn’t refill the hole voids within the perimeter blocks. I’m undecided if I have to, however I nonetheless may return and try this.

One other factor that I did otherwise this time is that I used my moist tile noticed to chop the curve within the entrance pavers. This labored out so a lot better! With the tile noticed, I used to be in a position to get a clear reduce right through on the primary reduce, and that gave them such a greater look. It wasn’t as fast and straightforward as chopping 1/4-inch-thick tile, however with the proper blade, it acquired the job completed.
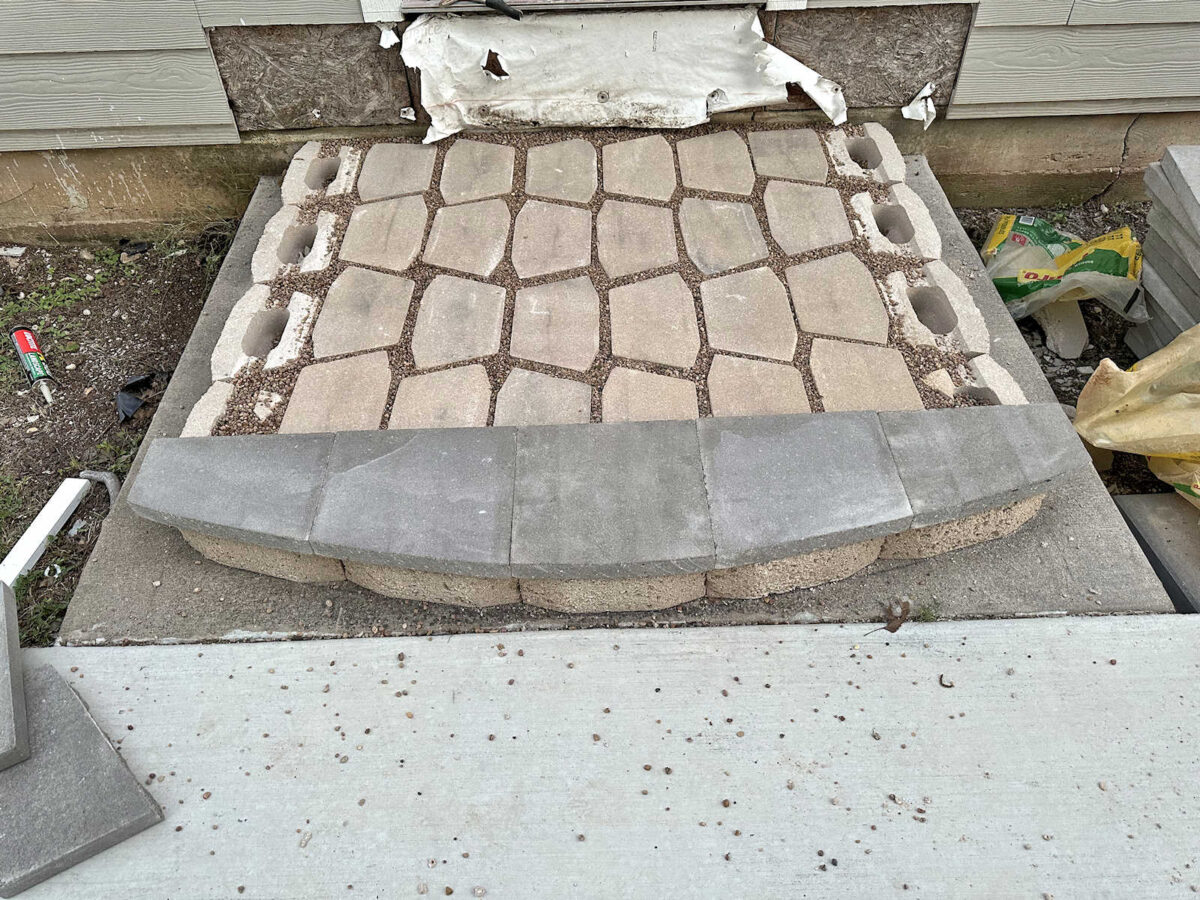
There are nonetheless some blade marks on them, so I nonetheless wish to grind these off as soon as I get the grinder/polisher disc for my handheld grinder. However at the same time as they’re proper now, I believe they give the impression of being very nice.
Right here’s a comparability of one of many pavers reduce two alternative ways. The one on prime is one which I reduce utilizing my handheld grinder midway by means of after which knocked off the surplus utilizing a hammer. You’ll be able to see simply how a lot grinding and sprucing that will have wanted with a purpose to get it clean. On the underside are those that I reduce utilizing my moist tile noticed. The distinction is day and evening. The reduce with the tile noticed is such an enchancment that these blade marks actually don’t even hassle me that a lot. However I’ll in all probability nonetheless attempt to clear them up a bit.
I nonetheless haven’t adhered these pavers into place. I have to perform a little bit extra readjusting earlier than I try this. And after they’re adhered, I wish to get that grinding/sprucing disc to go over the tops of all of them simply sufficient to get the dust and darkish colour off of them in order that the colour is constant. After which I’d prefer to seal them earlier than I transfer on to the following step in order that they’ll be much less prone to get soiled and darkish once more.
I’m so glad I took the time to do extra analysis on this earlier than forging forward. At this level, I really feel fully assured in my plan. This step is strong. It took some time to get the plan excellent, take a look at out the plan, and so forth. However now that I’ve a strong plan in place, and I do know the precise steps that I have to take to realize this, I believe the opposite two steps (and the opposite set of steps by the bed room door) will go a lot sooner. The trial and error, researching a plan, designing a plan, after which determining easy methods to execute that plan is the slowest a part of a venture. However now that I’ve the entire kinks labored out, the remaining must be a lot smoother and sooner.
Extra About Our Home Exterior & Yard


Addicted 2 Adorning is the place I share my DIY and adorning journey as I rework and adorn the 1948 fixer higher that my husband, Matt, and I purchased in 2013. Matt has M.S. and is unable to do bodily work, so I do nearly all of the work on the home on my own. You’ll be able to be taught extra about me right here.


")


")


