

Properly, it appears as if my concept to DIY the steps to the facet door of the studio went over like a lead balloon. I learn all the feedback, and I’ve to confess, I used to be very stunned at all the individuals who mentioned, “This isn’t a DIY venture. You’ll want to rent this out. Depart it to the professionals.”
I learn the feedback. I thought of the feedback. I did an entire lot extra analysis on my concept and the merchandise I needed to make use of. And I made a decision to forge forward. I actually love my concept, and even when it doesn’t work out in the long run, I’ll have at the very least tried one thing new and realized rather a lot from it. And after Day 1 of engaged on this venture, I’m much more decided and enthusiastic about these DIY steps. I didn’t get all the first step completed, however I like the progress to this point.
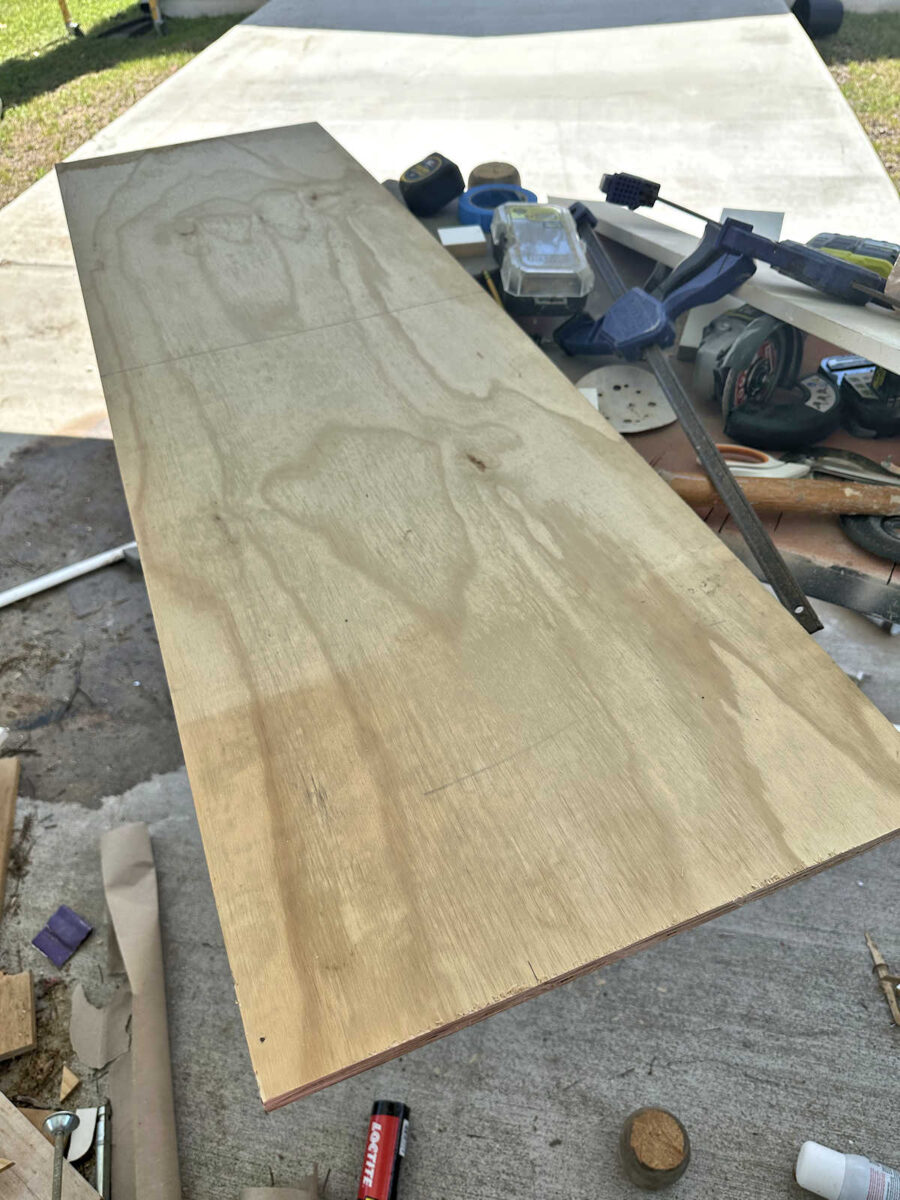
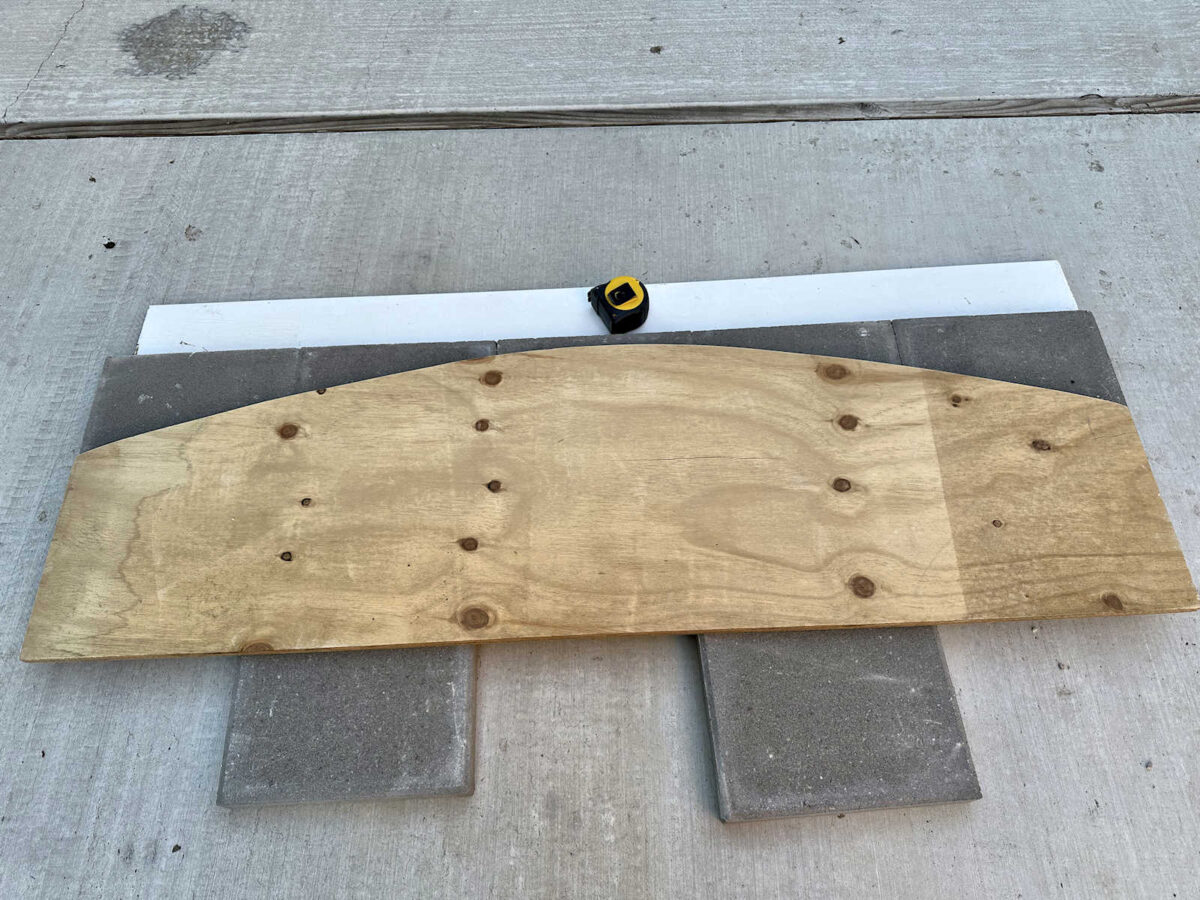
Right here’s how I did it. First, I wanted a sample for the entrance curve of the steps. I would like the general width of the steps to be 60 inches, however I would like the steps to over hand the risers by one inch on the perimeters and entrance. So I minimize a scrap piece of plywood to 58 inches extensive to make use of because the sample.
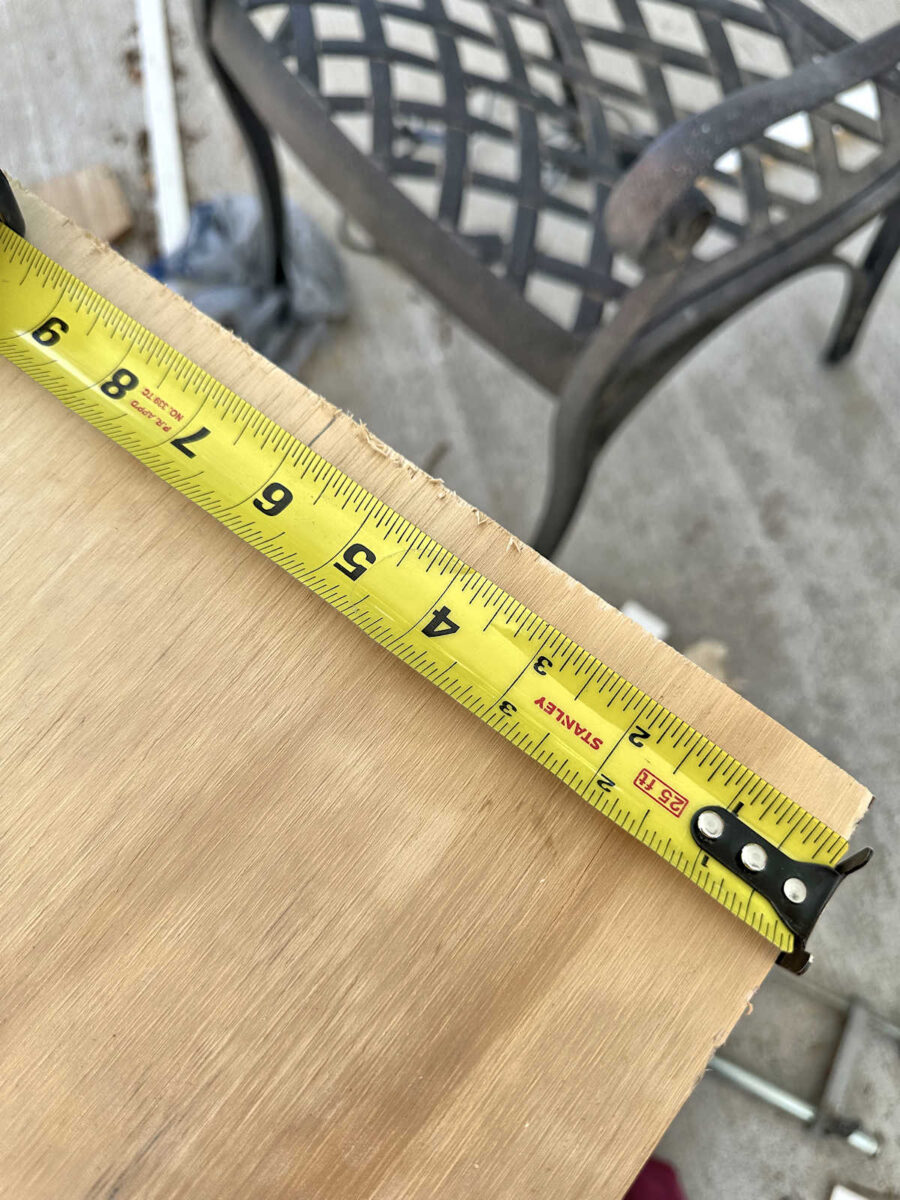
Then I measured and marked six inches on every finish of the plywood.
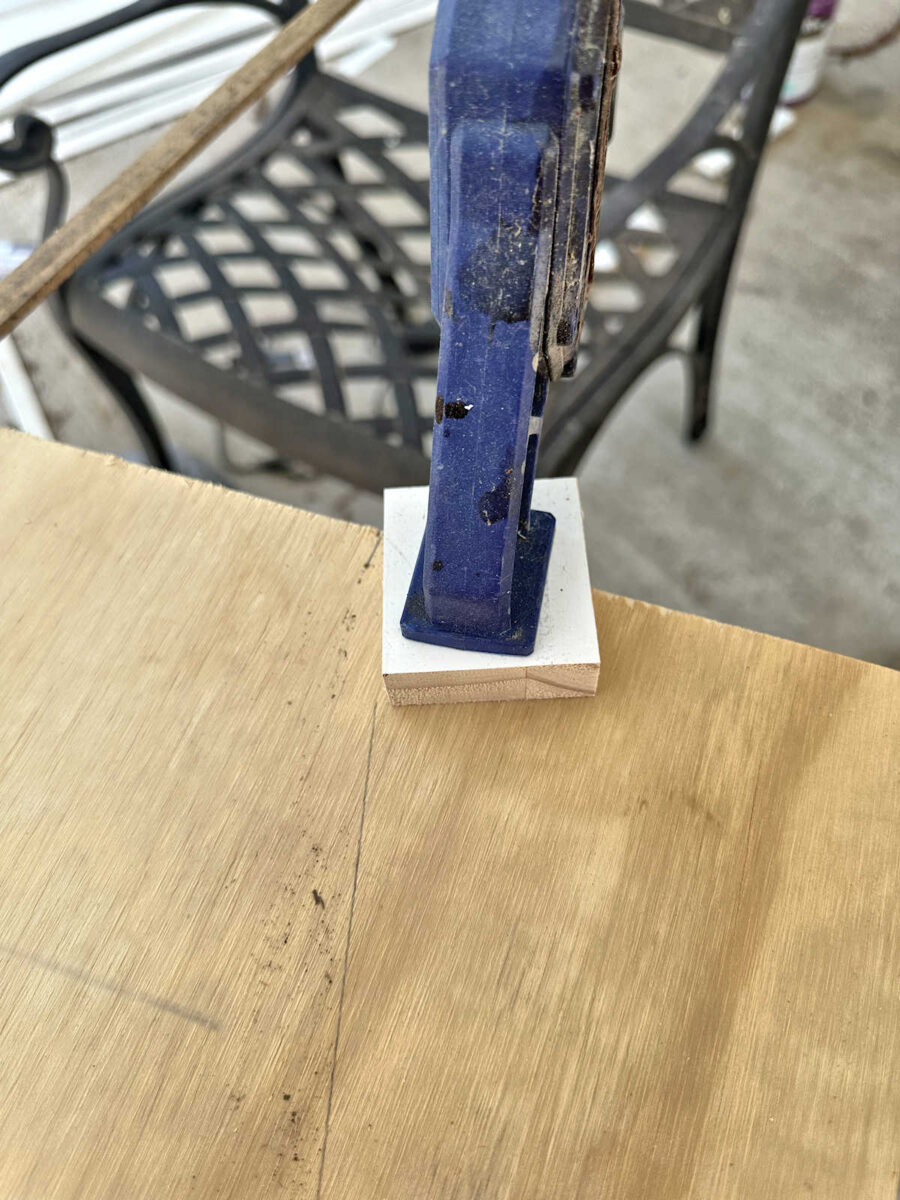
After which I clamped a bit of wooden at that six inch mark on either side. I positioned the wooden piece to the facet that will be minimize off, not on the facet that will stay as my sample.
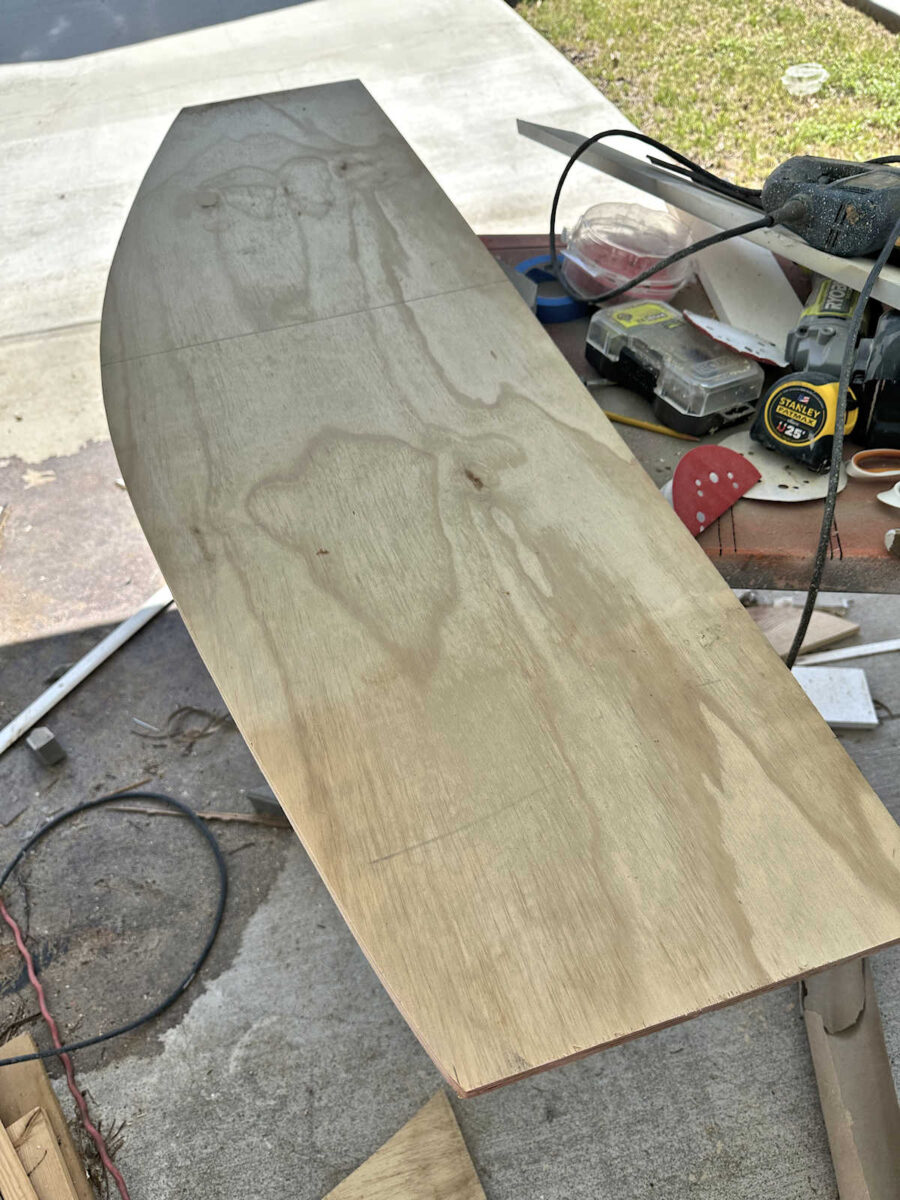
After which I used a skinny, flexible scrap that I had minimize off of one thing for a earlier venture (I discovered it in my discard pile) and positioned it behind the clamped wooden items and pulled it in direction of the entrance fringe of the plywood piece proper within the heart (which I had measured and marked) to type a curve. After which I traced that curve onto the plywood.
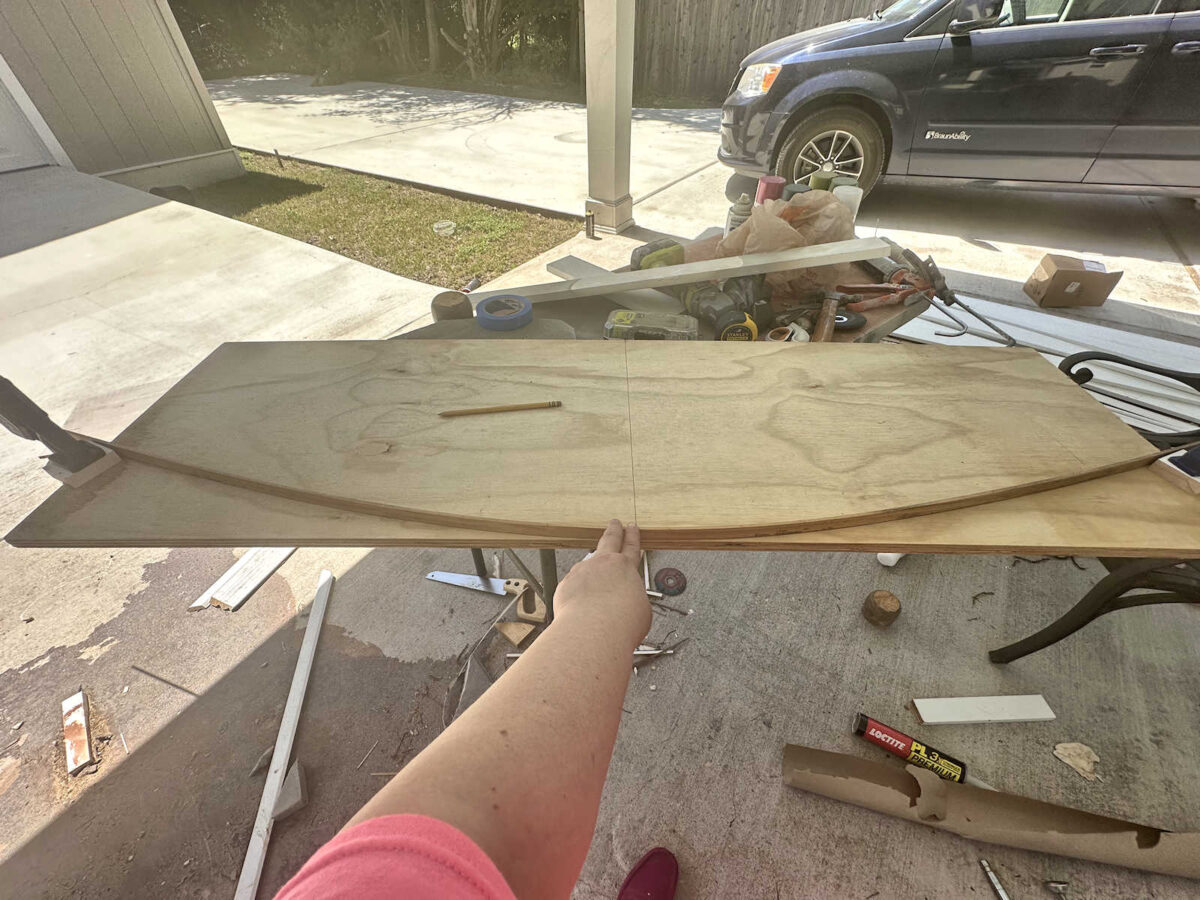
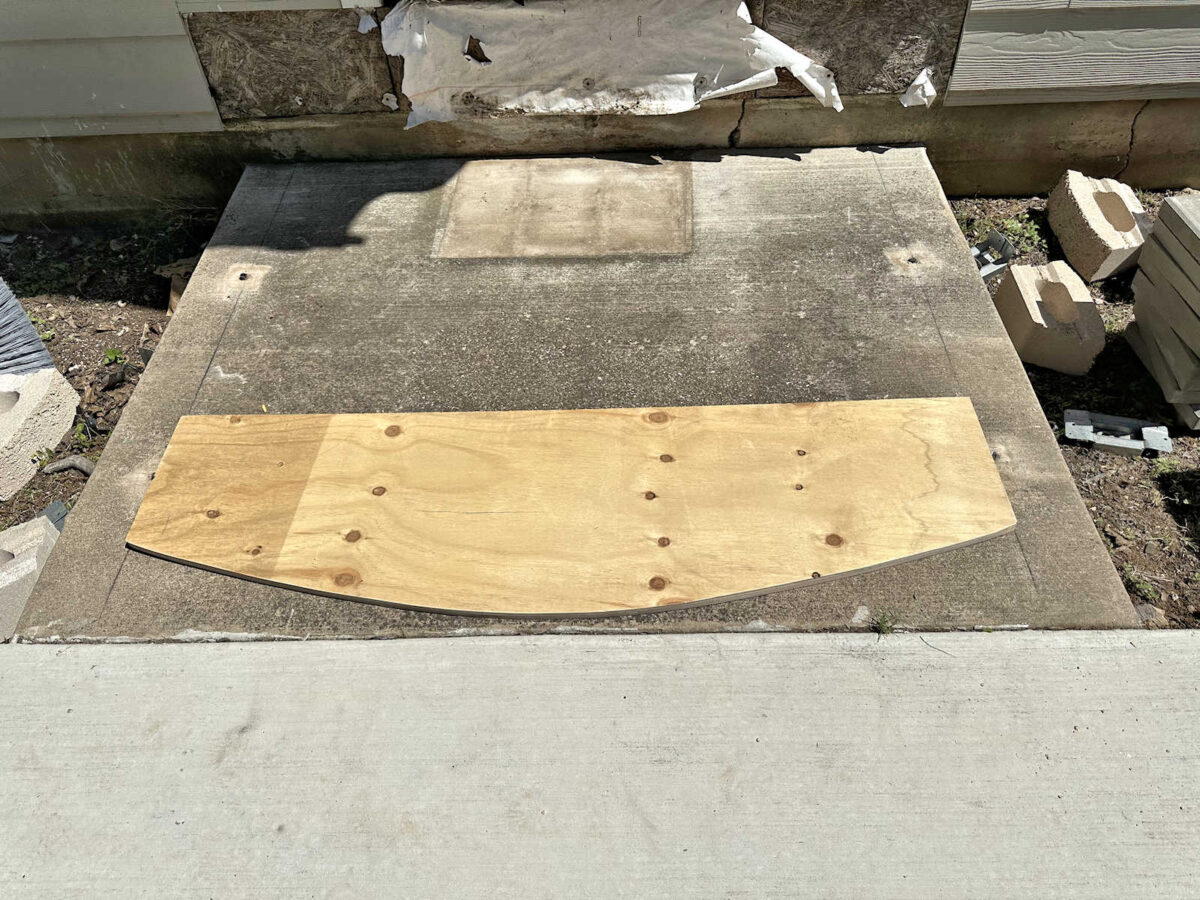
After which I used my jigsaw to chop out the curve and cleaned up the minimize with my rotary sander.
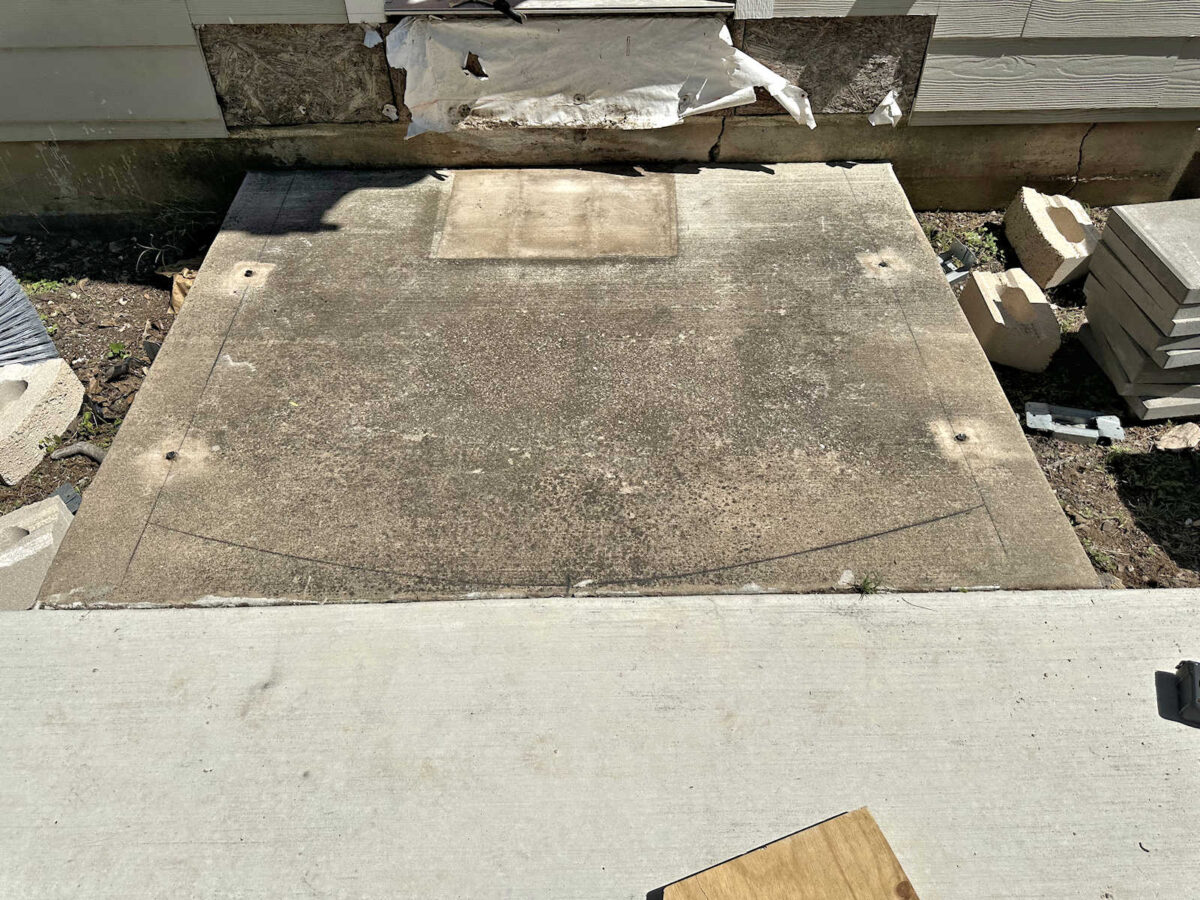
After marking and measuring the 58-inch width centered on the concrete pad and drawing the straight traces for the perimeters, I then positioned my curved sample on the entrance, set again an inch from the place the concrete pad meets the driveway and lined up with the straight traces on the perimeters. After which I traced the curve onto the concrete.
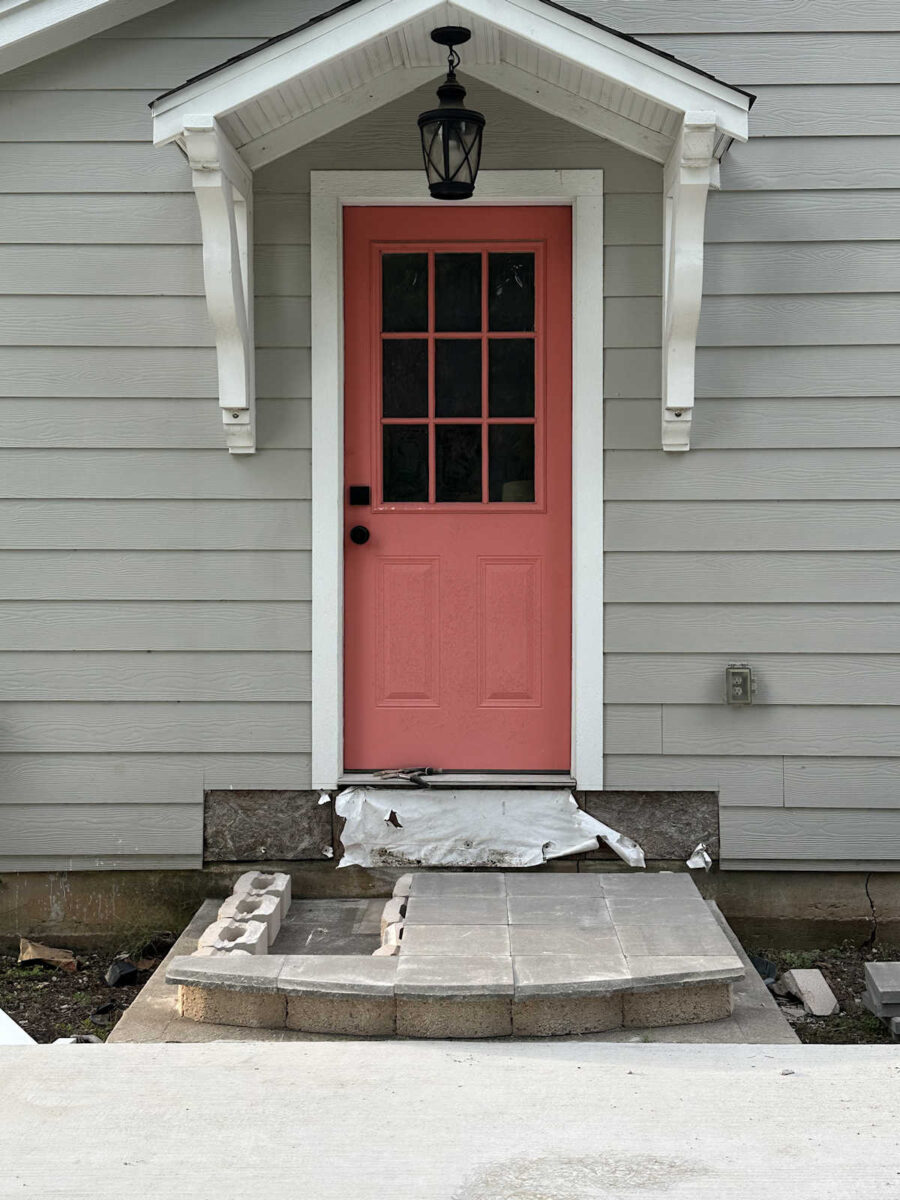
Facet observe: I nonetheless must waterproof that space the place the siding is minimize away. I’ve a plan for that, which I’ll should do earlier than I transfer on to the second step. However I knew step one wouldn’t cowl up any of that space, so I made a decision to do the step first since I used to be far more enthusiastic about engaged on the steps than I used to be about waterproofing that OSB. However don’t fear. It’ll get performed.
And right here’s the ultimate form traced onto the concrete pad.
I began laying out the retaining wall blocks alongside the entrance curve first. As soon as I had them organized excellent, I glued them into place utilizing an exterior polyurethane adhesive.
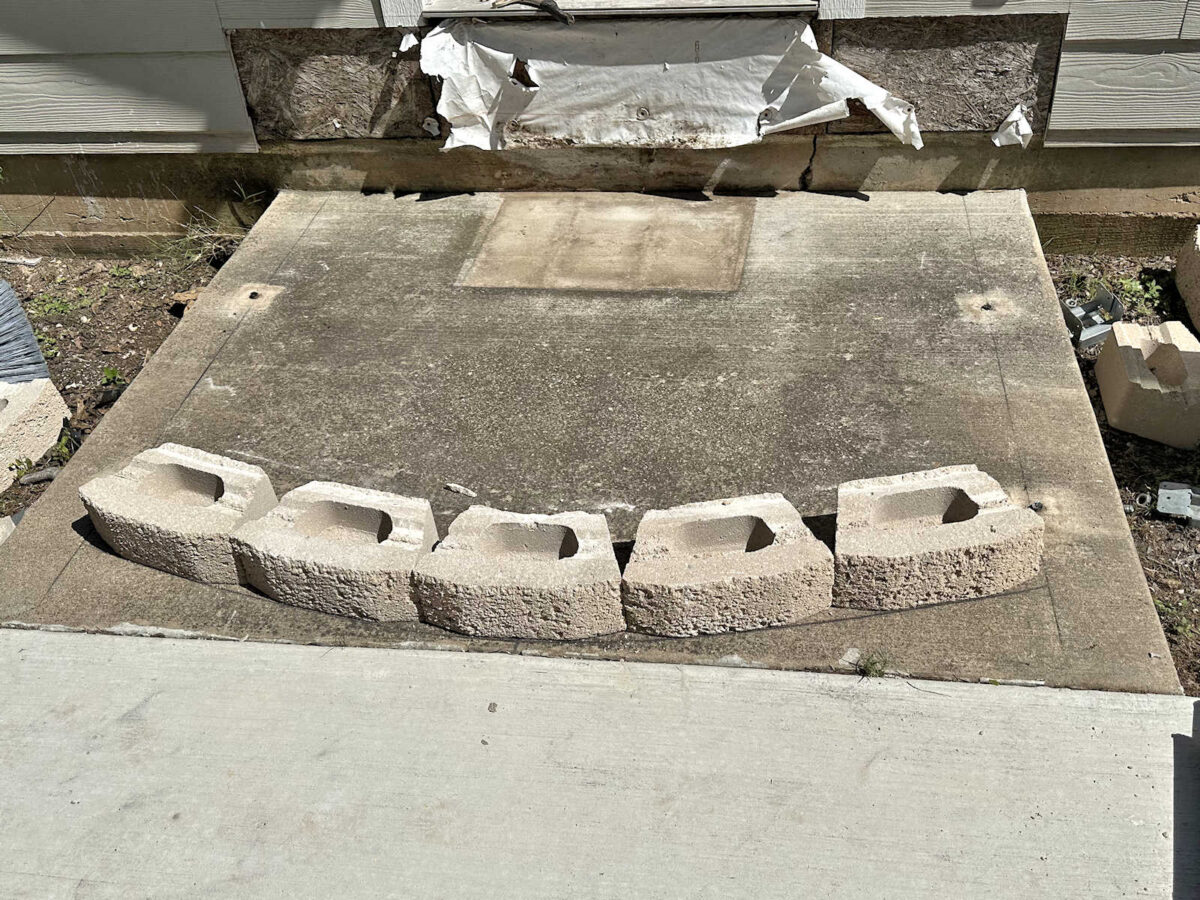
The explanation I made a decision to make use of polyurethane adhesive as an alternative of mortar is as a result of I did fairly a little bit of analysis and studying on this, and I got here throughout a couple of web sites the place folks can ask “execs” for enter, and a number of other of these execs made a really convincing argument that the adhesive is a greater choice than mortar as a result of polyurethane adhesive isn’t inflexible when it’s dry and cured. It will probably broaden and contract and stay a bit pliable by means of the seasons, the place mortar dries very arduous and inflexible and doesn’t have any give to it, so it might probably begin to crack by means of the seasons.
As soon as I had the entrance curve in place, I wanted to chop two blocks to start out the facet runs on both facet. I used my handheld grinder with a masonry disc on it for this. After drawing my minimize line on the highest and backside of the block, I used my grinder to attain the minimize line all the best way throughout. That is one other trick I realized from a professional. He mentioned by no means attempt to minimize on the full depth all approach throughout on the primary move. At all times make a rating line first, after which return with a number of passes till you attain the total depth of the minimize.
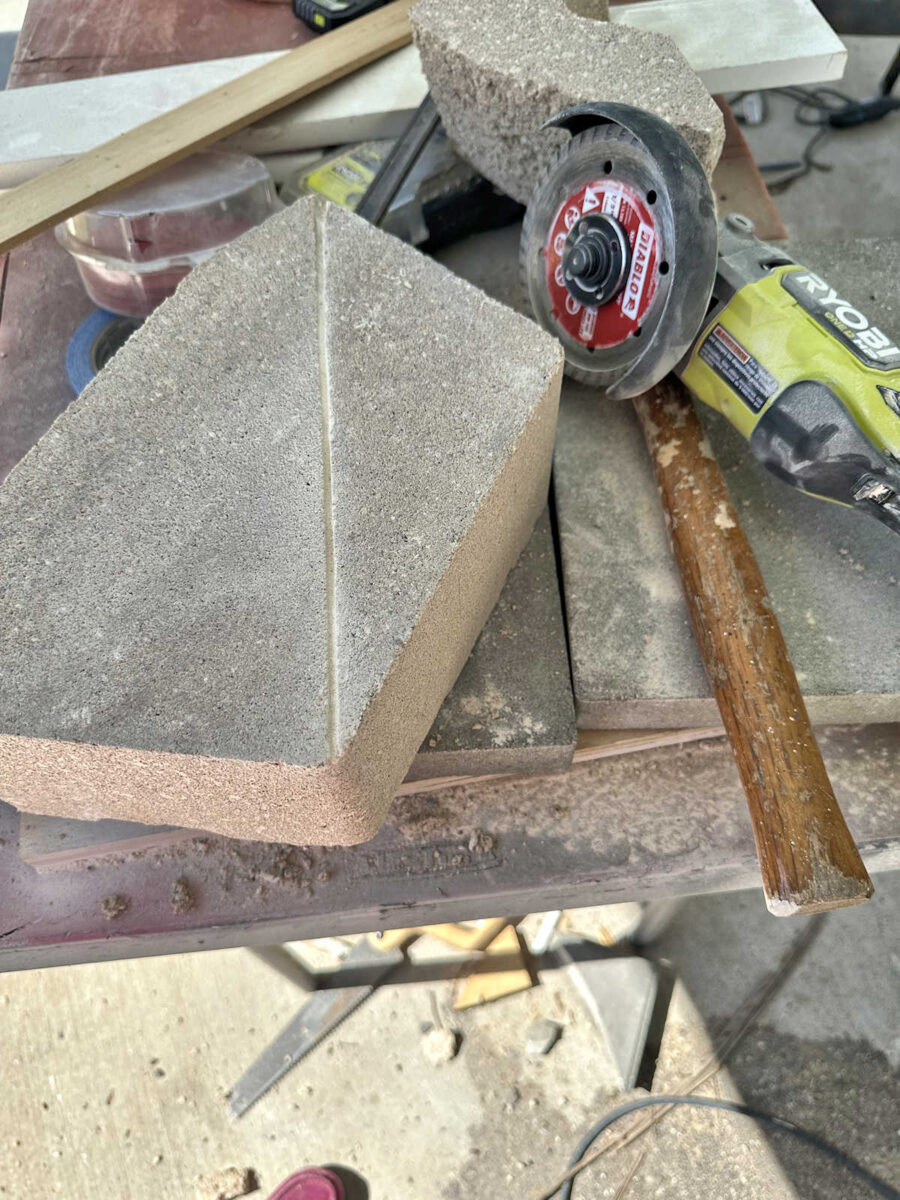
I minimize the block on high as deep as my grinder would go, after which I flipped the block over and minimize on the underside as deep as I may. It nonetheless didn’t get all through, however with a few agency faucets with a hammer, the surplus got here off moderately simply. After which I used my grinder to scrub up the minimize earlier than placing it into place.
After which I continued on with the perimeters. I dry match all the things first, and as soon as I had them the place I needed them, I went again and glued them down with the polyurethane adhesive. After which I repeated that course of on the opposite facet.
With the outer form of the primary riser in place, I labored on the pavers for step one whereas the polyurethane adhesive set. I lined up 5 concrete pavers, after which used a straight edge (a 1″ x 4″ piece of lumber) to ensure they had been completely lined up.
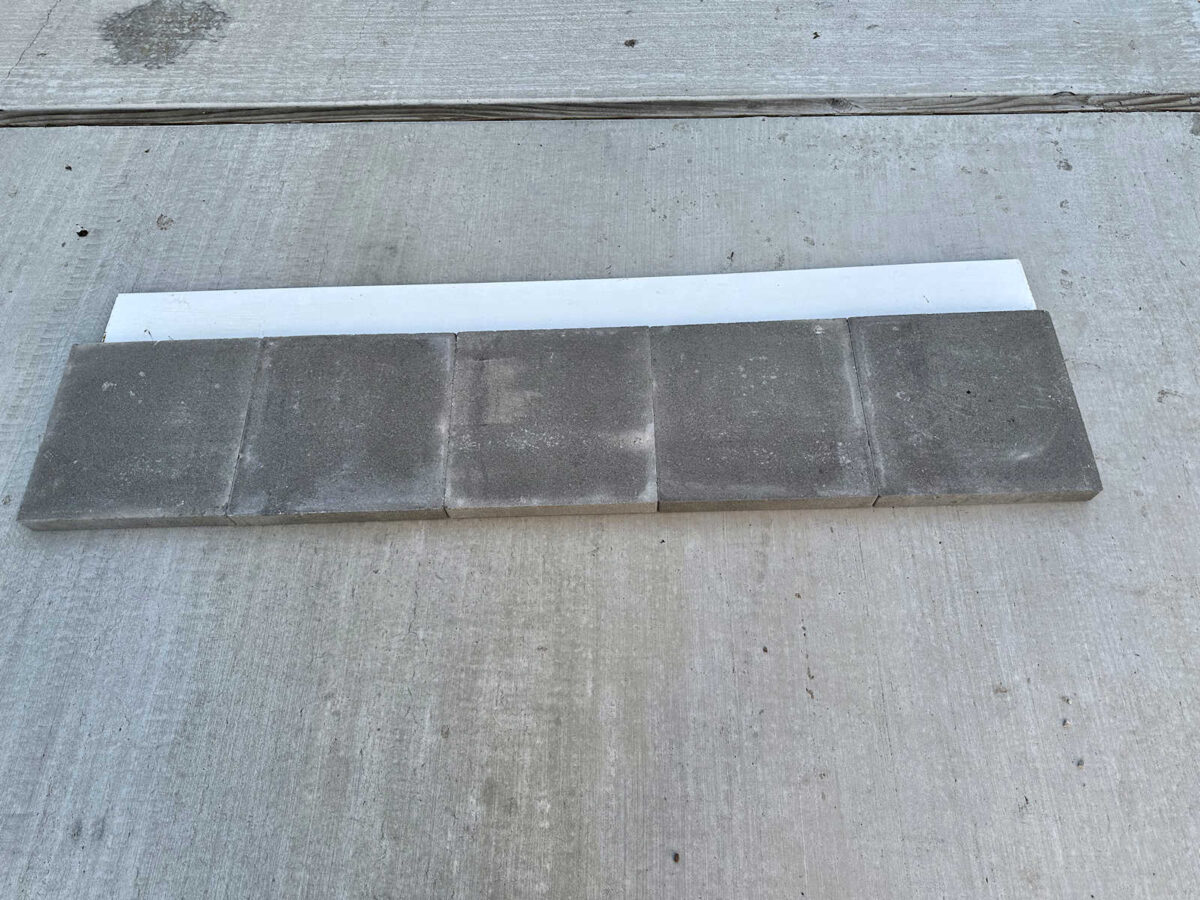
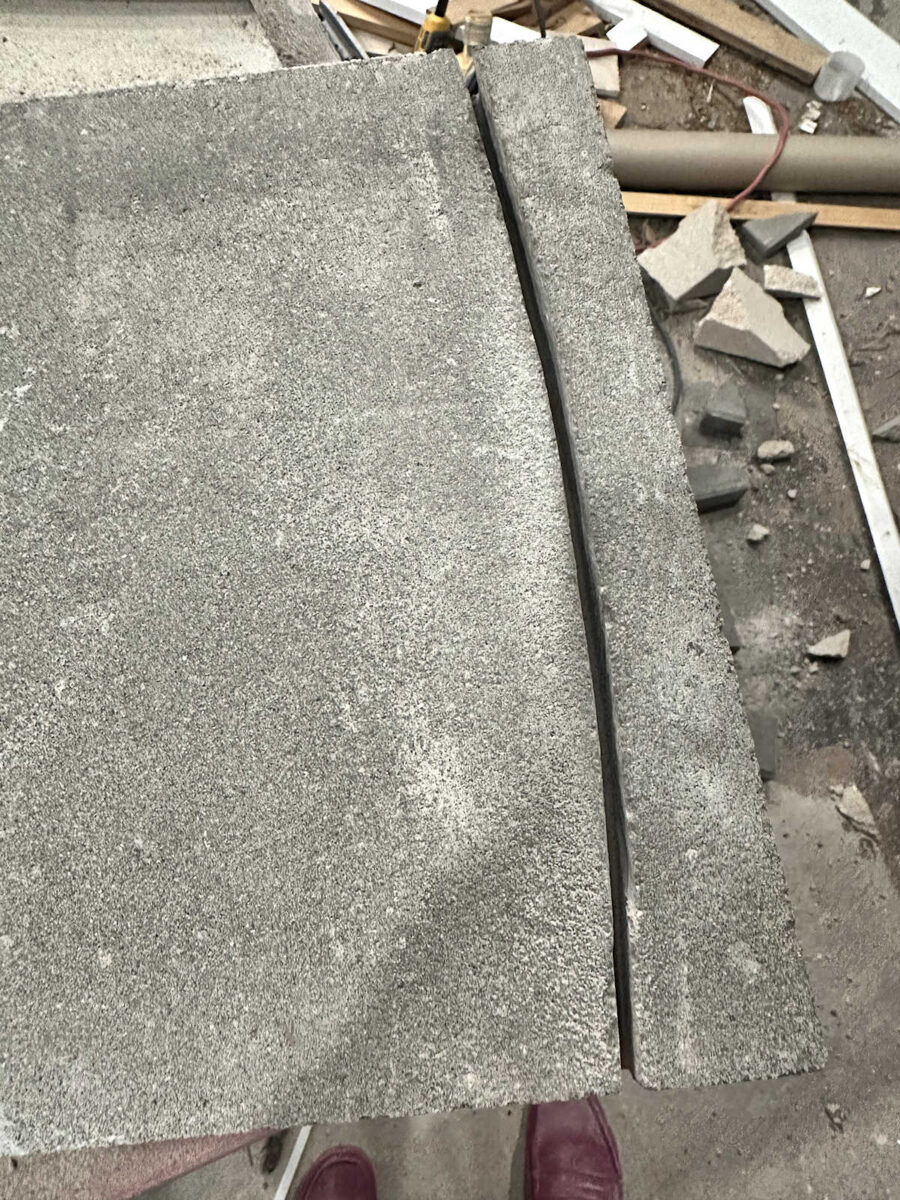
After which I used my curve sample to hint the curve throughout the pavers.
One factor I ought to have performed is use my grinder to attain the curved form into all 5 pavers whereas they had been nonetheless collectively in order that the minimize could be constant from paver to paver. However I forgot to do this, so I took every paver to my work space individually and scored and minimize them.
That is the place I made a decision to do some little bit of experimenting. Since these pavers are cheap, I made a decision I may lose a couple of for this experiment. I needed to see which methodology would work out higher, and I had a few choices. First, I may minimize one facet to the total depth that my grinder would go, after which use a hammer to knock off the surplus. The second methodology I may use is to hint the sample on each side of the pavers after which use my grinder to chop one facet, flip it over, and minimize the opposite facet. The second methodology would give me a minimize all through, however the first methodology (if it labored) could be a lot simpler.
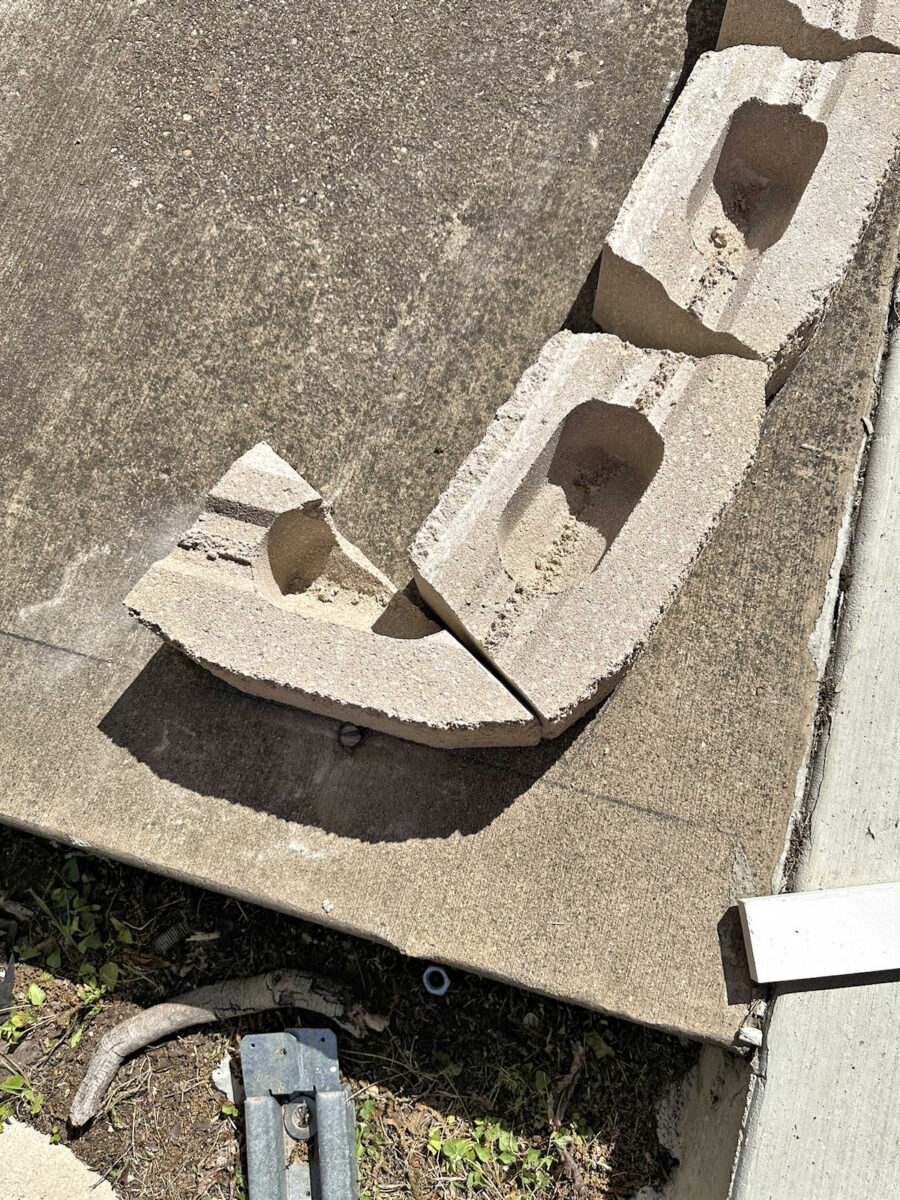
I solely had time to check out the primary methodology yesterday, so I minimize as deep as I may with my grinder, after which used a hammer to knock off the surplus.
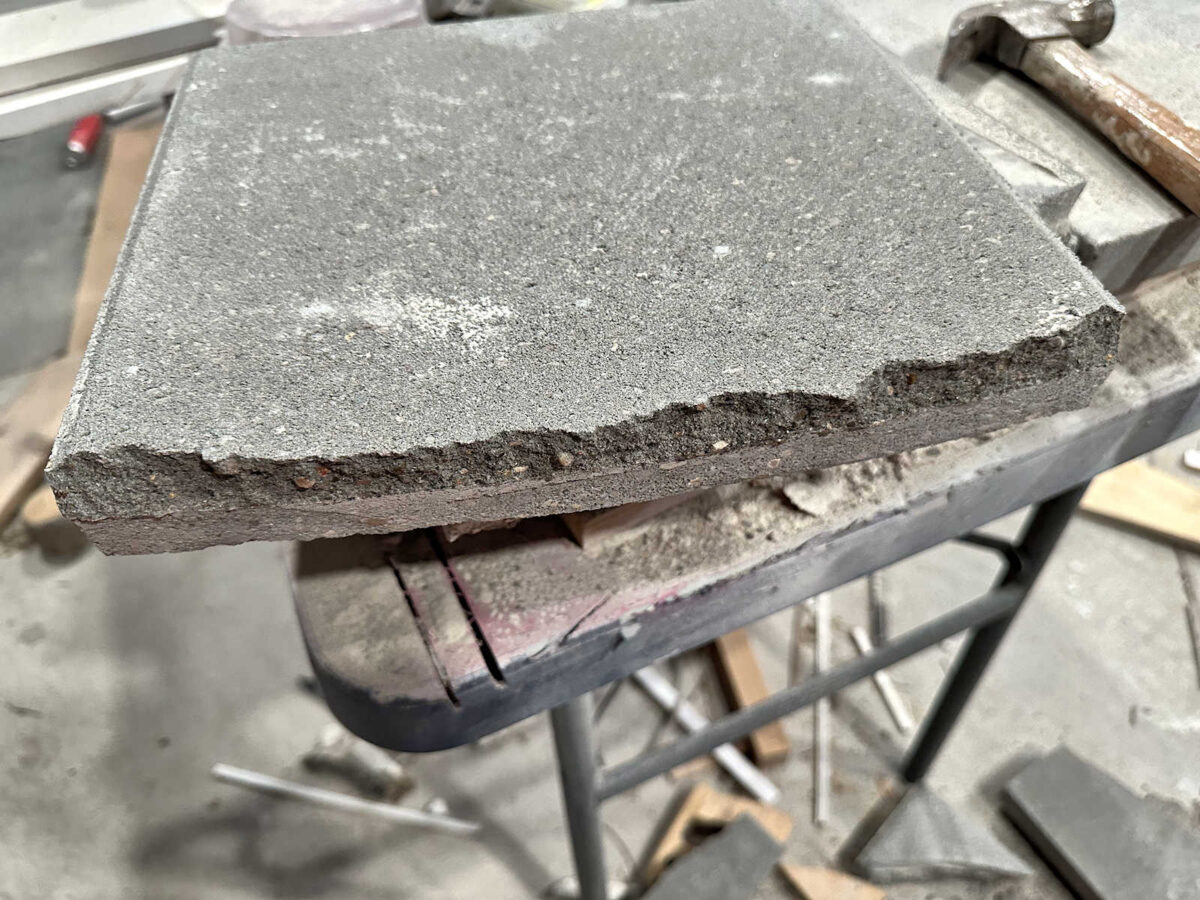
That didn’t work as a result of the uncut half that got here off was fairly a bit additional into the paver than the minimize half. If it had left extra, I may use a concrete grinding/sharpening disc to grind away the surplus. However because it took off an excessive amount of, there was no method to get the sting clean.
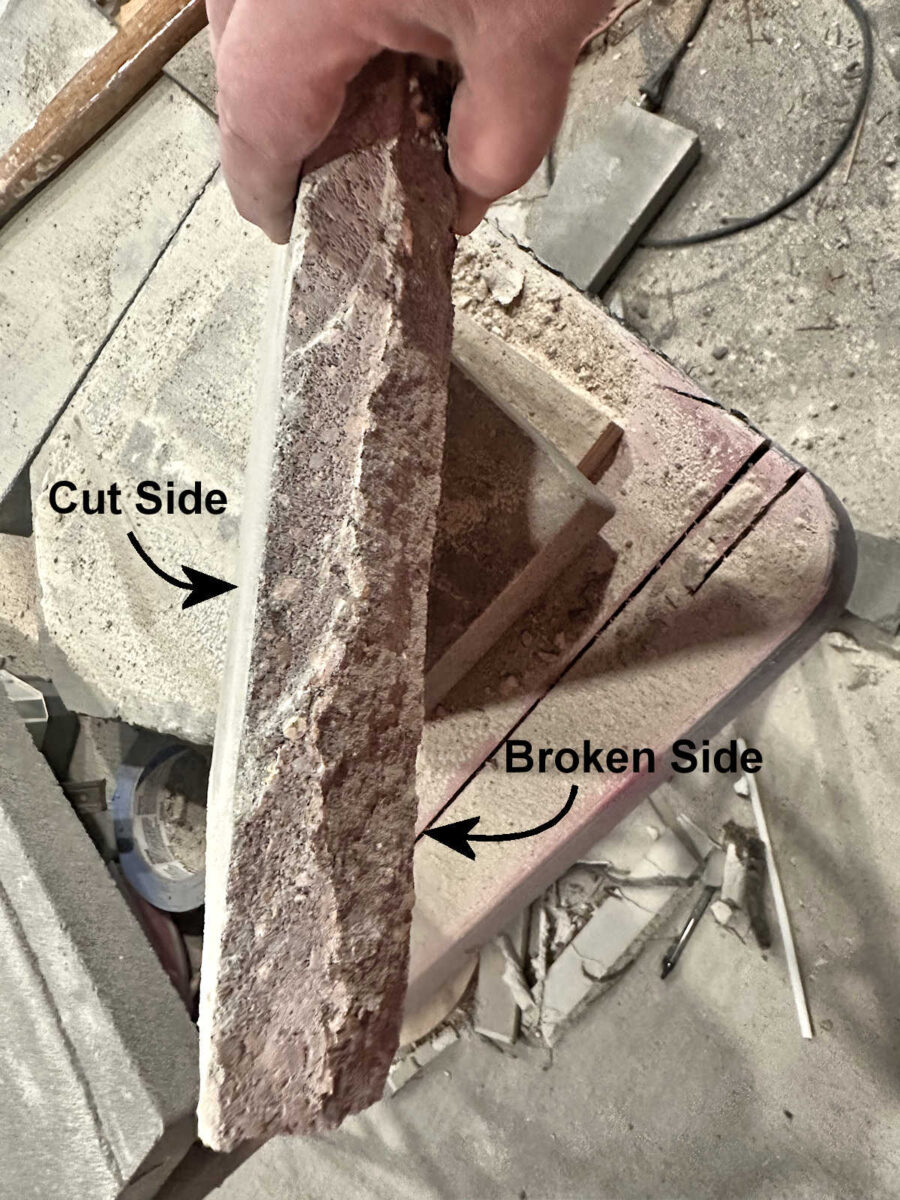
So I examined yet one more. This time, I minimize as deep as I may with my grinder, after which as an alternative of utilizing the hammer on the minimize facet, I flipped it over and used the hammer on the uncut facet to interrupt away the surplus. This really labored! I can’t clarify the physics of it, nevertheless it simply made sense in my thoughts that hitting the uncut facet would depart extra as an alternative of breaking away an excessive amount of. And it labored on all 5 pavers. What’s left may be simply cleaned up with a concrete grinding/sharpening disc on my grinder.
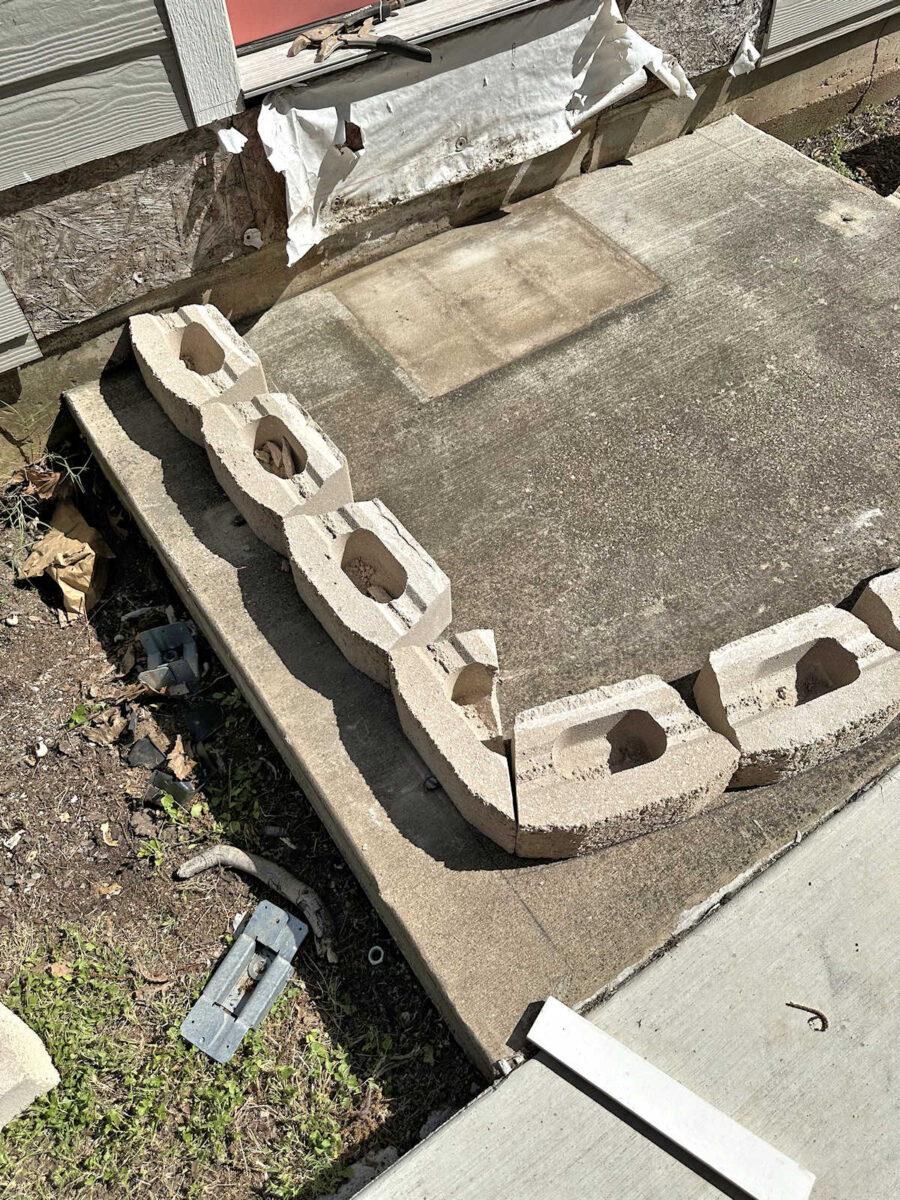
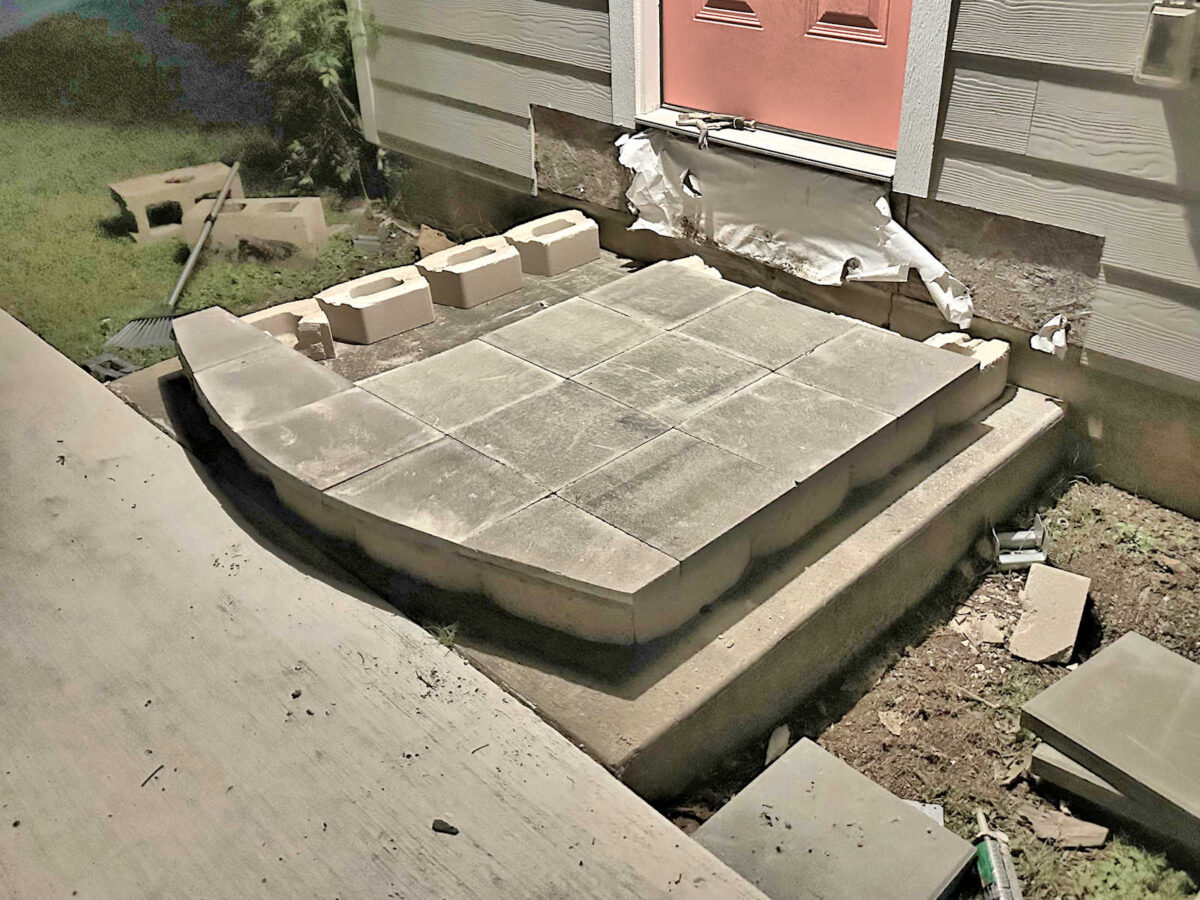
I didn’t get to check my concept as a result of by that time, it was too darkish to see clearly sufficient to check out my concept. However I did put them into place to see the general form and design.

And since I used to be curious, I went forward and put extra of the pavers in place. Not one of the pavers are adhered in place but. I need to wait till I’ve these entrance pavers labored out earlier than any of them get adhered into place. I nonetheless need to check out choice 2 for reducing these entrance pavers (i.e, reducing from each side) to see which one I like higher. However both methodology goes to require a concrete grinding/sharpening disc as soon as the pavers are minimize.
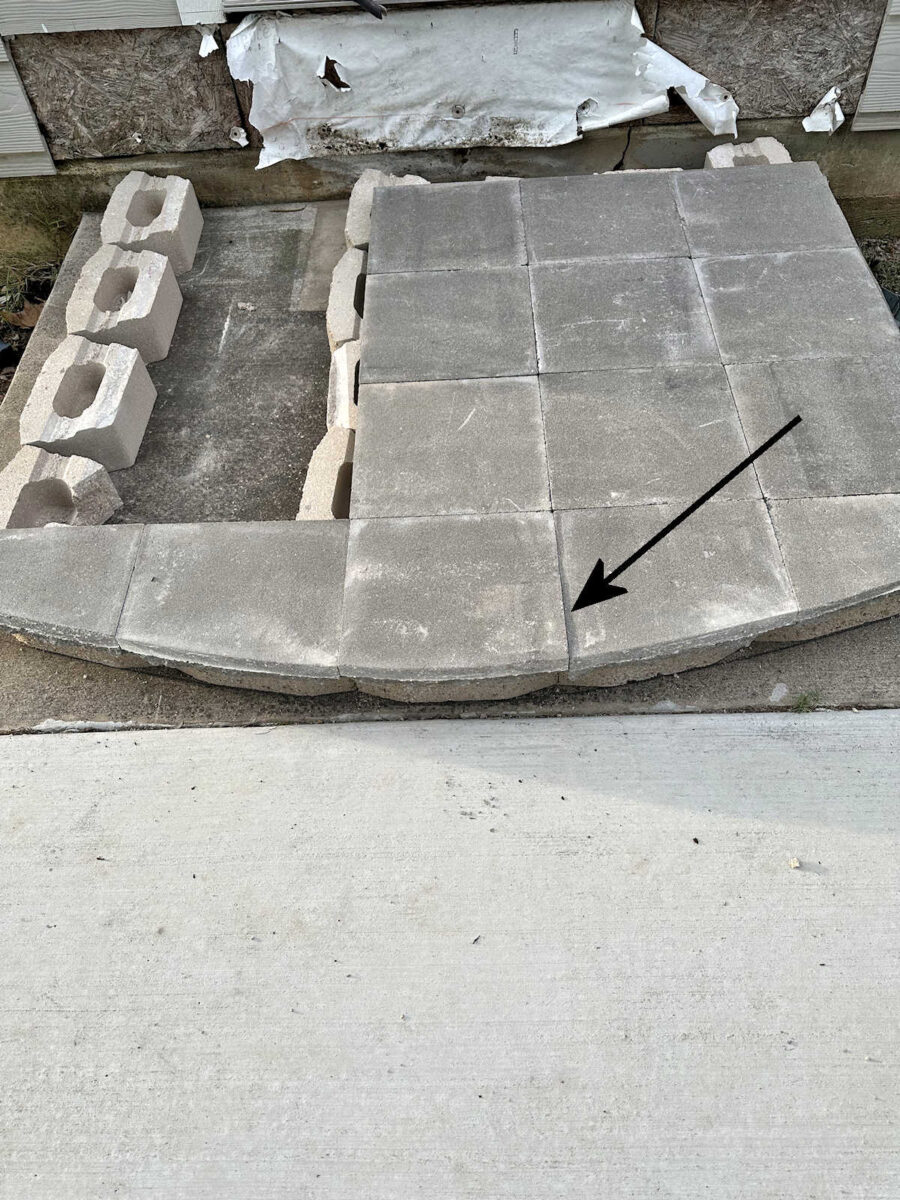
I used to be stunned at how flat all the pavers had been, with one exception. This entrance paver has a bit of little bit of a lip on it, however I’ll simply take away the paver, discover the excessive spot on the retaining wall block, grind it away, and place the paver again in place.
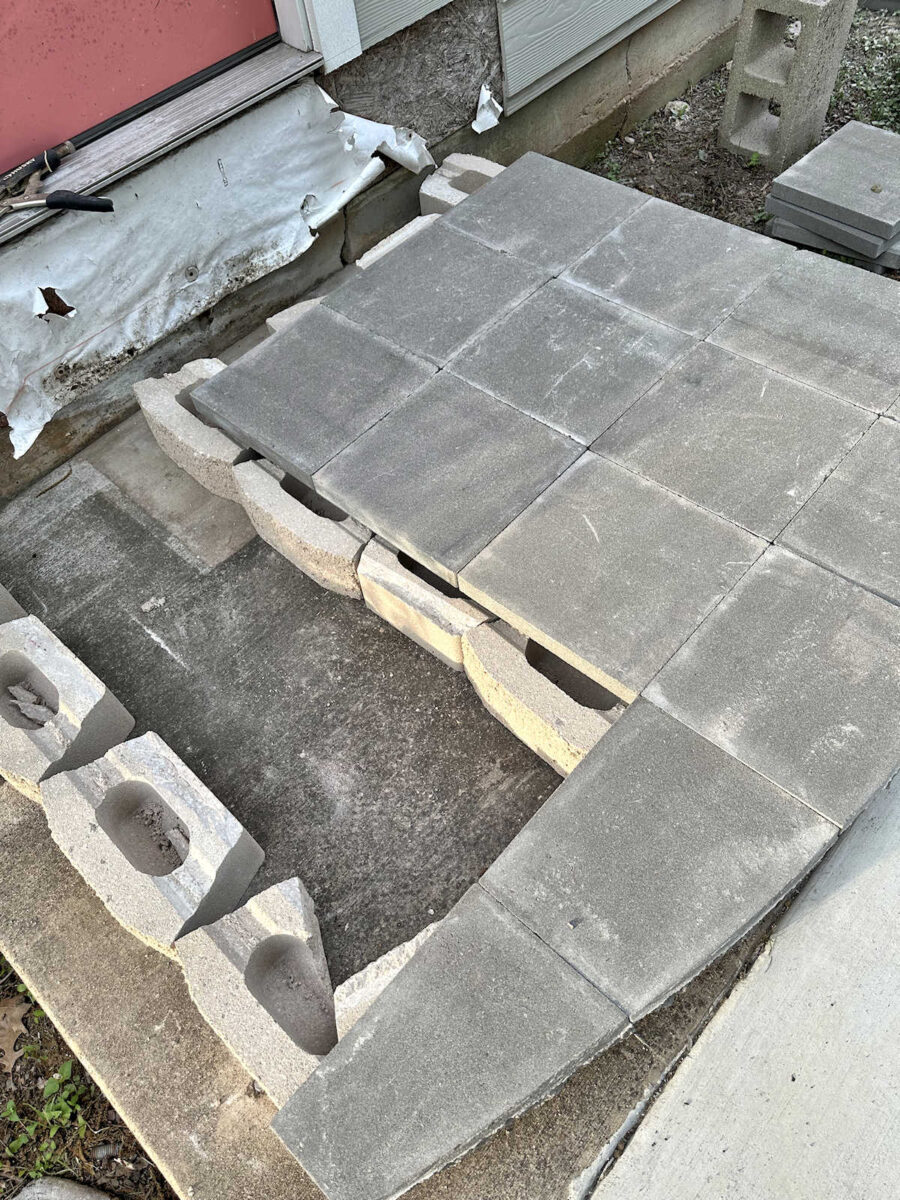
I additionally need to minimize these blocks which can be getting used as the within assist in half earlier than I adhere them into place. Of their full dimension, I discover it arduous to place them precisely the place I would like them. With them minimize in half, I’ll have much more flexibility in inserting them within the precise proper spot. However once more, I ran out of daylight earlier than I may get that performed yesterday.
However I’ve to let you know, I’m very enthusiastic about how that is wanting. And I can envision the opposite two steps, and I believe it’ll look nice. You’re welcome to disagree with me, after all. 🙂 However we will conform to disagree on this one. I believe it’s going to look very nice.
If all of my measurements work out (and there’s no cause they shouldn’t), the steps will likely be 12 inches deep, 5.5 inches excessive, the highest touchdown will likely be 30 inches deep, and the entire thing will likely be 60 inches extensive. That’s how I deliberate it for the reason that day this concrete pad was poured.
We’ll see how a lot I can get completed this weekend. I haven’t even checked the climate, so hopefully my progress I gained’t be delayed by rain.
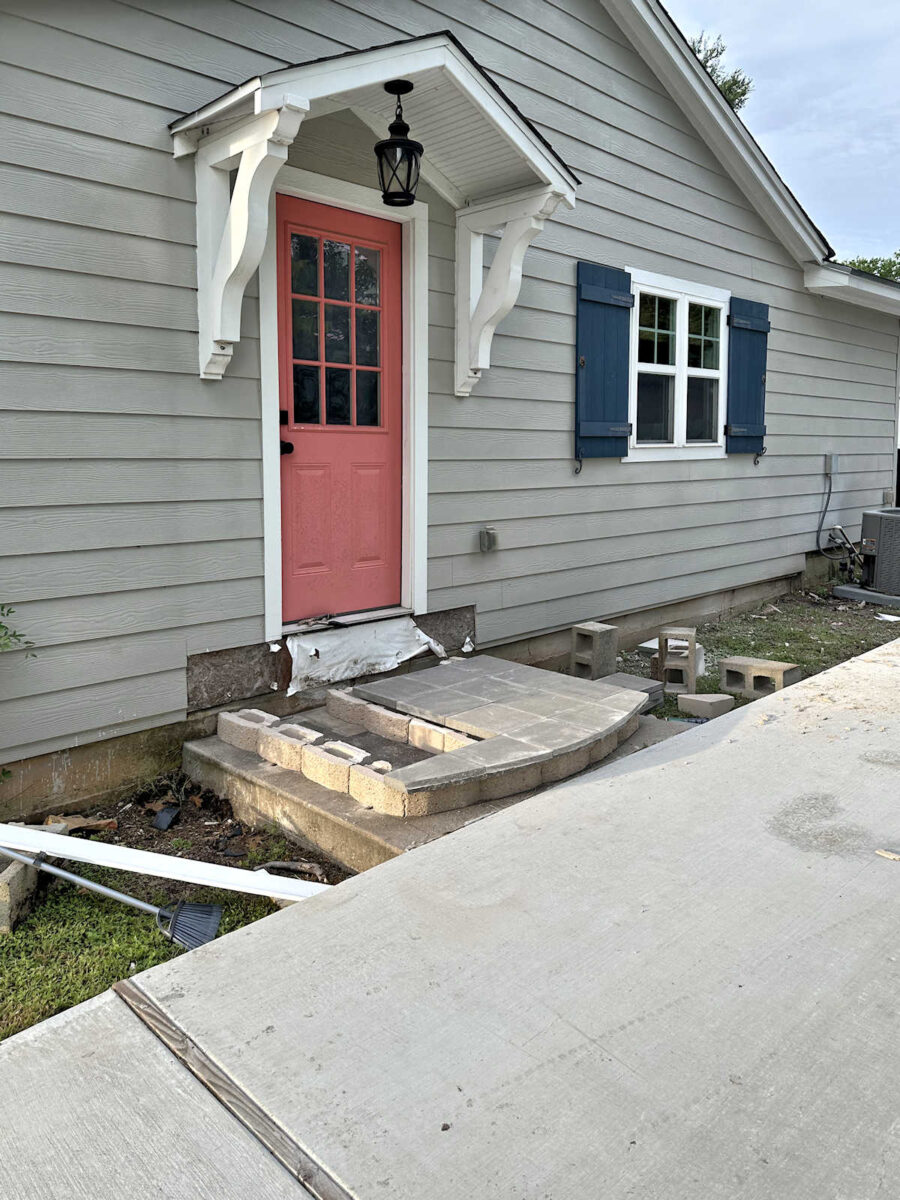
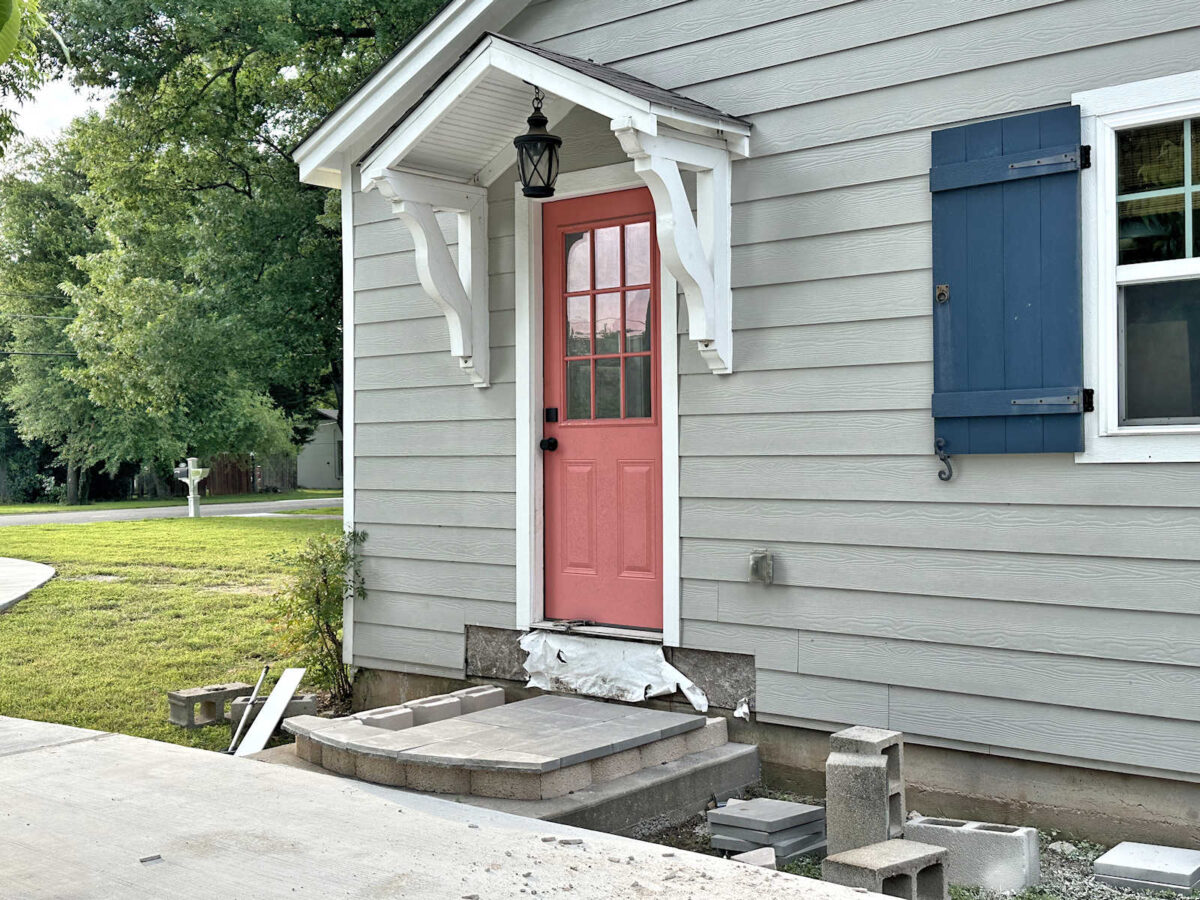
I actually need to get these completed this weekend (or do my greatest in direction of that aim) as a result of I’ve an concept for the entrance porch. As I discussed in a earlier publish, the aim is to coordinate the three areas with steps, and the best way I intend to tie within the entrance porch with these steps is through the use of a stone look on the porch skirting to match the risers on these steps. And I believe I’ve an concept of how to do this now, so I actually need to end these steps in order that I can check out my concept. I’ll work as quick as I can, and we’ll see what sort of progress I’ve made on Monday.
Extra About Our Home Exterior & Yard


Addicted 2 Adorning is the place I share my DIY and adorning journey as I rework and enhance the 1948 fixer higher that my husband, Matt, and I purchased in 2013. Matt has M.S. and is unable to do bodily work, so I do nearly all of the work on the home on my own. You possibly can be taught extra about me right here.

")

")


![[Academic Research] Would you actually use a zero-cost interior design service to choose your furniture? (5 min survey)](https://preview.redd.it/p8piv8fm0c1h1.png?width=140&height=98&auto=webp&s=7819dd7f0202a521016c21f2b82aa9502413ef68 "[Academic Research] Would you actually use a zero-cost interior design service to choose your furniture? (5 min survey)")


