

I spent yesterday including the entire fairly molding and a bit flourish to my closet cupboards. I’ve to chortle at myself since you’d suppose that after 30+ years of DIYing, I’d have a way more life like understanding of how lengthy this stuff ought to take, and but, it looks as if I’ll by no means be taught.
Earlier than final weekend, I believed that I may spend a few hours including the entire molding, one other couple of hours priming and caulking, after which be capable of paint a minimum of a few of the cupboards earlier than the top of the weekend. However right here I’m on Tuesday morning, and I’ve solely now gotten the gorgeous molding hooked up, I don’t even have half of the cupboards primed but, and I haven’t even began on the caulking. Ugh. I don’t do these big initiatives commonly, so within the interim, I appear to overlook simply how lengthy all of those completely different steps truly take. However perhaps…simply perhaps…I’ll be prepared to color the cupboards by the top of this week.
This is just one half of what’s going to be a really lengthy sequence of posts on my largest constructed but — my walk-in closet and laundry mixture. When you missed the earlier publish, you could find that right here: The Stroll-In Closet Is All Trimmed Out
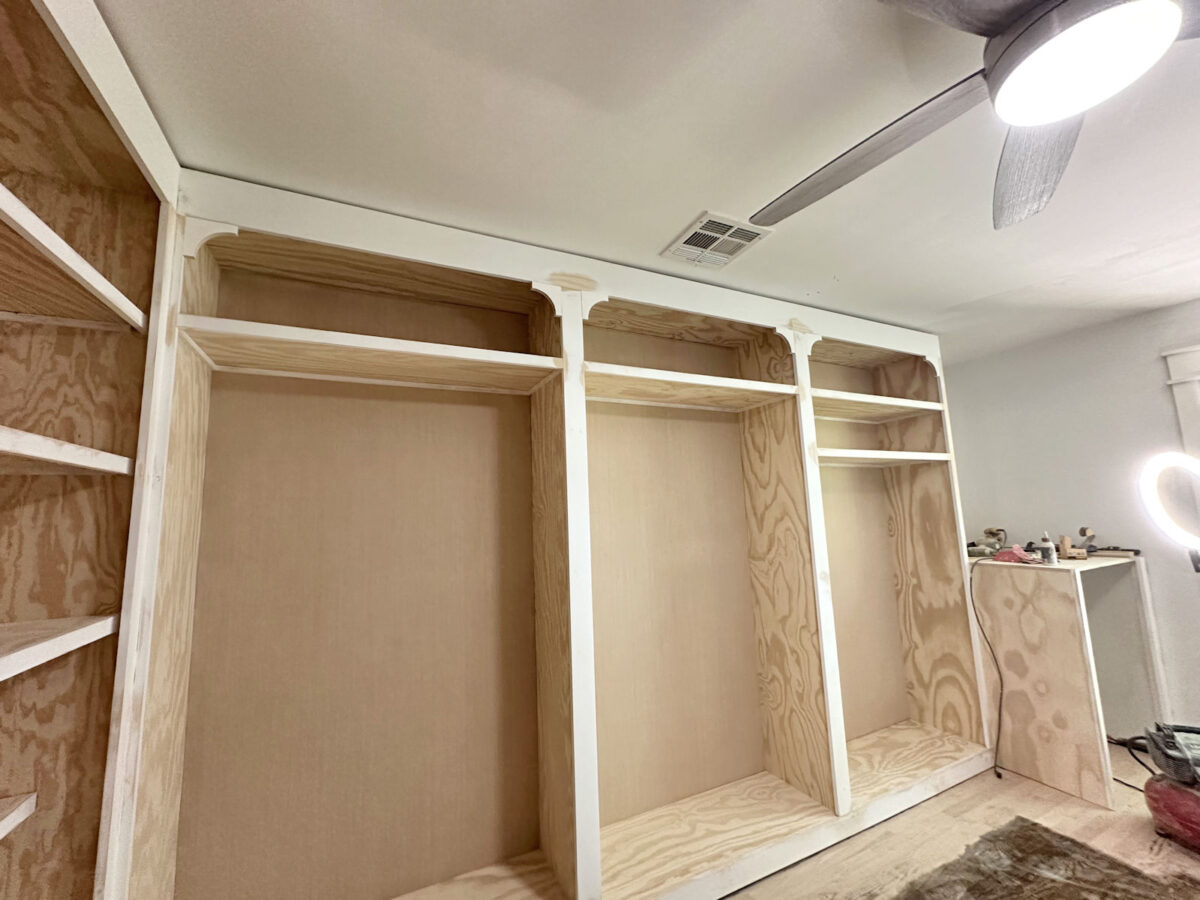
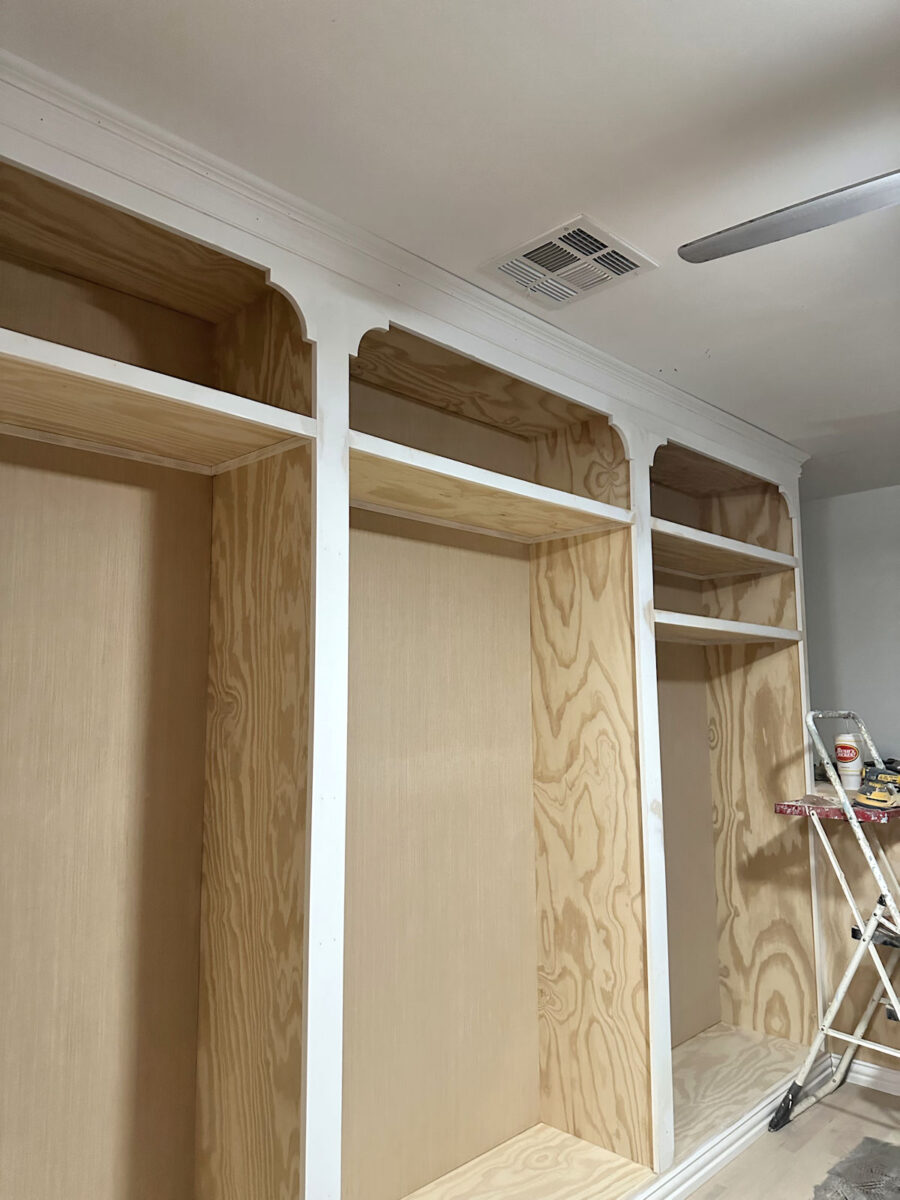
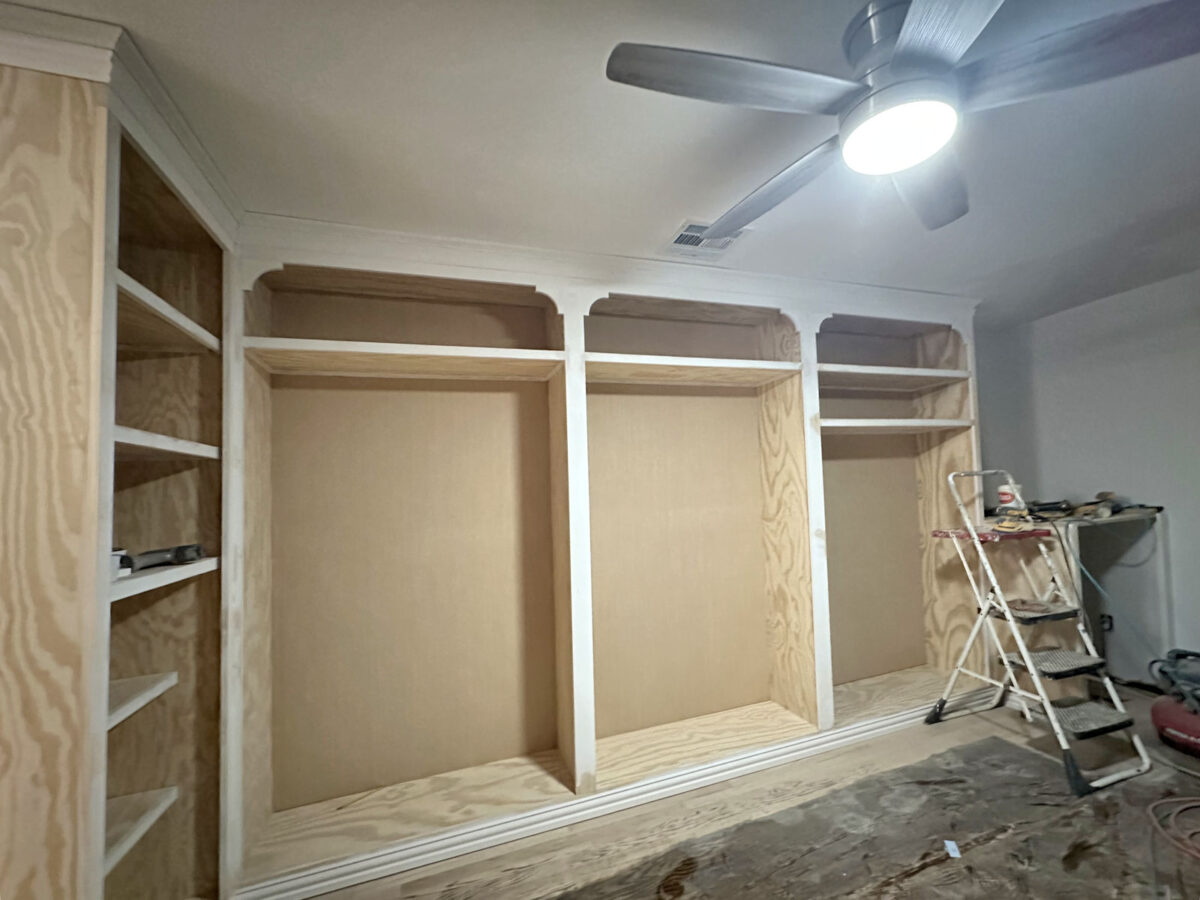
The excellent news is that the entire trim and molding is now put in. I’ll in all probability be including two extra cabinets, and people will want trim as properly. I’m nonetheless figuring out these particulars. However so far as the cupboards and cabinets which are presently within the room, these are all trimmed out, and I now have the entire fairly molding put in additionally.
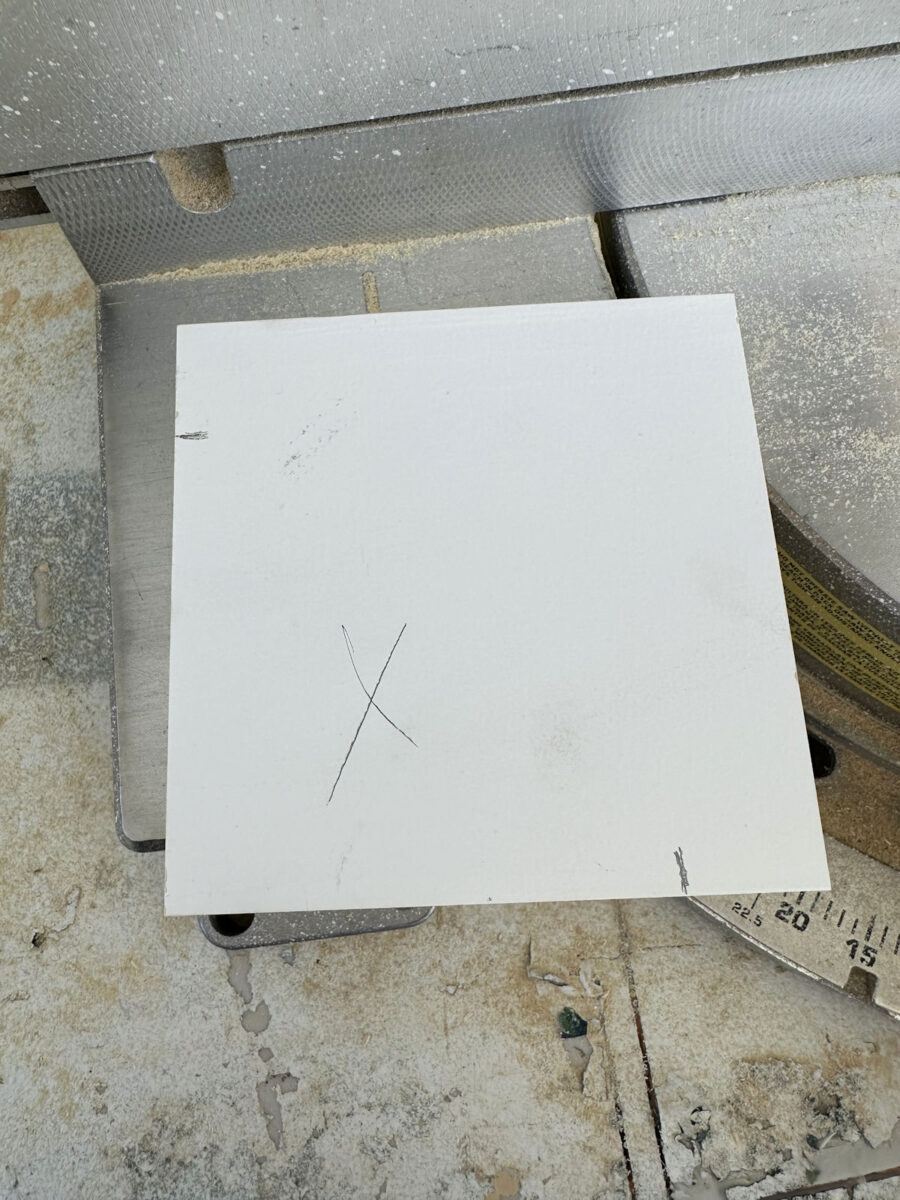
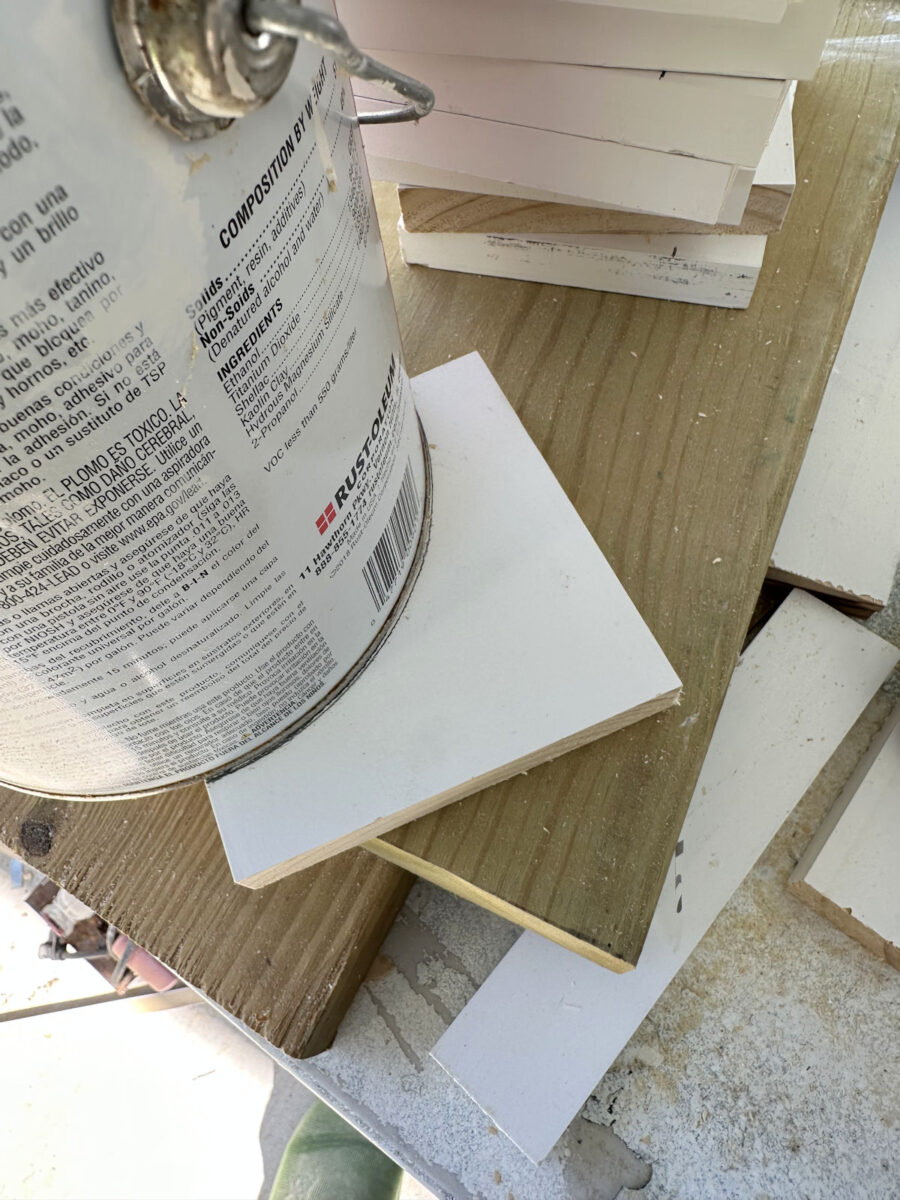
Earlier than I put in the gorgeous trim, I made a decision so as to add a bit flourish to the cupboards. To do that, I reduce 12 items of 1″x5″ lumber (which is definitely 4.5″ large) into 4.5″ squares. After which I made a mark one inch on within the high left aspect and the underside proper aspect.
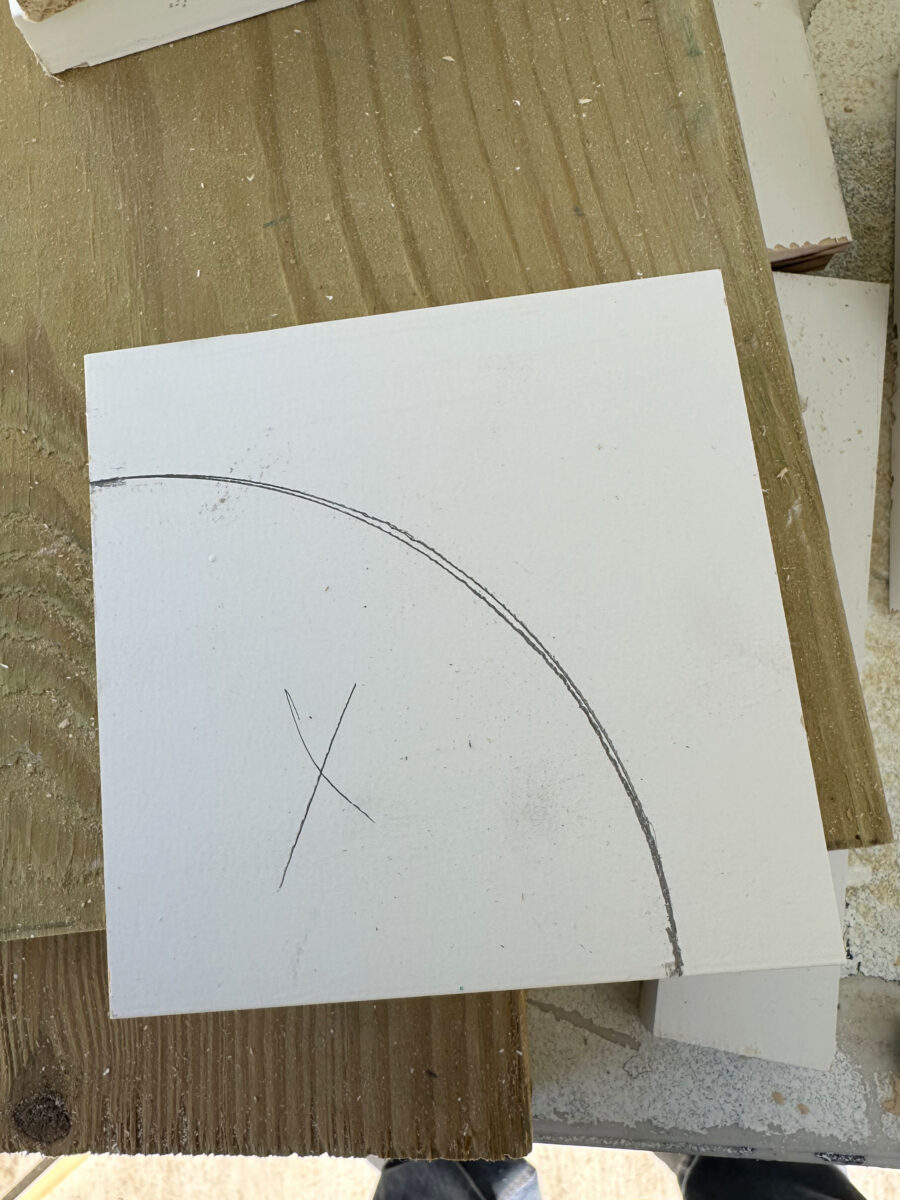
Utilizing a one-gallon paint can, I traced a curve between these two marks.
It appeared like this with the curve traced on it…
After which I used my band noticed to chop the curve.
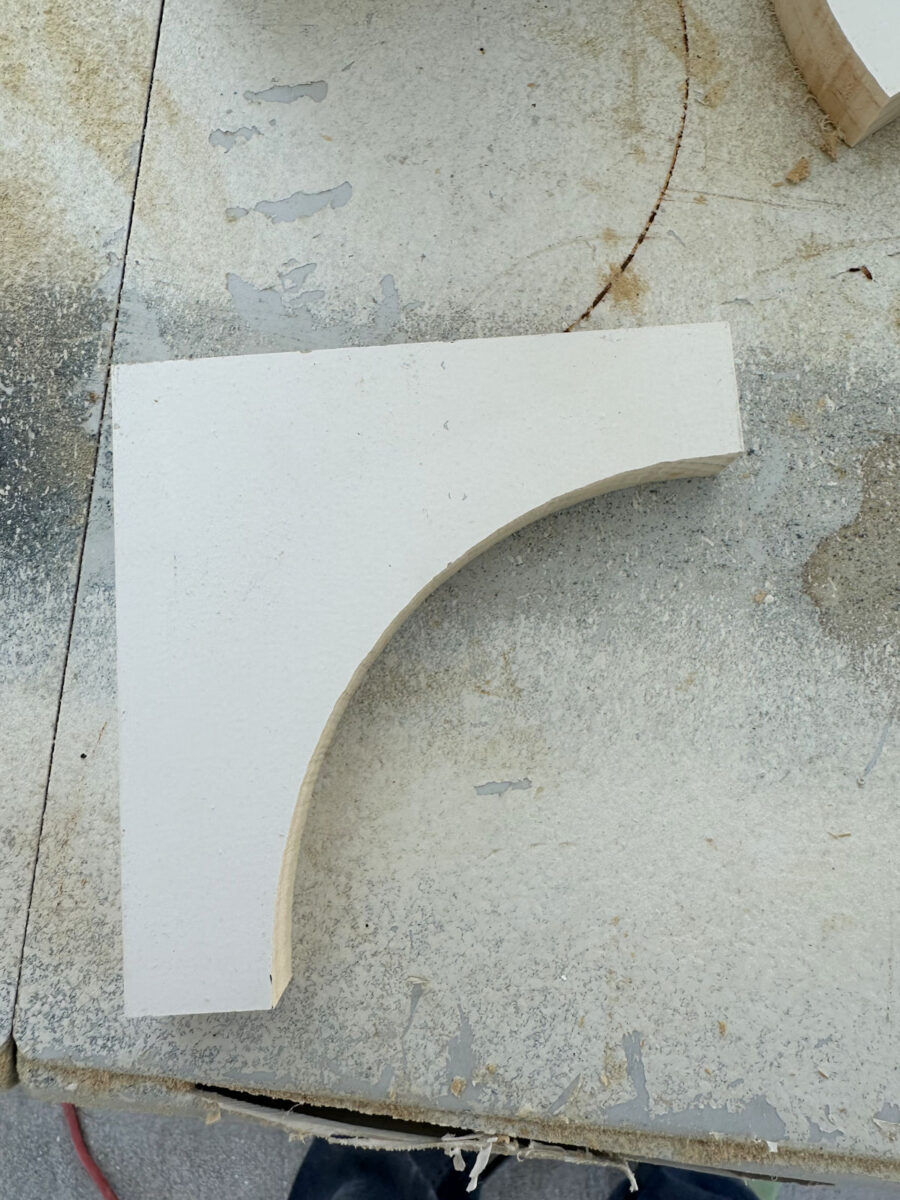
I repeated that 11 extra occasions, after which I hooked up these items to the within high corners of every of the six cupboard sections utilizing wooden glue and 16-gauge 2-inch nails.
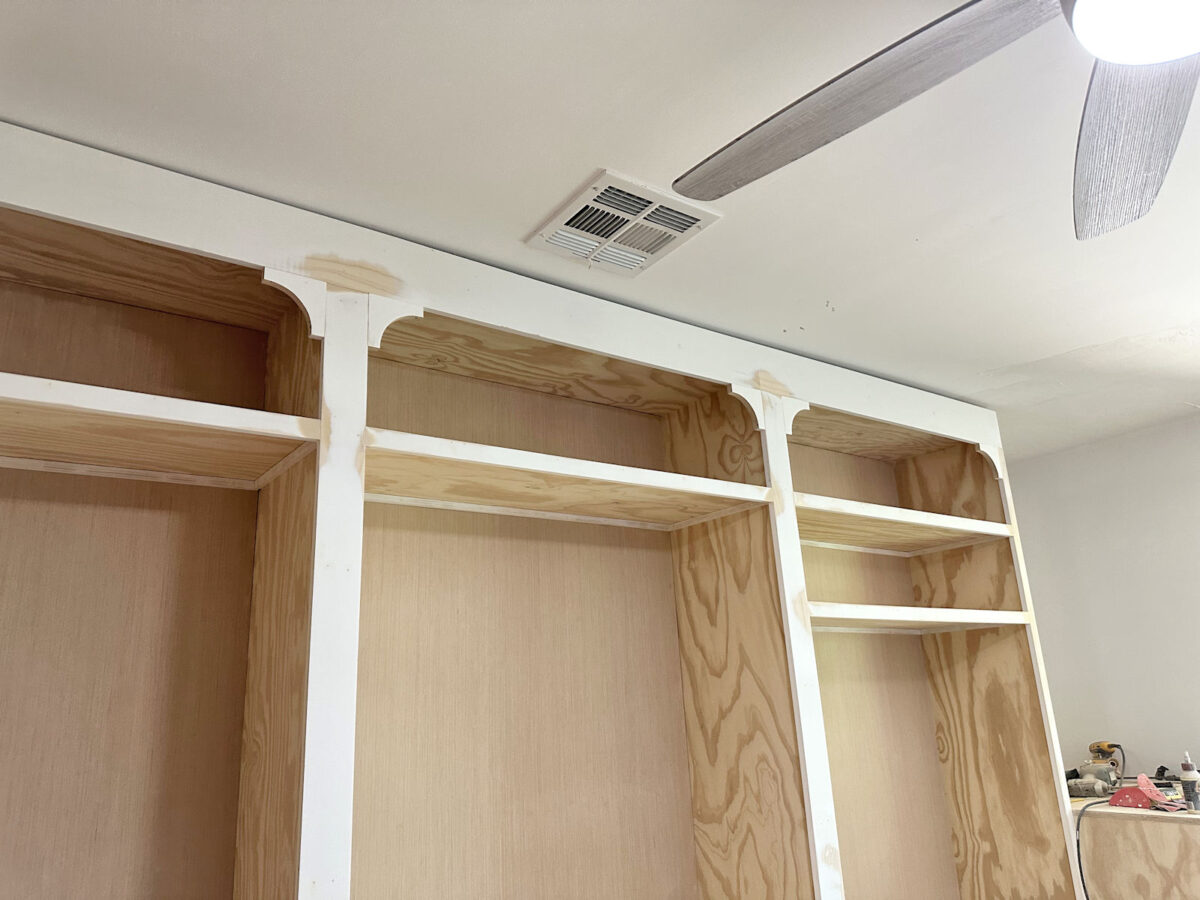
I didn’t add these items to the cupboards flanking the door as a result of I’m planning on including cupboard doorways to these cupboards…I feel. (I’ve to confess that I’ve been second-guessing that call, so we’ll see.)
I want that I may have made these items a bit bit greater, however I had to make use of the highest shoe shelf (the shortest shelf on the fitting part on the fitting wall) to find out how huge these items could possibly be..
I didn’t need these ornamental items to be jammed proper up in opposition to that high shelf. I wished to go away some house between these items and the highest shelf, so I made up my mind that 4.5 inches was the largest I may make them…
As soon as they had been all hooked up, and the wooden glue had time to dry, I piled on the wooden filler…
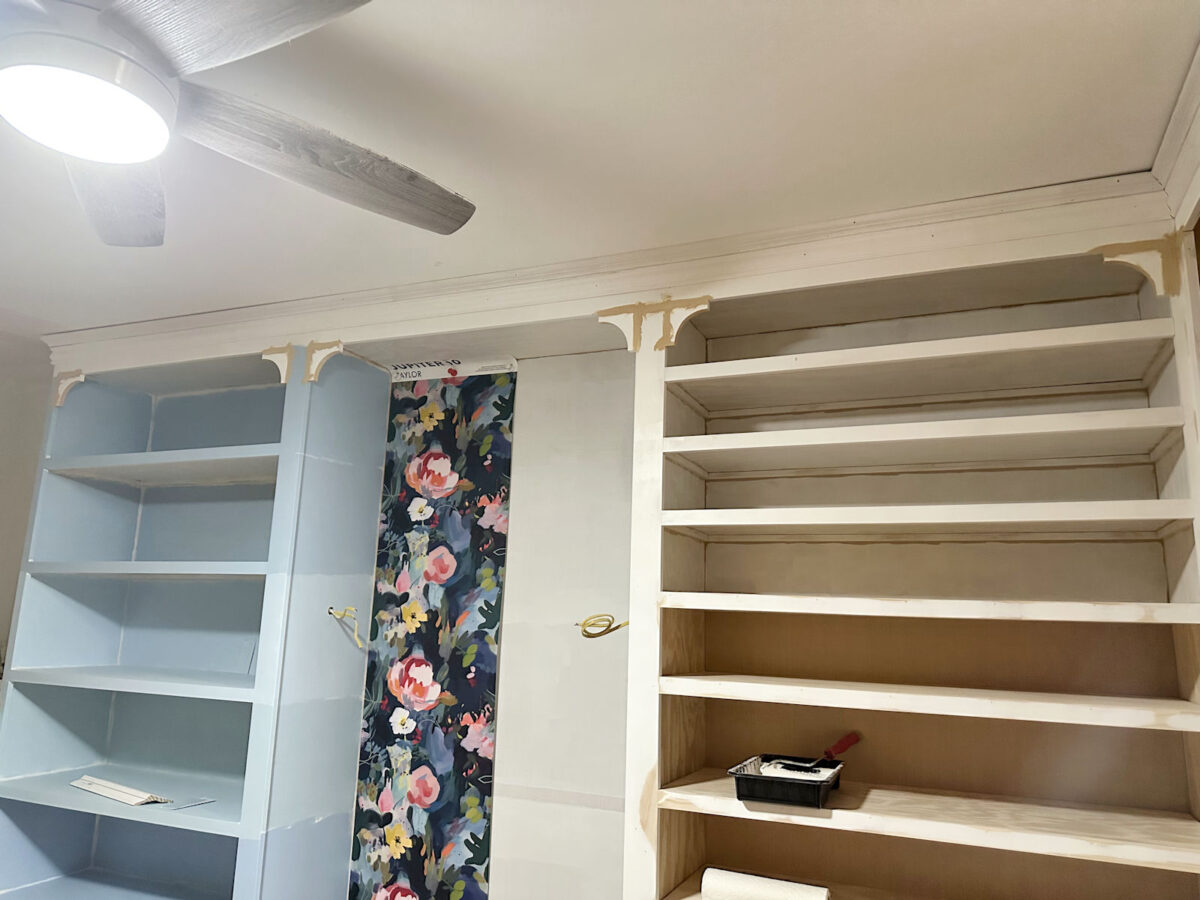
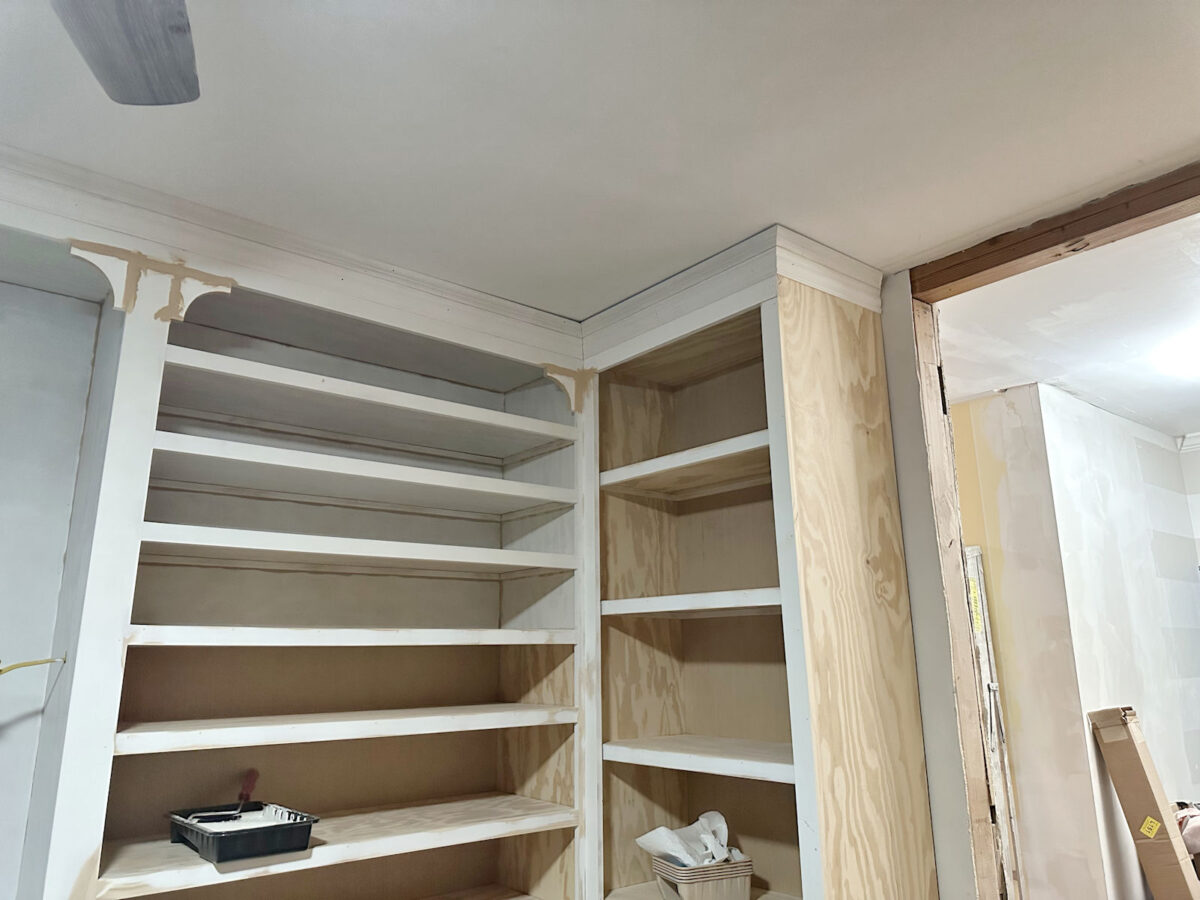
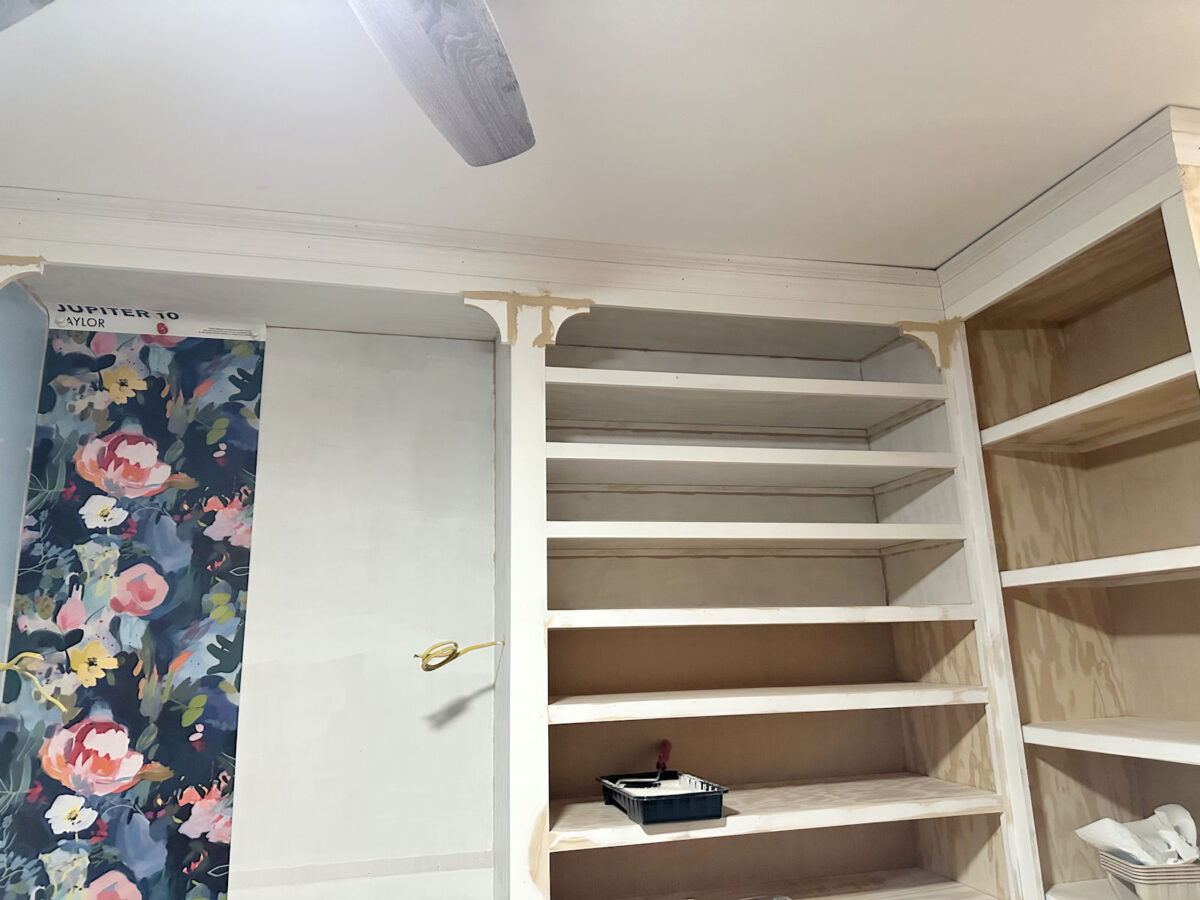
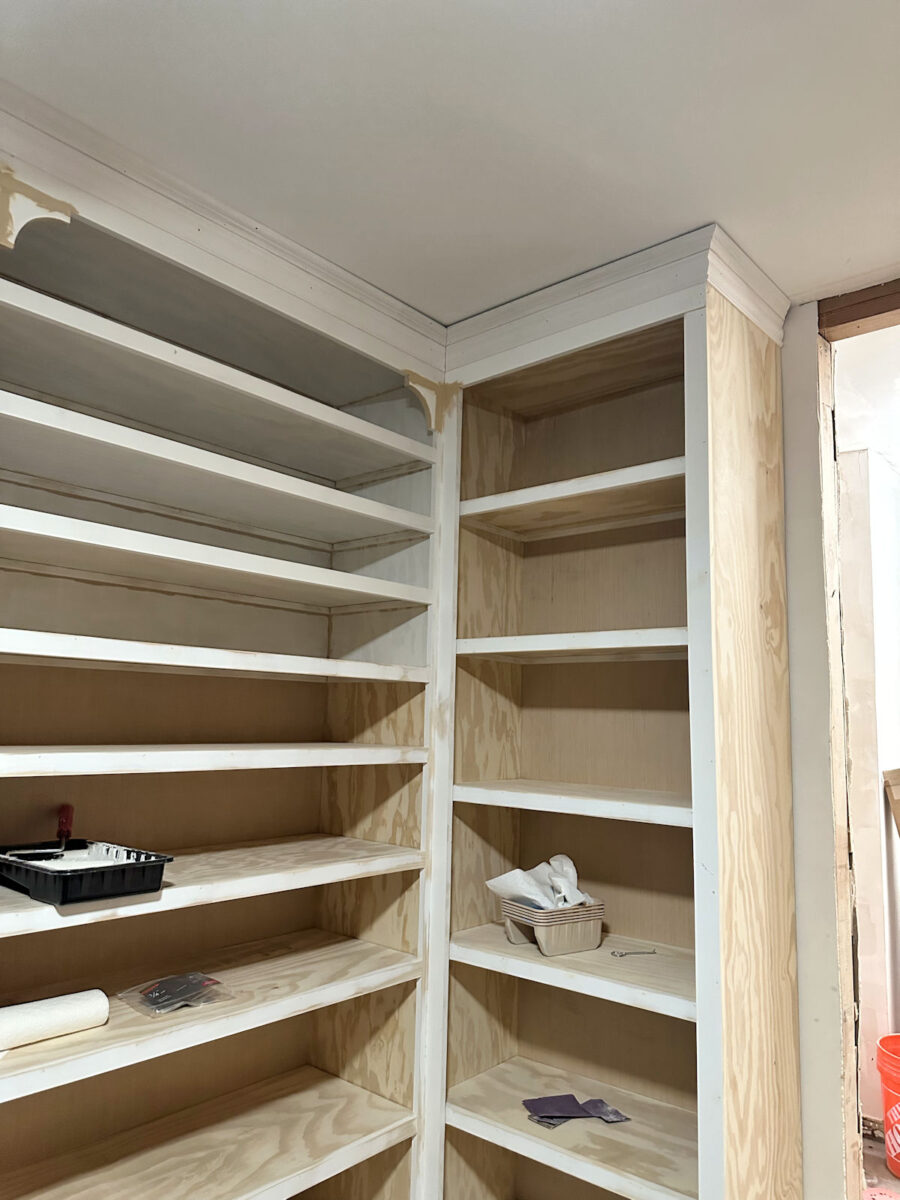
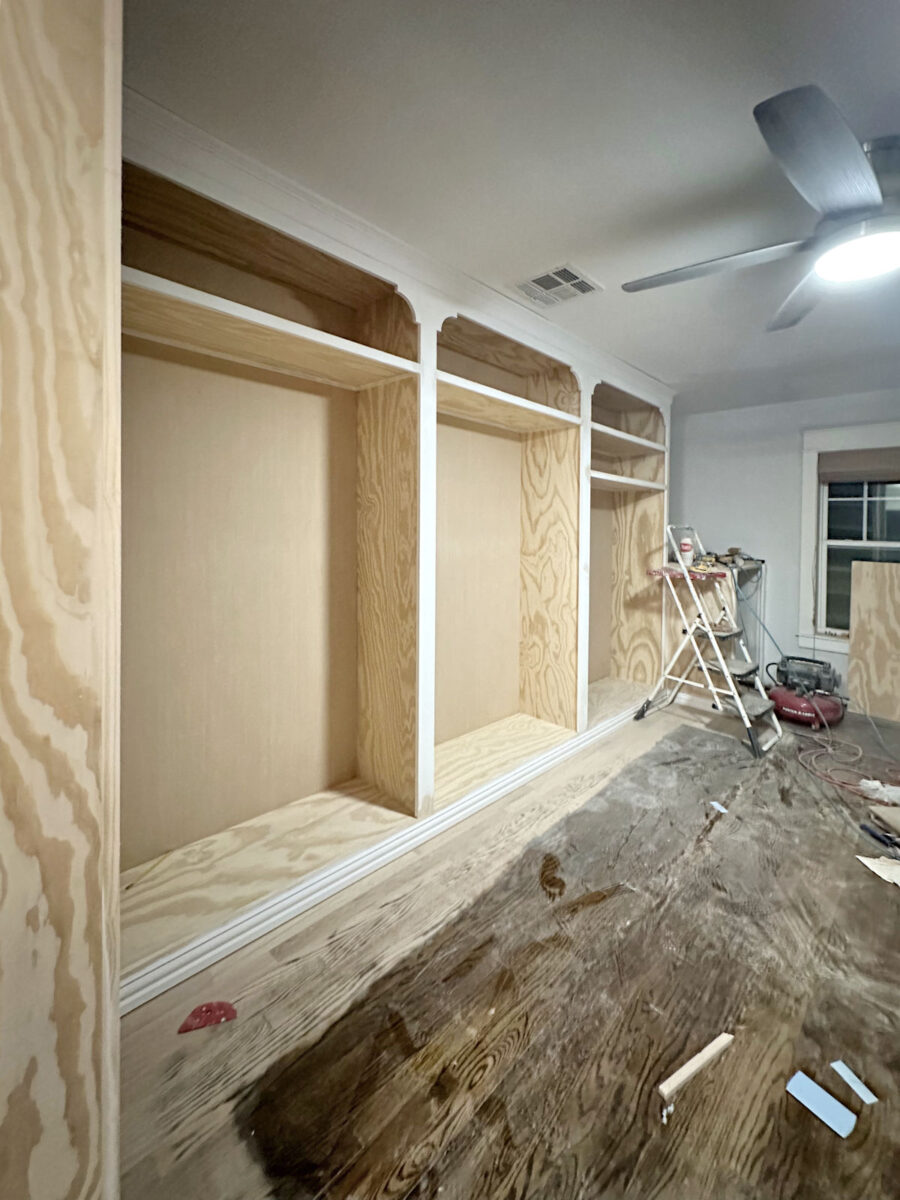
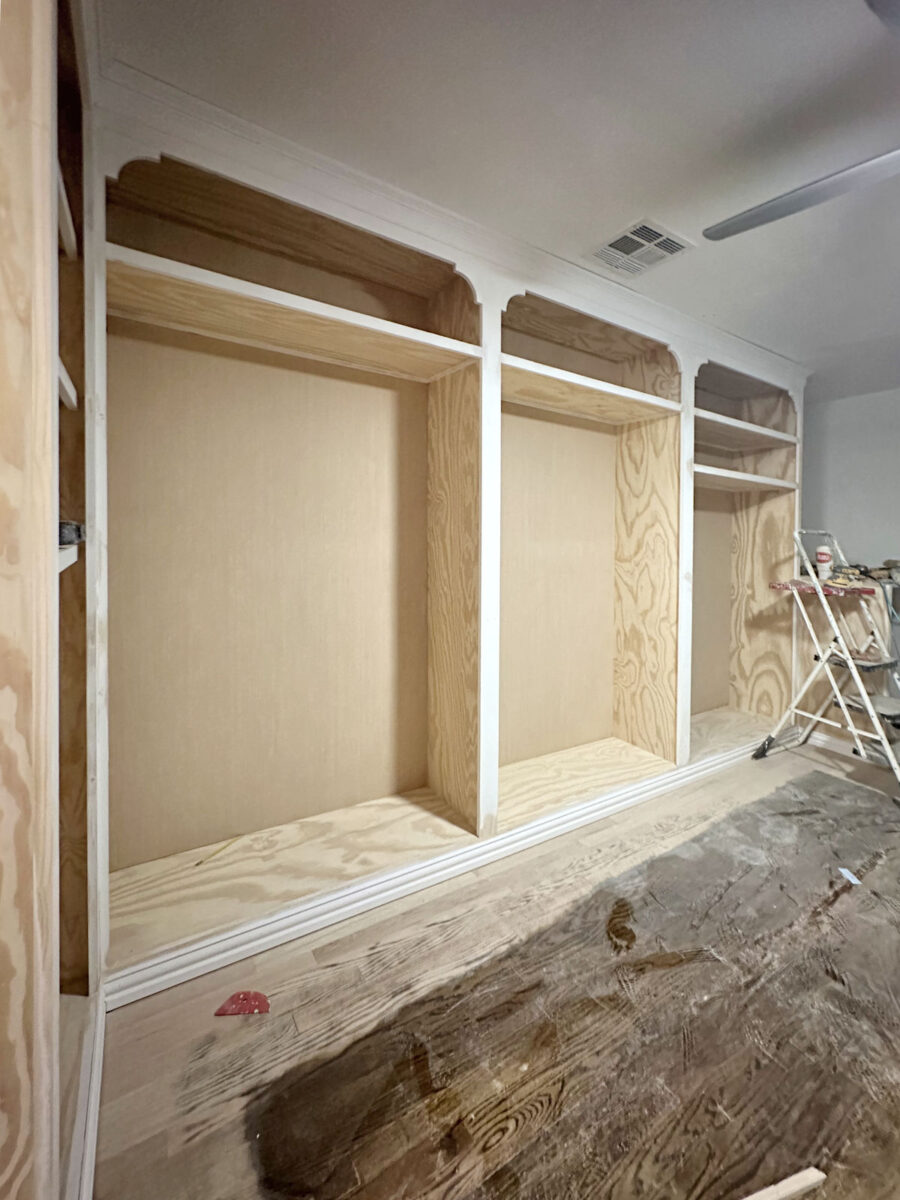
Whereas the wooden filler dried, I labored on the ornamental molding. For the highest molding, I didn’t use common crown molding as a result of I wished so as to add a extremely huge molding, however on the left aspect of the room, the HVAC vent is fairly near the cupboards.
I didn’t need the molding getting to shut to that air vent, so with a purpose to faux the look of a extremely huge crown molding, I used the identical trick that I used on the cupboards in my studio through the use of a 3.25-inch baseboard and attaching a tiny crown molding to the highest. That approach, it has the looks of a big crown molding, however it doesn’t stick out too removed from the cupboards like an enormous crown molding would since a lot of the molding (i.e., the baseboard) is mendacity flat in opposition to the highest of the cupboards. The one projection is that tiny crown molding on the very high.
The bonus is that this methodology of putting in high molding is a lot simpler than putting in crown molding as a result of the 2 items are glued and nailed collectively first earlier than they’re reduce. So reducing them is as simple as reducing baseboards. You don’t have to determine spring angles and reduce them like crown molding, which may get sophisticated for non-pros.
Right here’s a greater view of the highest molding. You’ll be able to see that a lot of the ornamental components are literally baseboard that’s hooked up flat in opposition to the highest of the cupboards, and solely the highest 1.5 inches is tiny crown molding that has an angle to it.
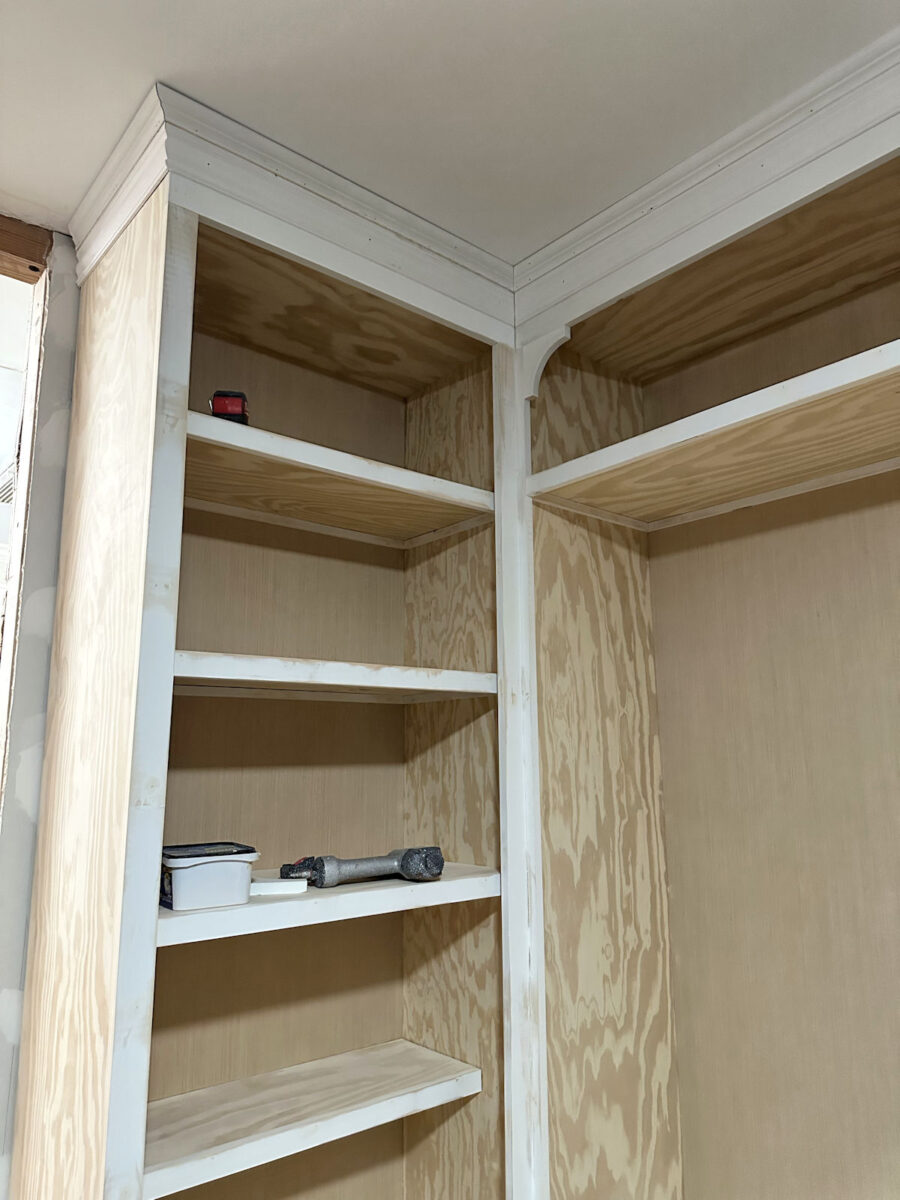
Attaching the highest molding was nonetheless a little bit of a problem, although, as a result of the ceiling on this room is simply not flat. Oh, the enjoyment of working in an previous house the place nothing is flat, sq., or plumb! So there are areas the place the molding is correct up in opposition to the ceiling, and different areas (as you may see within the nook under) the place the molding merely wouldn’t sit in opposition to the ceiling irrespective of how exhausting I pushed on it.
And since I couldn’t get the lengthy piece to take a seat in opposition to the ceiling, I needed to drop the piece connecting to it on the opposite cupboard down a bit as properly.
You’ll be able to see that on the opposite finish of this wall as properly the place there’s a niche between the molding and the ceiling.
I’m not frightened about that as a result of caulk will magically make these gaps disappear, and as soon as it’s all painted, it’ll look as good as something can look in an almost-80-year-old house.
The opposite aspect of the room wasn’t fairly as a lot of an issue. A lot of the high trim on that aspect is in opposition to the ceiling, however I did have a little bit of an issue across the cupboard flanking the doorway. However once more, caulk will maintain that drawback.
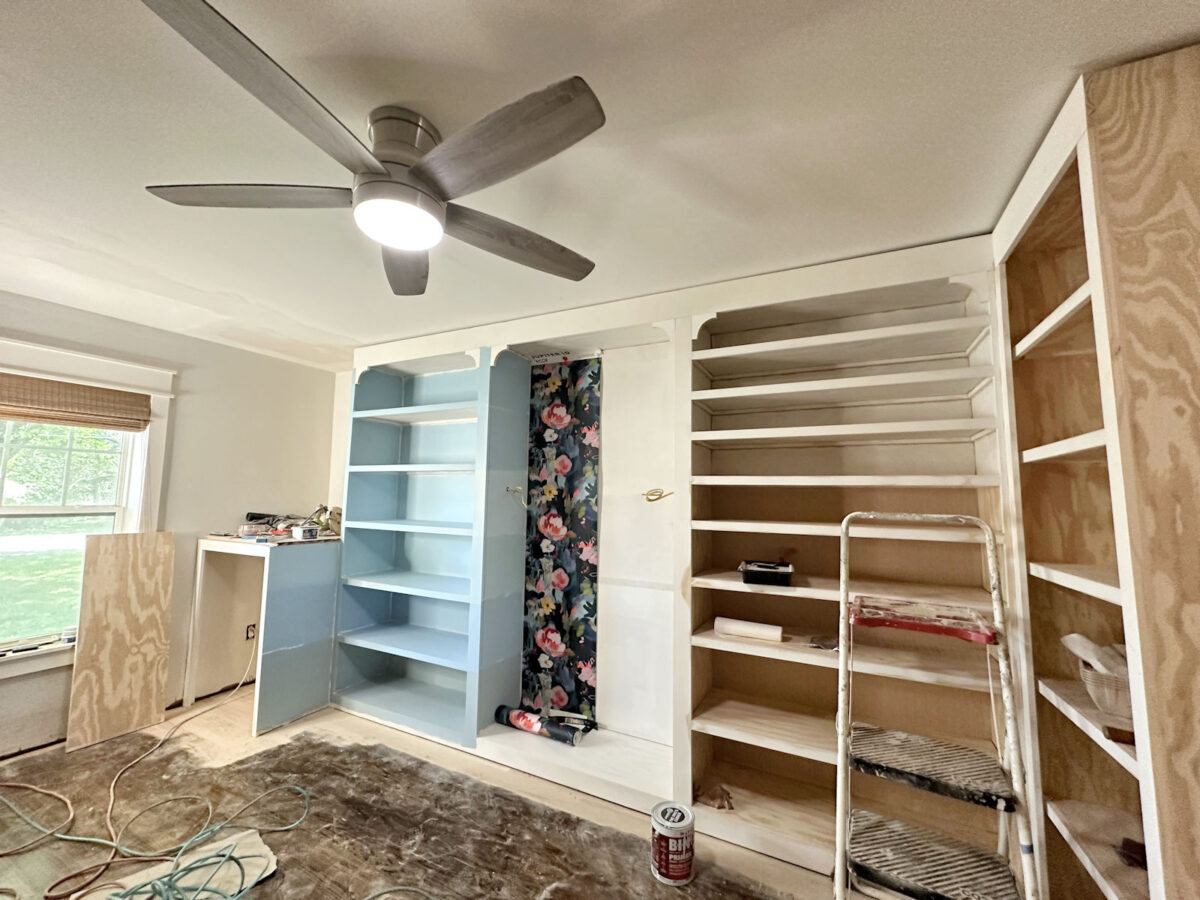
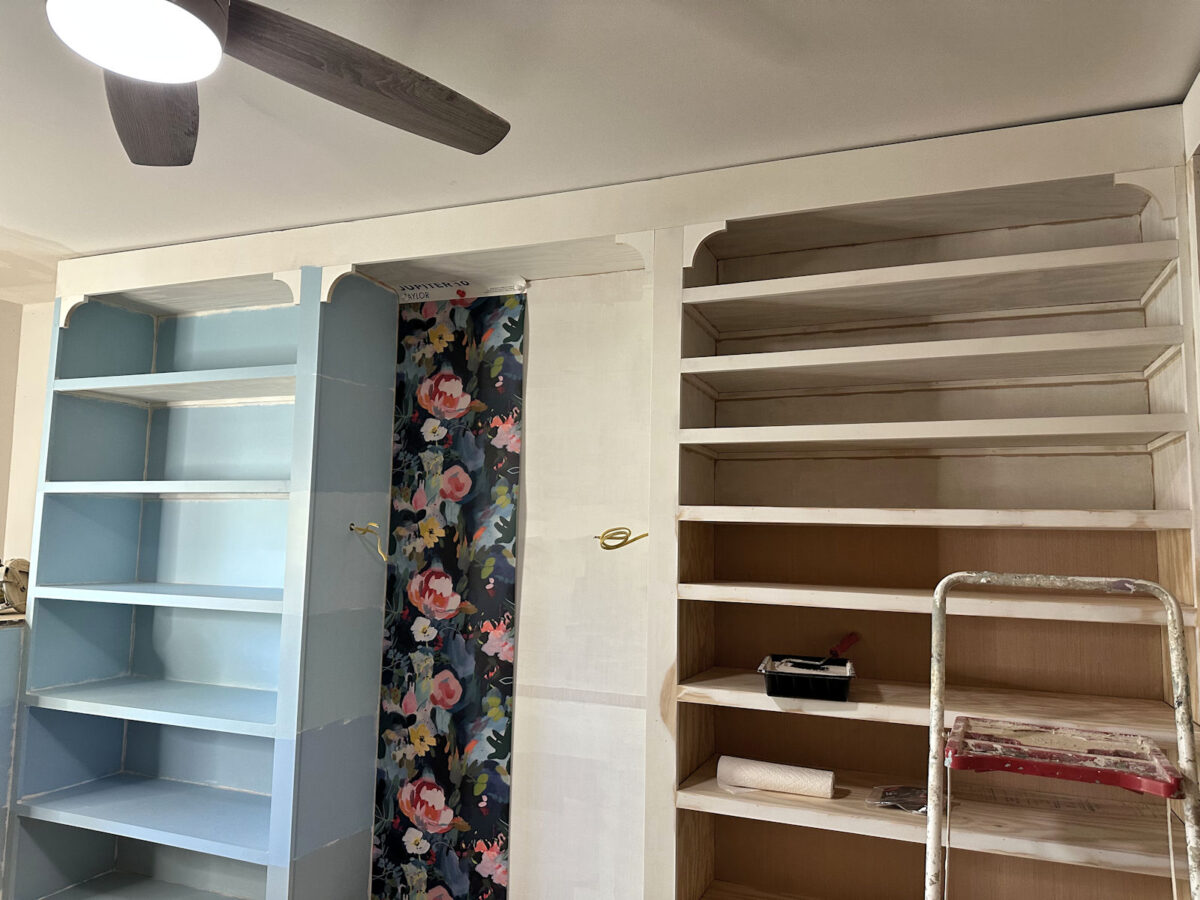
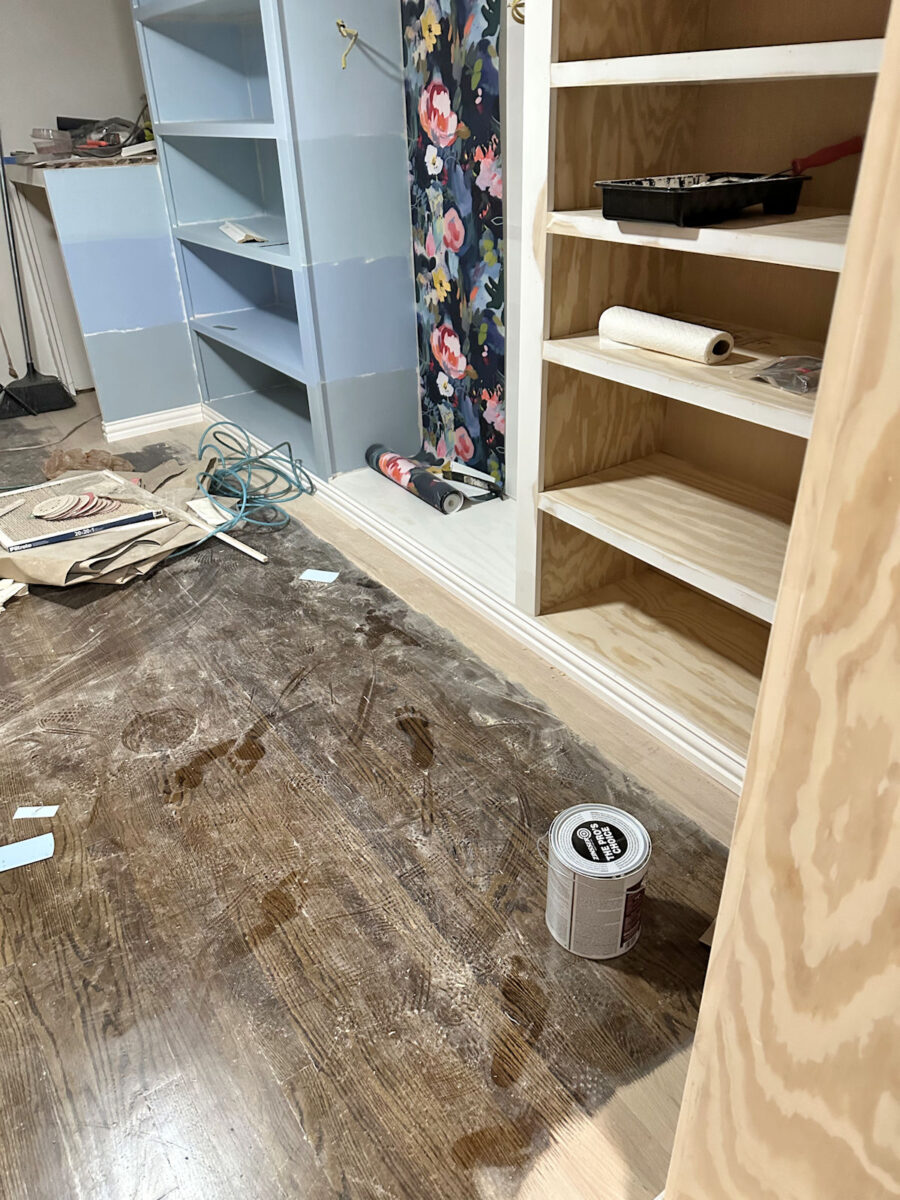
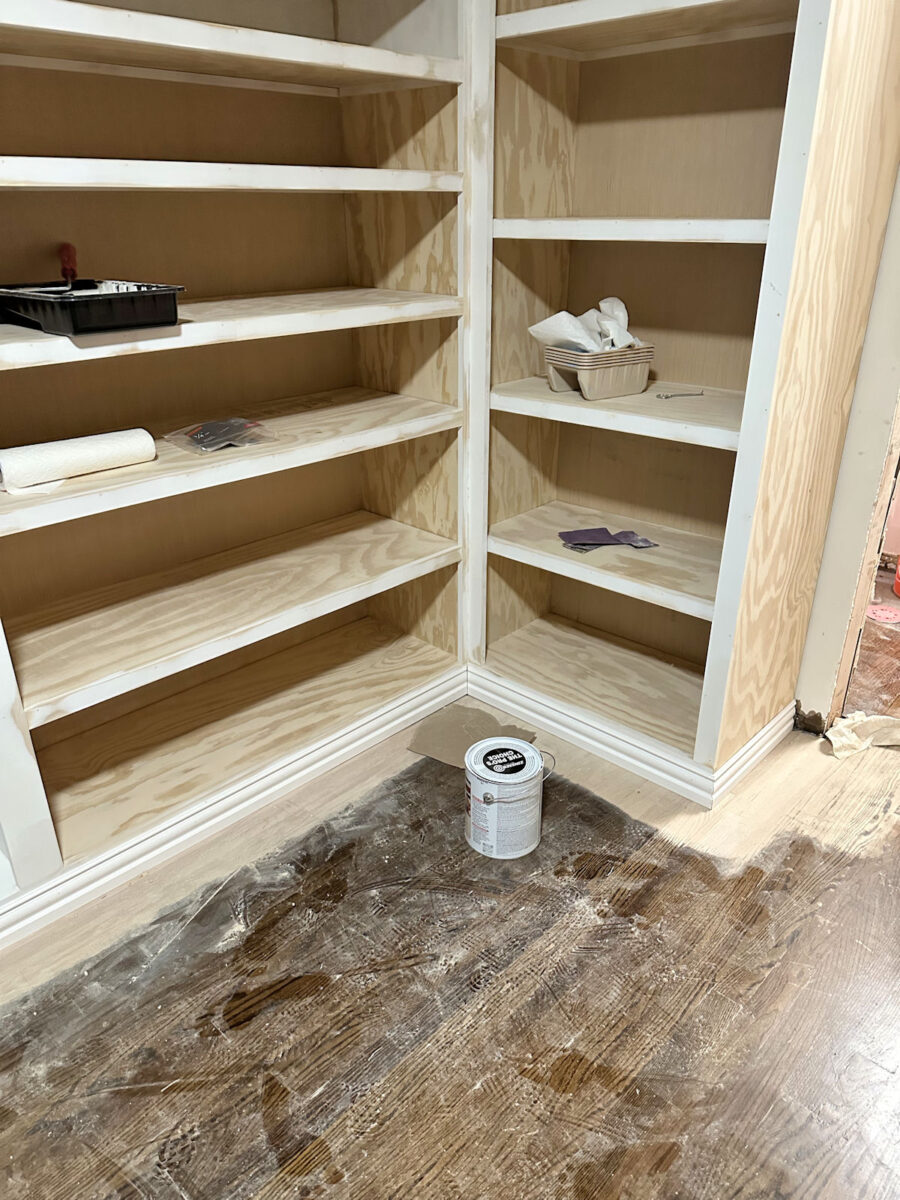
And on this aspect, I obtained the little thrives sanded and primed, however I nonetheless must prime the within of the cupboards and the cabinets…

I additionally obtained the entire baseboards hooked up across the backside of the cupboards.
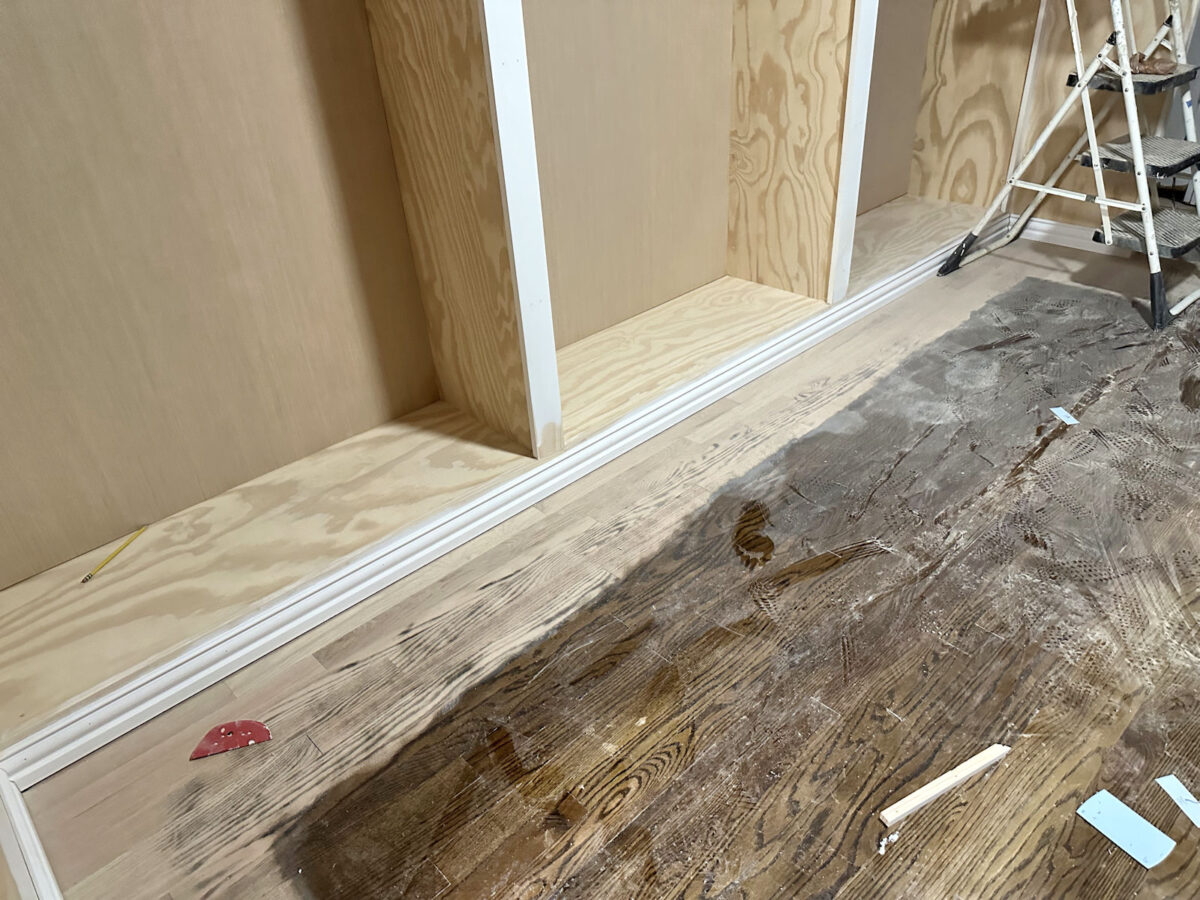
I will likely be including shoe molding as properly, however I must get the flooring refinished earlier than I connect these.
After which the baseboards proceed across the sides of the washer and dryer cupboards to tie all of them collectively and end off the underside of these cupboards.
And right here’s a take a look at how they wrap round to the cupboards flanking the doorway.
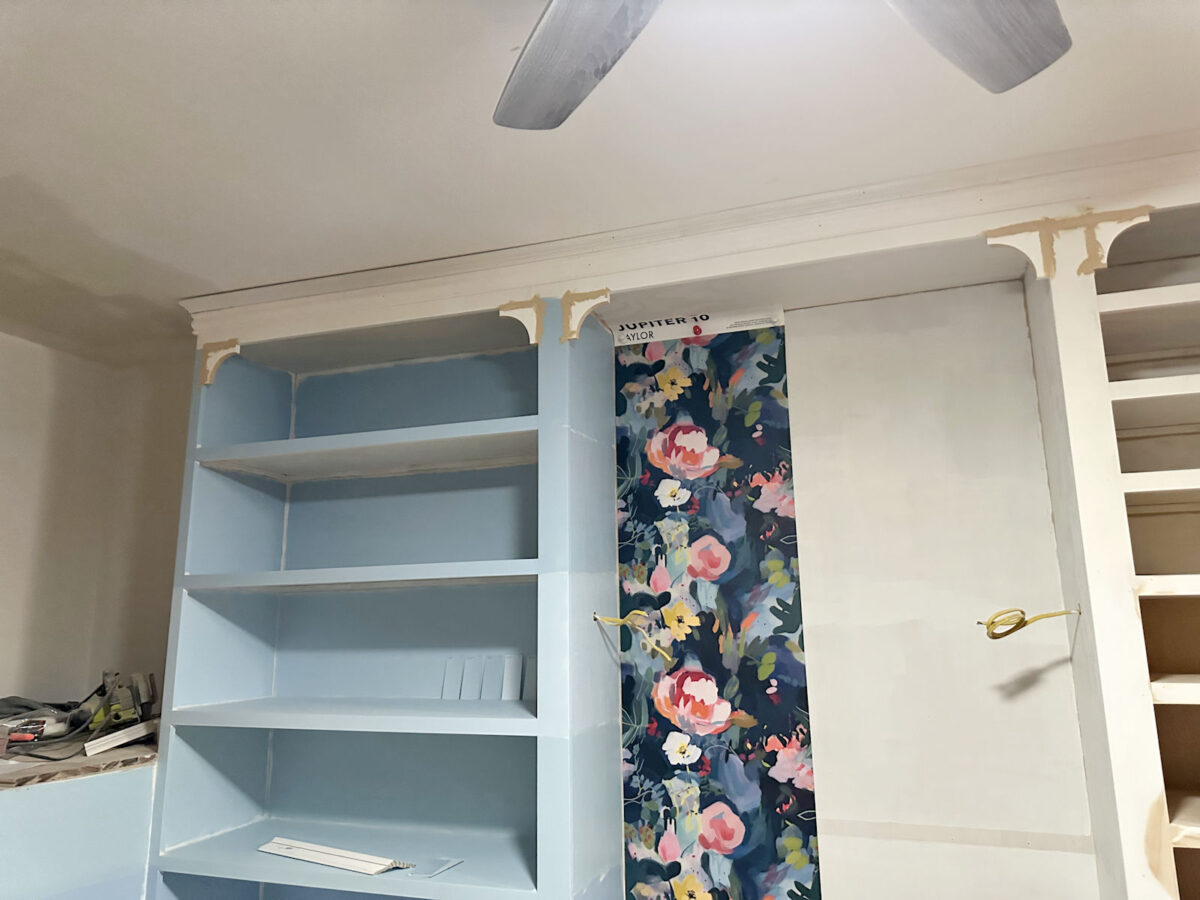
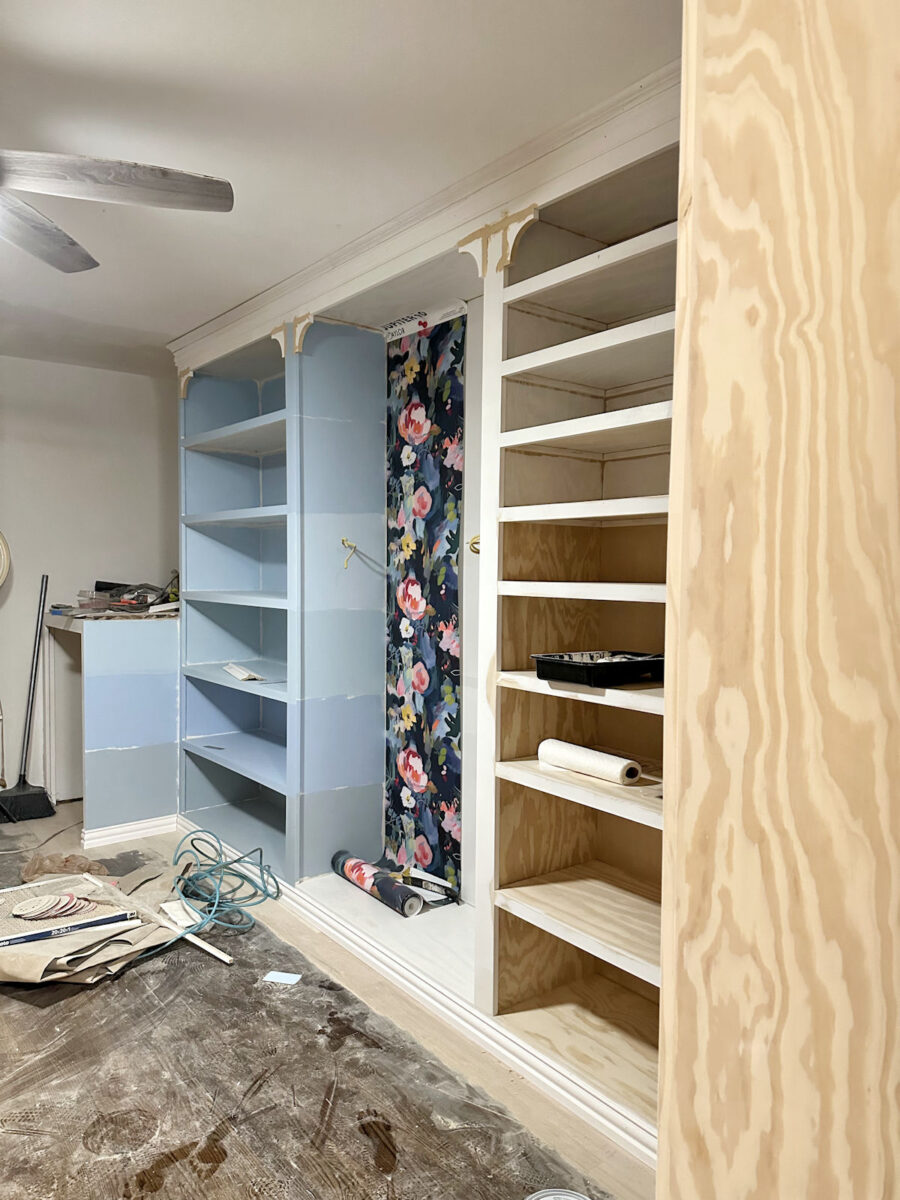
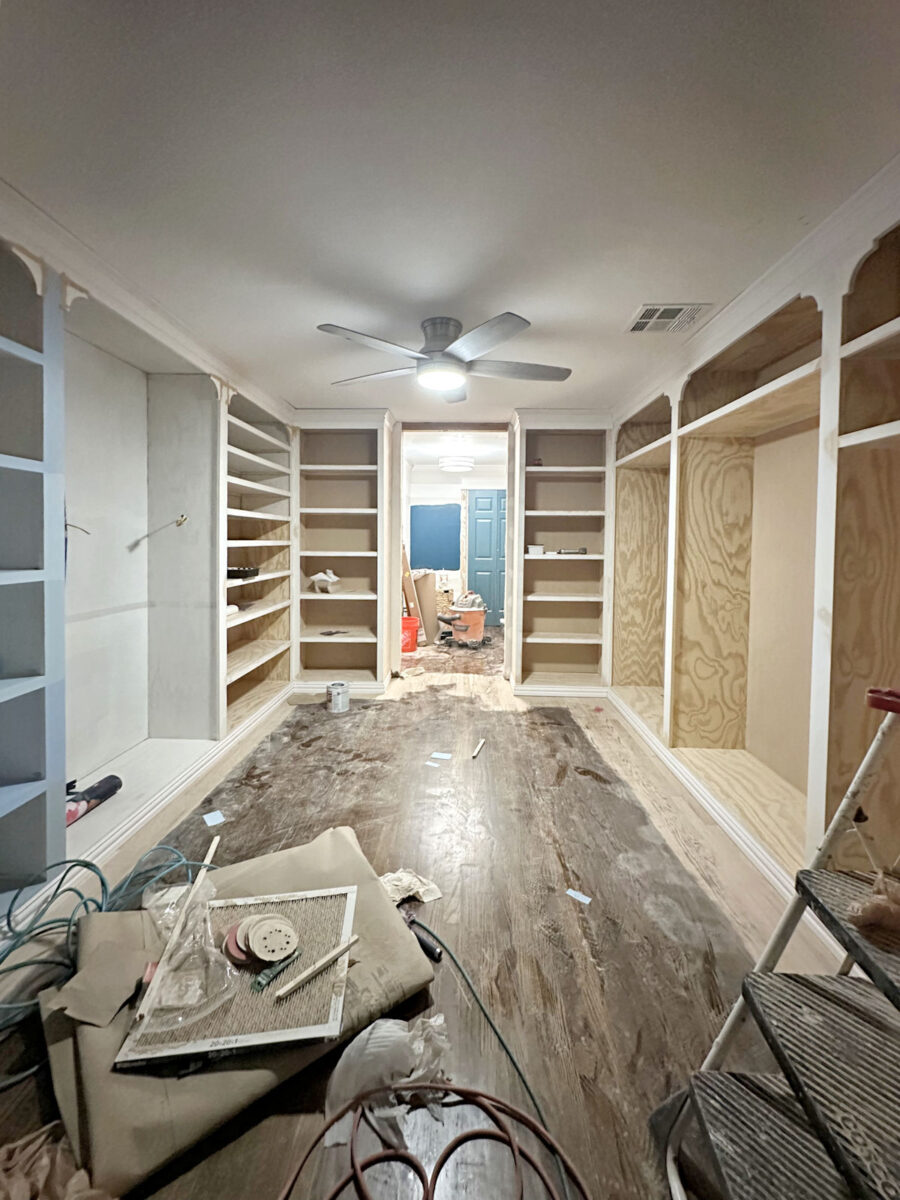
In order of final evening, right here’s what the left aspect of the room seems like with the entire trim and molding put in…
At the moment, I must get these thrives (I’m positive these have a correct identify, however I don’t now what it’s) on the fitting aspect of the room sanded and primed, after which proceed with priming the remainder of the cupboards. I additionally must resolve if I wish to add these different two cabinets as a result of if I do, that clearly must be finished whereas I’m nonetheless on this part of the undertaking. I don’t wish to get all of this primed, caulked, and painted, after which have to return and add two extra cabinets.
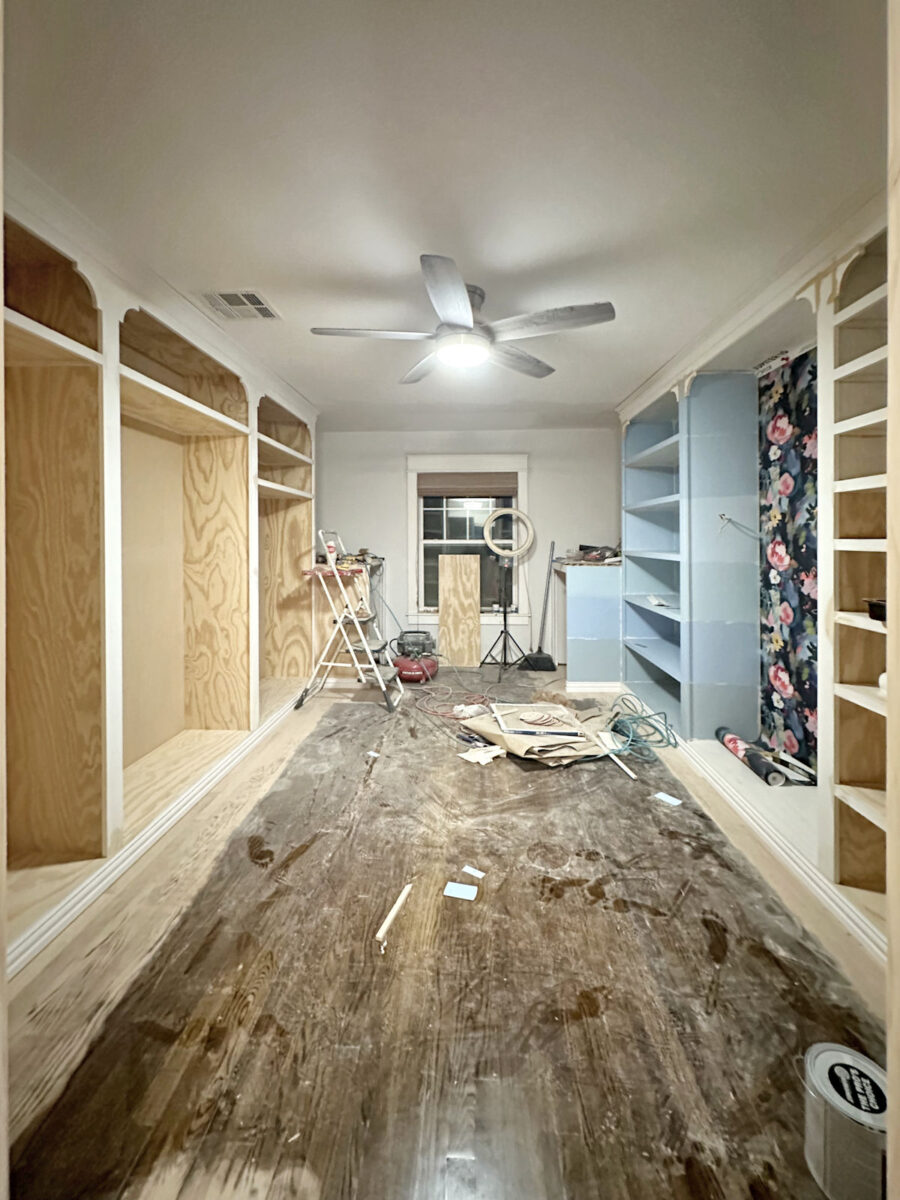
And I additionally must resolve for positive if I would like doorways on the cupboards flanking the doorway. I actually like the way it seems with the open cabinets, and if I would like these objects out of sight, I may at all times use fairly baskets to retailer issues.
I simply hold pondering that we’ll ultimately have a whole storage closet (the present hallway lavatory) the place I can retailer something I would like saved out of sight, and I actually just like the consistency of getting the entire cupboards on this room open. I simply don’t know that I wish to spoil that consistency by having two cupboards with doorways on them. *Sigh* I hate being undecided on these issues this late within the undertaking, however that’s how my thoughts works. I typically change my thoughts and make adjustments mid-project. I don’t thoughts altering plans as I’m going alongside, however I hate being undecided.
So I’ll be again at it right now! Extra sanding, extra priming, and hopefully I can get to the caulking right now. And I’ll in all probability be including two extra cabinets earlier than the day is over.

Addicted 2 Adorning is the place I share my DIY and adorning journey as I rework and enhance the 1948 fixer higher that my husband, Matt, and I purchased in 2013. Matt has M.S. and is unable to do bodily work, so I do the vast majority of the work on the home on my own. You’ll be able to be taught extra about me right here.


")


