

I’ve decided on what I wish to do to cowl the skirting space on my concrete entrance porch. After going via a number of totally different concepts final week, I lastly determined to return to my unique unique concept and canopy the skirting space with Austin stone to match the stone portion of our home.
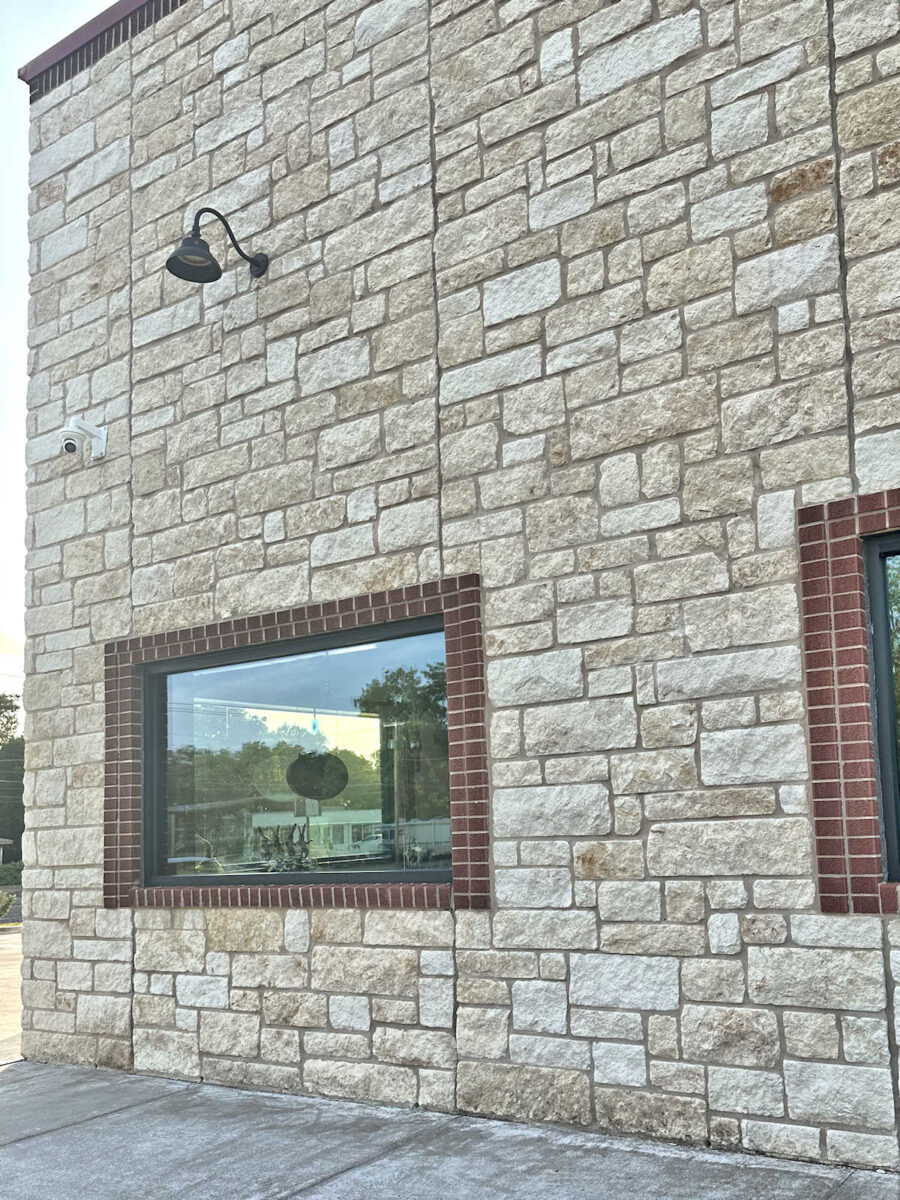
That is what I wished to do from the very starting. Years in the past, after I constructed the floating wooden porch over the concrete porch, my unique imaginative and prescient was to hold the Austin stone that covers half of the entrance of our home onto the entrance porch. Austin stone is a white/light-colored limestone that’s ubiquitous in Texas, and it’s referred to as Austin stone right here in Texas as a result of it’s quarried across the Austin and Texas Hill Nation space.
The issue I bumped into again then was that I couldn’t discover any Austin stone that matched the stone on our home. I wasn’t involved about matching the colour as a result of ours is painted. Sadly, our stone was painted after we purchased the home, so my choices have been both to have it sandblasted or repaint it a coloration I wished. I selected the second choice as a result of it was quicker and less expensive. And actually, I don’t actually like the colour of pure Austin stone anyway. Like I stated, this stone is ubiquitous on this space, and it has been for many years, so it’s not likely something particular, in my humble opinion. I a lot favor the sunshine grey of our home reasonably than having the siding portion match the yellow/beige coloration of a pure Austin stone.
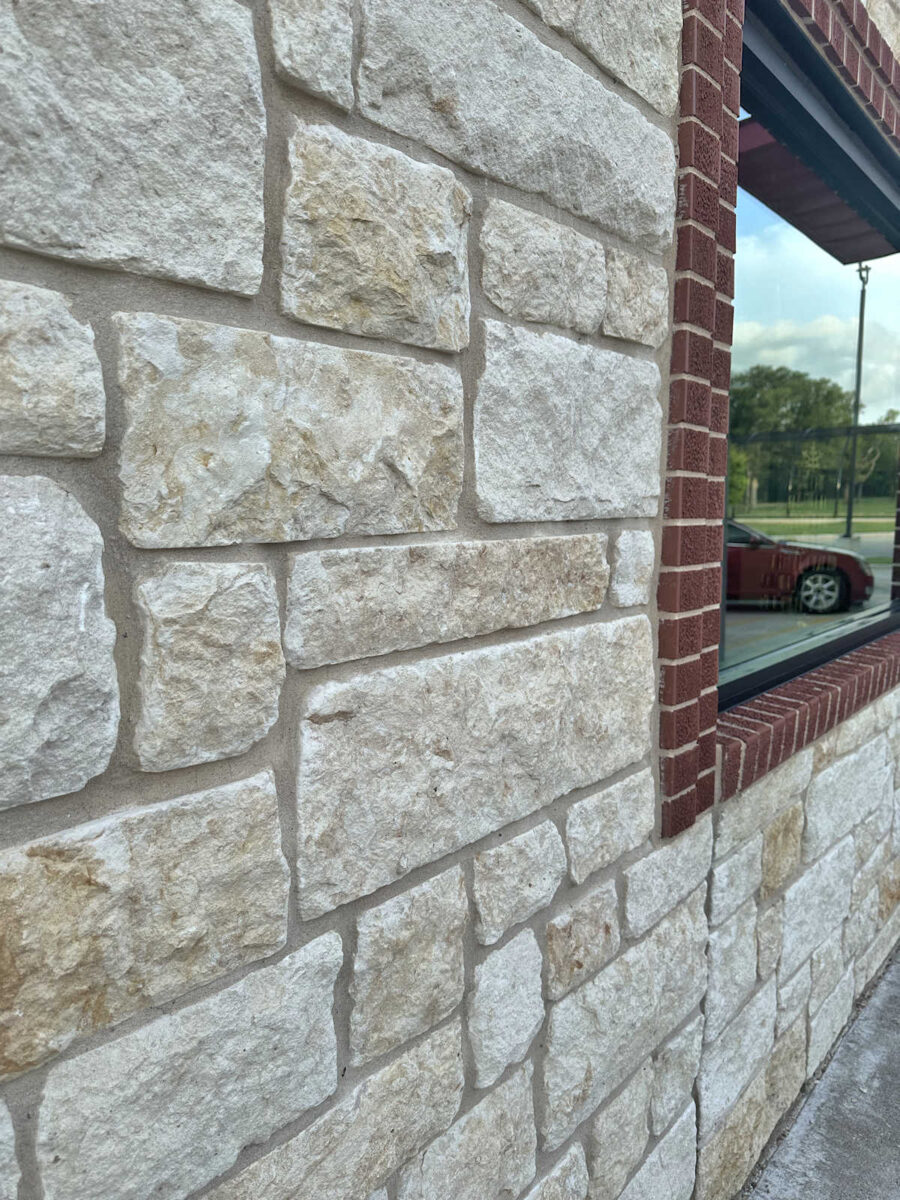
However the issue that I bumped into is that Austin stone within the late 40s and early 50s was minimize very otherwise than fashionable Austin stone. Right here’s a extra fashionable constructing with an Austin stone facade (with the pure coloration of Austin stone), and you’ll see that the stones are minimize in order that they’re fairly flat on the fronts.
Right here’s a more in-depth view of what it appears like, and that is just about how all Austin stone is minimize lately.
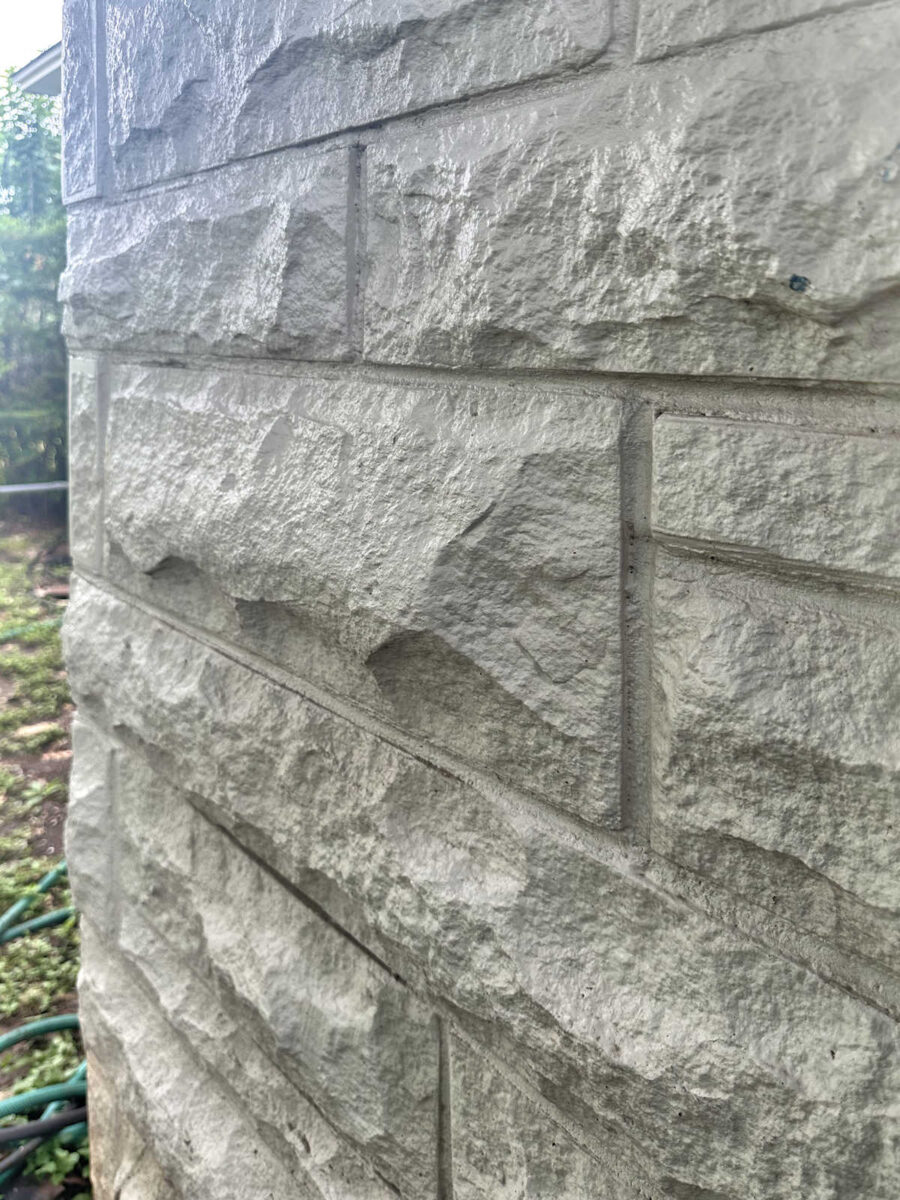
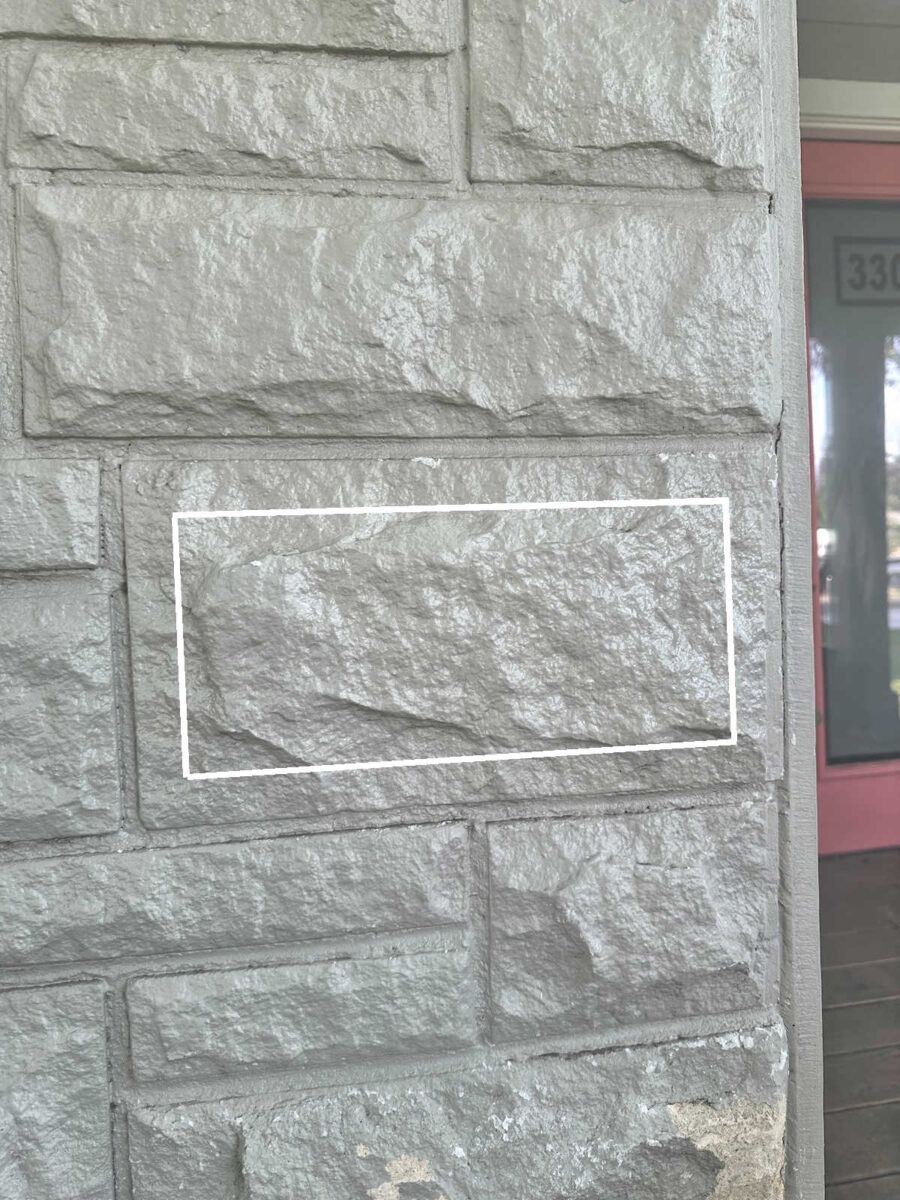
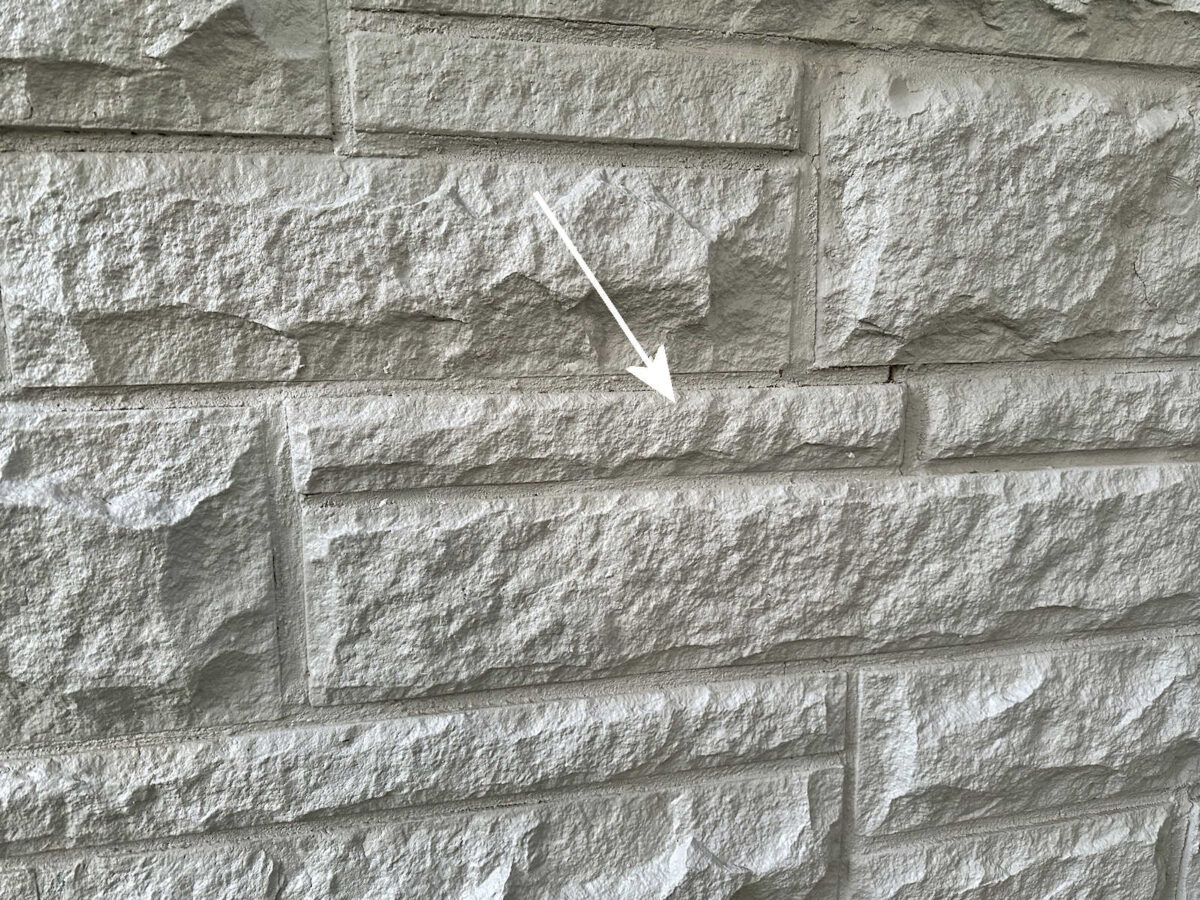
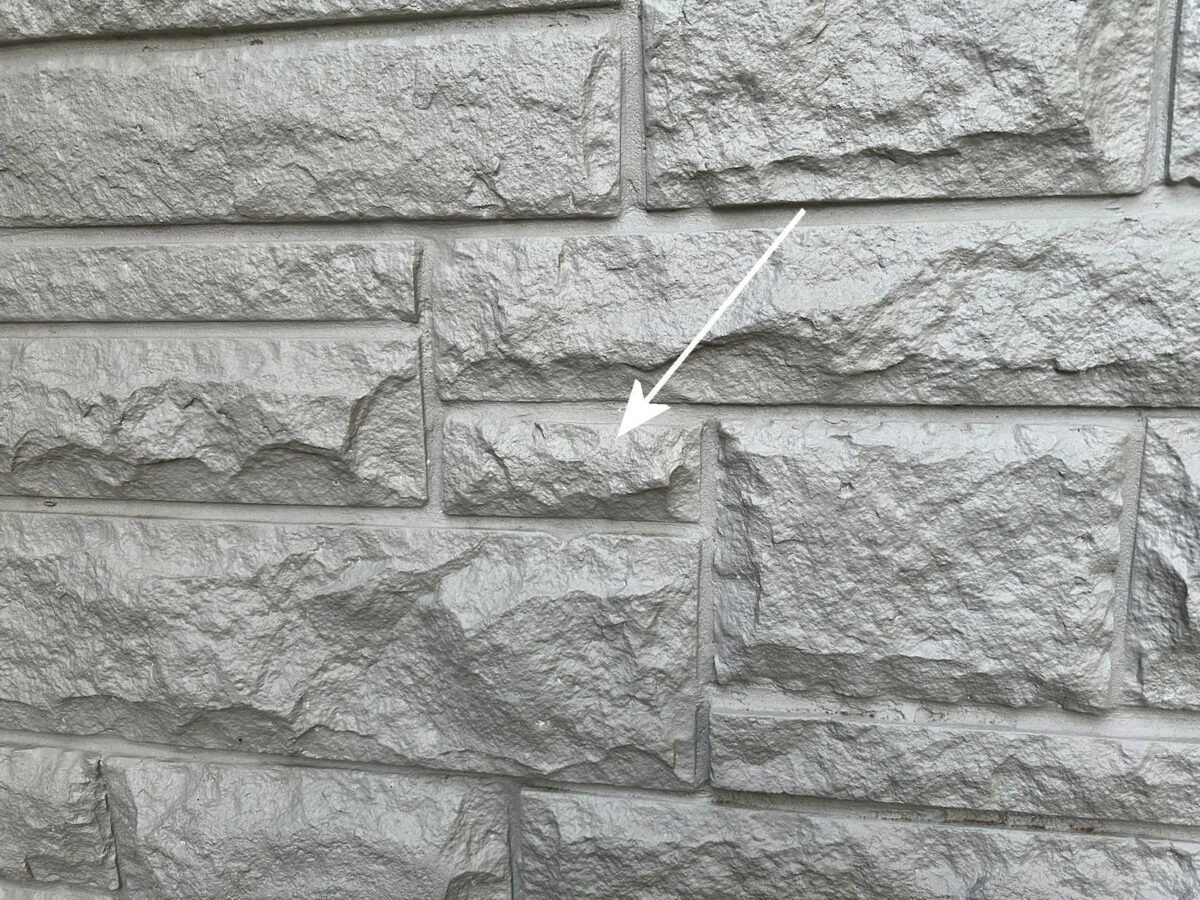
And right here’s a view of the stone on the entrance of our home. You’ll be able to inform instantly, simply from how the stone is minimize and chiseled on the entrance, whether it is fashionable or if it was constructed across the mid-century time interval. Again then, they chiseled the stone in order that the middle of the face of every stone protruded rather more. There aren’t many stones on our home which have a flat face on them.
So after I tried to seek out matching Austin stone (actual or pretend) to match our home, it was just about unattainable. I discovered some which will have labored, however they have been usually fairly costly, and I didn’t wish to pay that a lot for one thing that wasn’t an actual match. So I ended up giving up on that concept and looking for different methods to cowl the skirting.
Properly, after attempting a few different concepts, after which contemplating just a few others, I’m again to the Austin stone concept. No, I didn’t discover a supply for matching Austin stone. As an alternative, this time I’ve determined to make my very own. Right here’s the method I’ve selected: (1) make my very own silicone molds (i.e., textured mats) utilizing the stone on our home because the mould kind for the silicone molds, (2) use these silicone textured mats within fundamental concrete molds that I’ll construct to suit the dimensions of every mould (or textured mat) that I make, (3) create my very own stone facade items utilizing an aircrete combination in order that the stone facade is light-weight and will be adhered to the entrance of the concrete skirting space, and (4) prime and paint the stone to match the remainder of the home.
I do not know if it will really work, however I’m going to have enjoyable attempting! I’ve already made 4 silicone molds (one fail and three successes), and I feel I want a complete of six usable molds for my entrance porch. This course of was really very straightforward, so let me present you the way I did it.
make straightforward DIY silicone molds (two components):
This isn’t my unique concept. I noticed this course of on YouTube (I shared this video with you in submit final week), and he made it look really easy. So I made a decision to strive it out and see if this is able to work for my venture.
To make your personal silicone molds, you want two components — 100% all objective silicone caulk and cornstarch. I used a glass bowl and poured a whole package deal of cornstarch into the bowl. You need to use the most affordable cornstarch you will discover. Sadly, this Bob’s Crimson Mill was the one model out there on the retailer I occurred to go to, and it prices about twice the worth of low cost cornstarch at about $3/package deal. However the low cost stuff works simply high-quality.
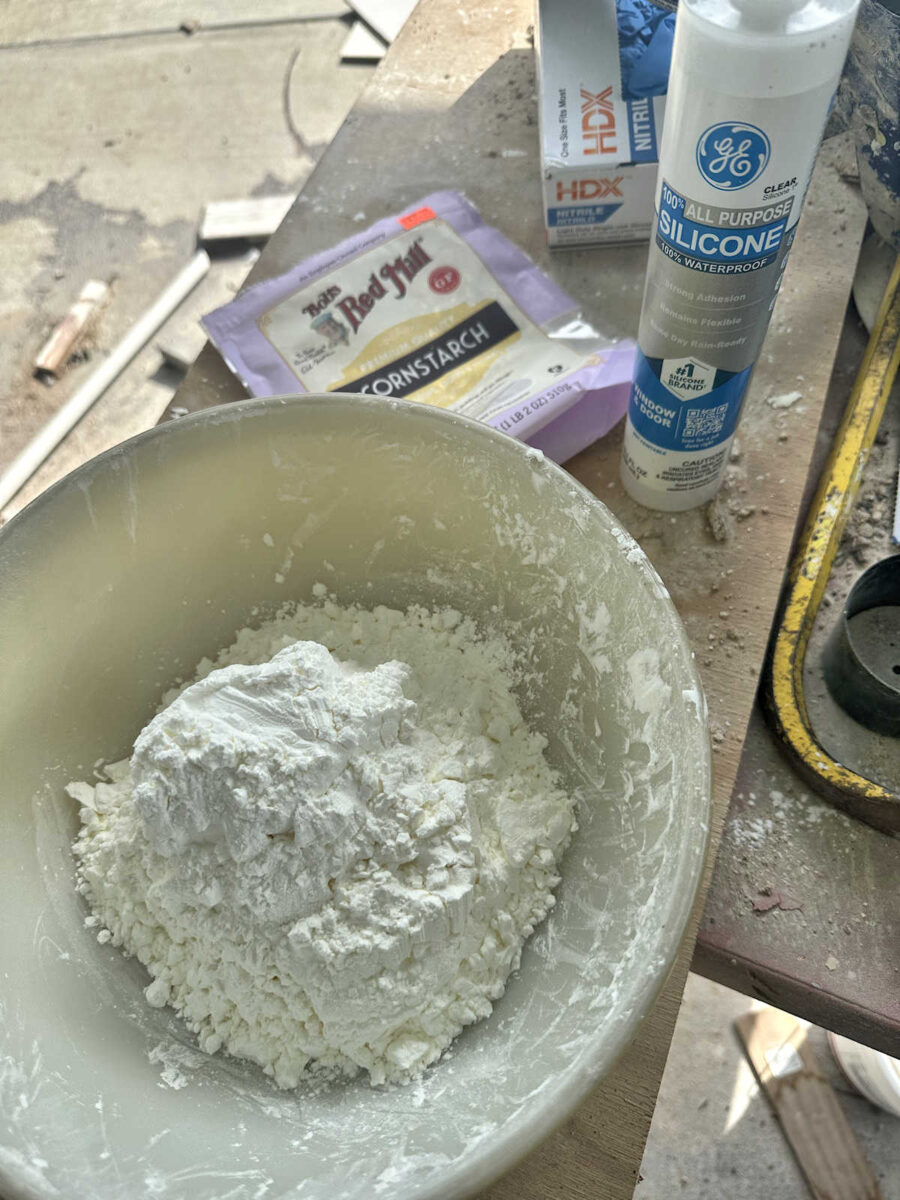
After which I used my caulk gun and squeezed out two whole containers of silicone caulk proper into the middle of the cornstarch.
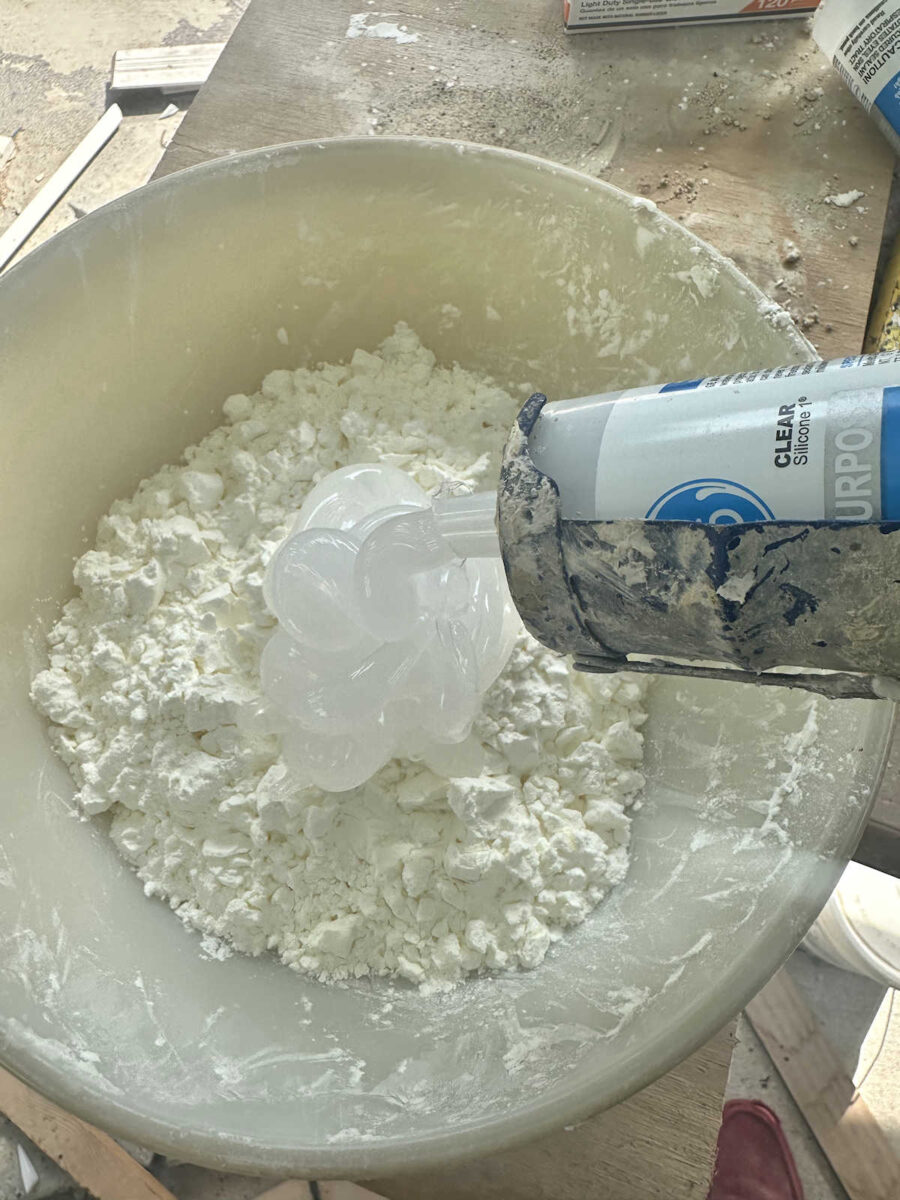
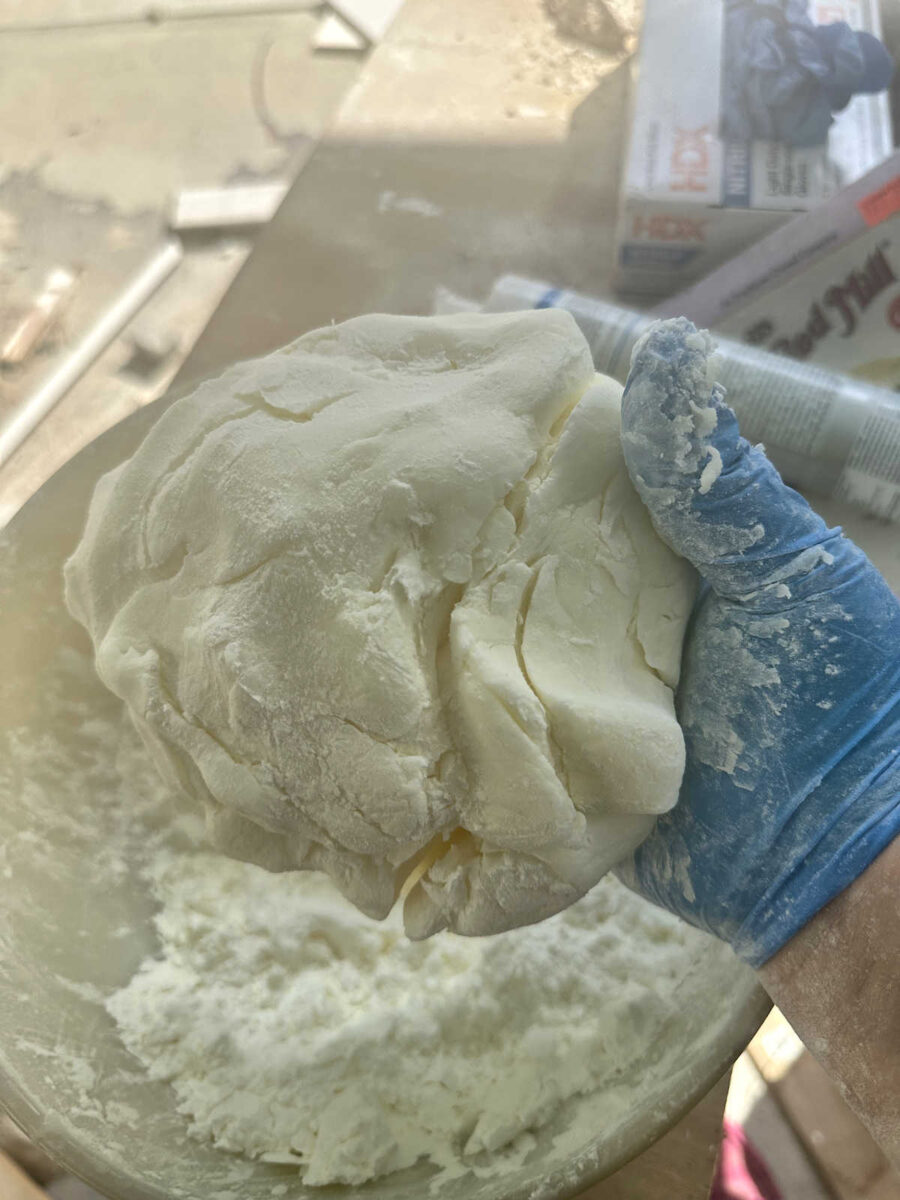
After which I put some gloves on and started mixing the caulk into the cornstarch. I attempted my hardest to not contact the caulk immediately as a result of that stuff is actually sticky. I principally folded the cornstarch over onto the caulk, making my approach across the bowl, folding the cornstarch over onto the caulk all the best way across the bowl till the caulk misplaced most of its stickiness. I finished when the caulk and cornstarch combination fashioned a ball that felt just like the consistency of Play-doh.
After which I chosen the stone I wished to make use of to kind the primary silicone mould and pressed the silicone and cornstarch ball onto the face of the stone. I actually had no concept what I used to be doing on this primary one, so this was my take a look at.

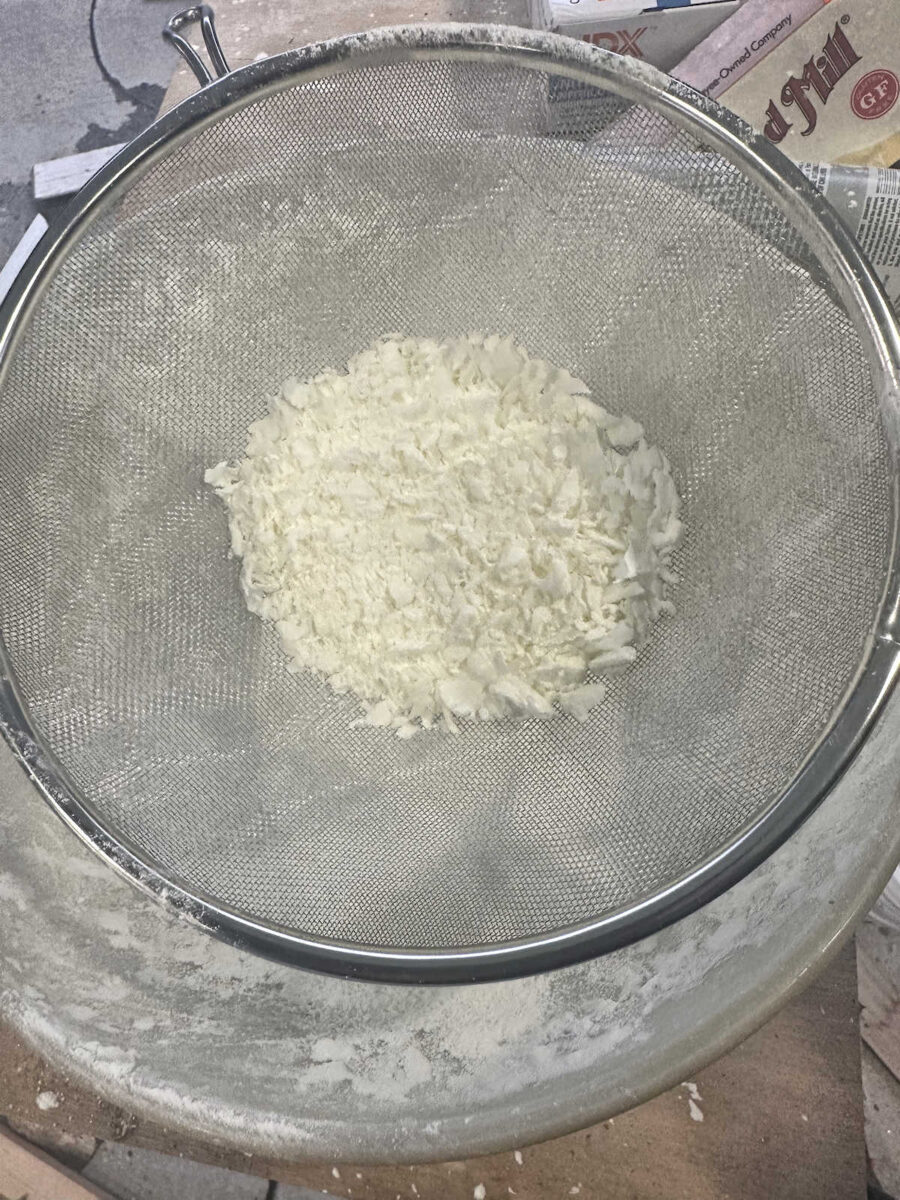
I gave that about three hours to dry. Whereas it was drying, I used a sieve to take away the entire caulk bits from the remaining cornstarch in order that I may reuse the leftover cornstarch for the following mould.
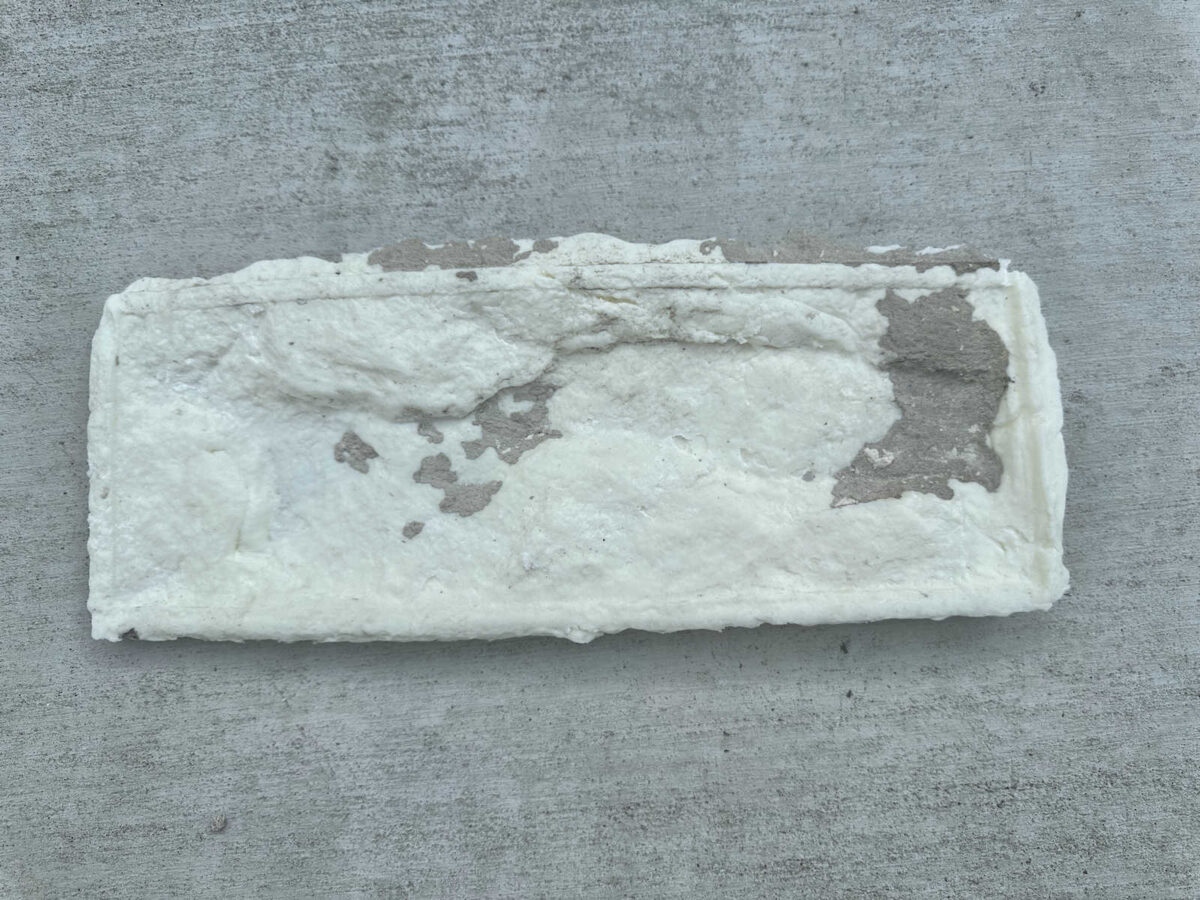
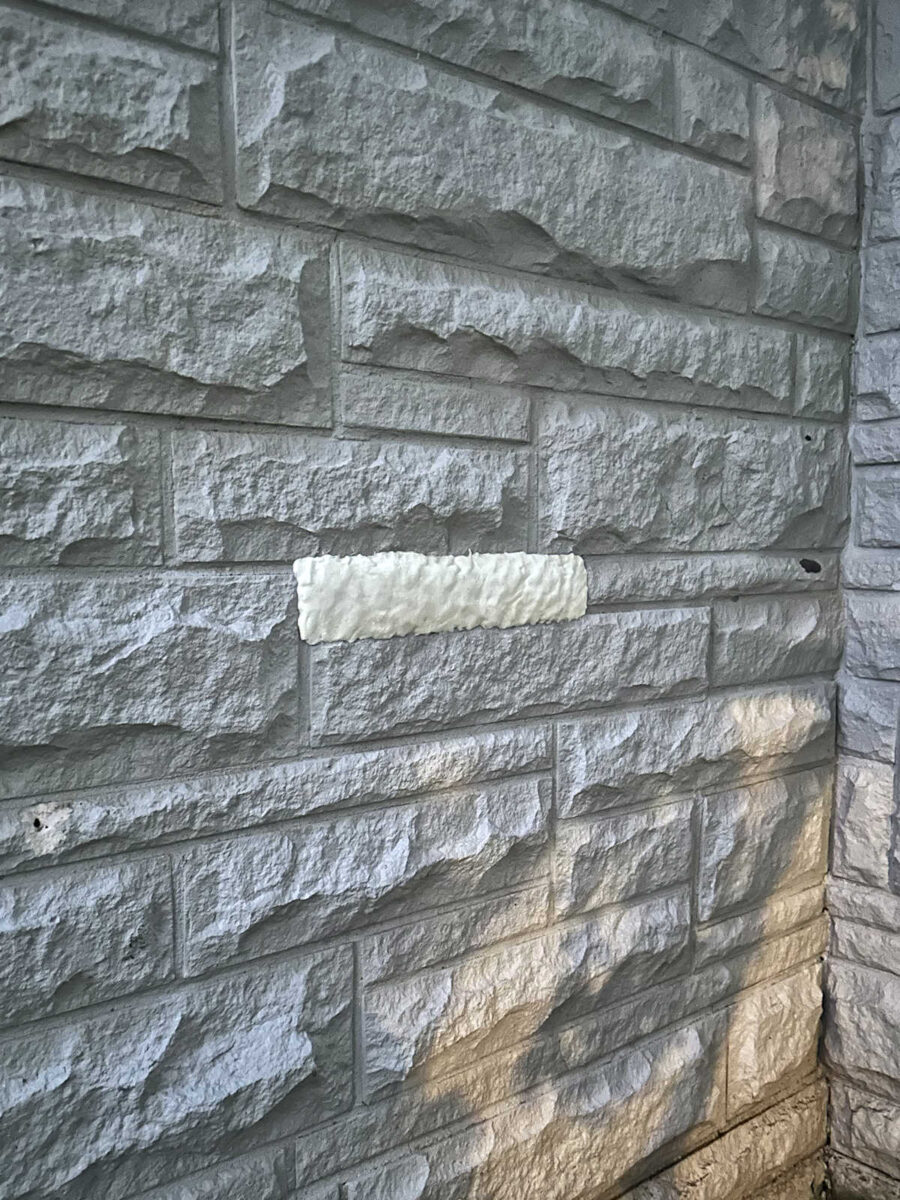
Eradicating that silicone from the stone was a problem, and as I pulled it off, it pulled a few of the paint from the stone. (You’ll be able to see the colour that the stone was painted after we purchased the home. Bleh. I definitely didn’t need a whole home painted that coloration.)

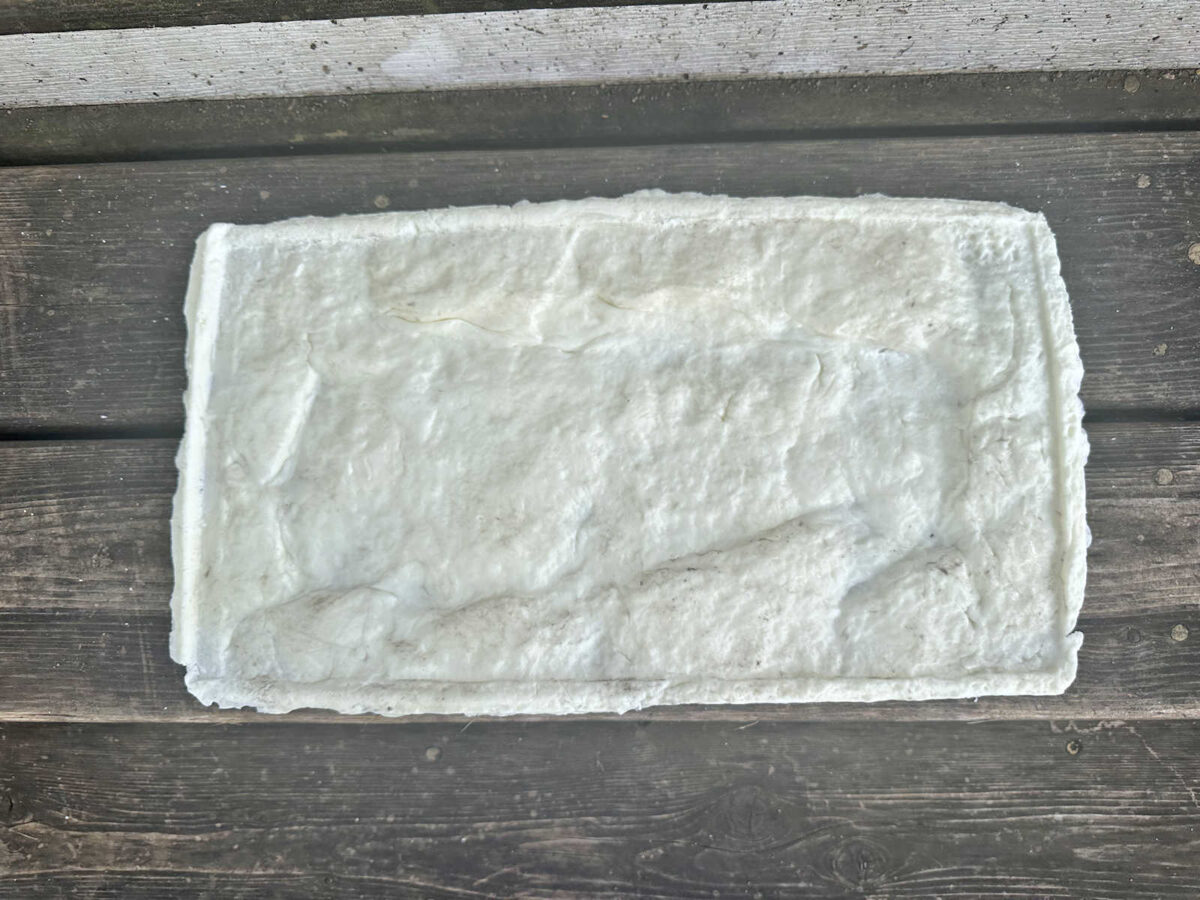
That is what the silicone mould (or textured mat) seemed like after I eliminated it. I doubt that this one is definitely going to be usable since concrete will most likely persist with these tough areas. However this take a look at gave me perception into what I wanted to do for the following one.
I rummaged via my cupboards to see what I may discover to make use of as a mould launch, and I discovered this little bottle of olive oil that has been in my cupboard far too lengthy to make use of for cooking.

So on the following one, earlier than urgent the silicone to the stone, I coated the middle space of the stone with a really gentle coat of olive oil. I simply used my gloved fingers to do that. I didn’t put all of it the best way to the sides as a result of I wanted the silicone to seize onto one thing, and if the entire thing was coated with olive oil, it might don’t have anything to seize onto. However I actually simply wanted a mould launch on essentially the most closely textured areas, which is the middle a part of every stone.
After which I eliminated my gloves (I didn’t wish to get olive oil combined into the silicone) and coated my palms with cornstarch to press the silicone onto the stone. I had about quarter-hour of working time with every silicone/cornstarch ball.
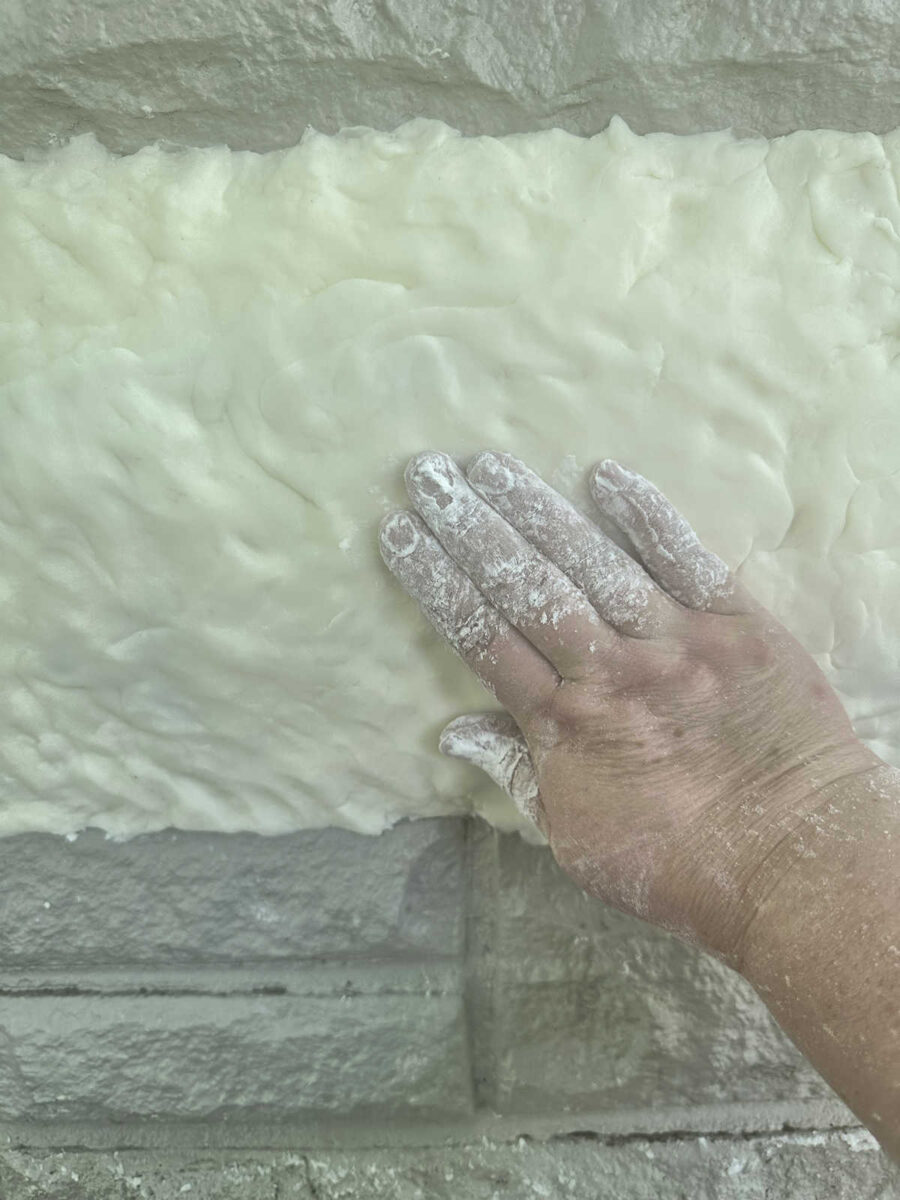
This one labored out completely. Once more, I gave it about three hours to utterly dry, and after I pulled it off of the stone, it seemed nice! No paint pulled off of the stone with this one. So utilizing some form of mould launch is vital to getting a terrific outcome with the textured mat.
With my second take a look at carried out and leading to success, I did two extra on the similar time. Since my entrance porch skirting space is fairly quick, I wished to create a mould for a few shorter and smaller stones. I chosen this one…
And right here’s what that seemed like with the silicone pressed onto it…
After which I chosen this infant.
Right here’s that one with the silicone…
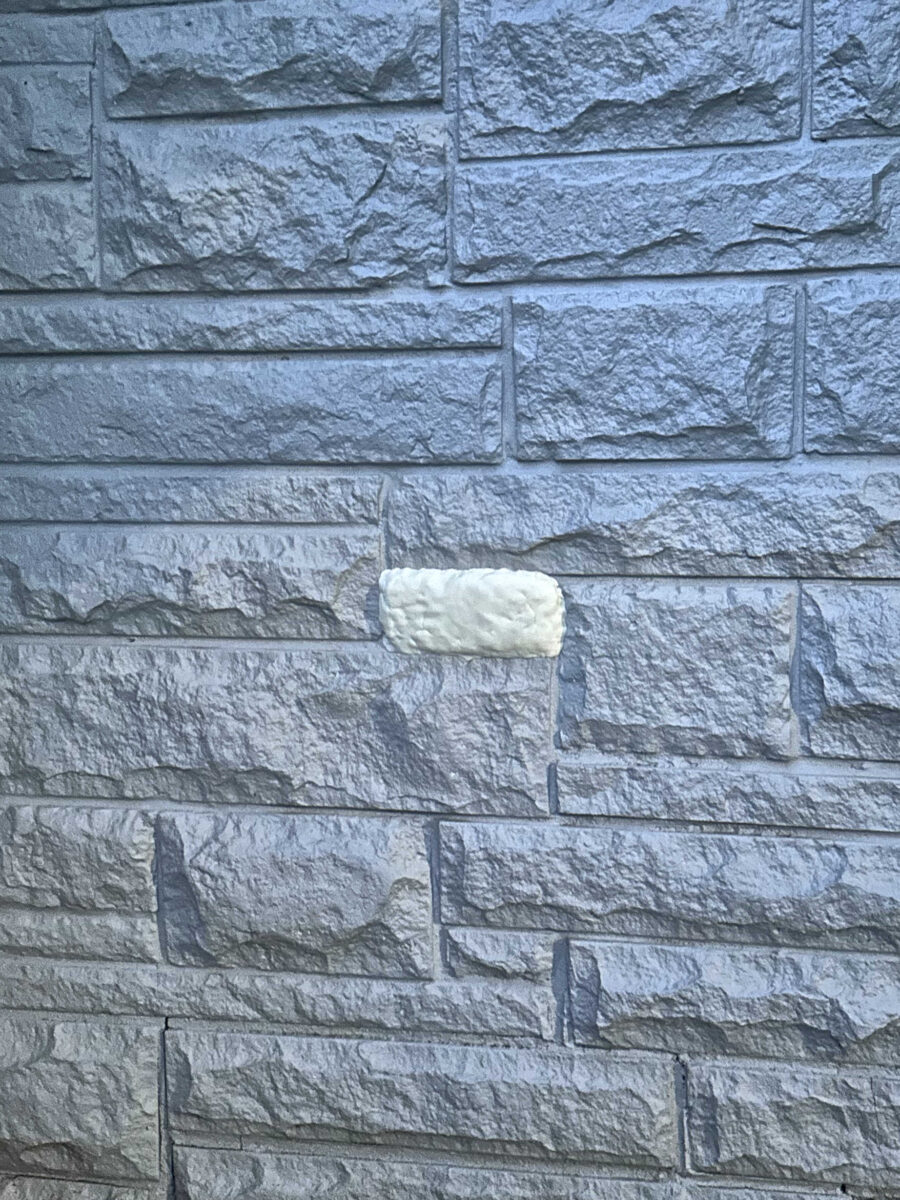
Each of these turned out nice as nicely. The oil used as a mould launch is the important thing. However once more, I solely added the oil to essentially the most textured heart elements of the stone in order that the silicone would persist with the outer areas that didn’t have any oil on them.
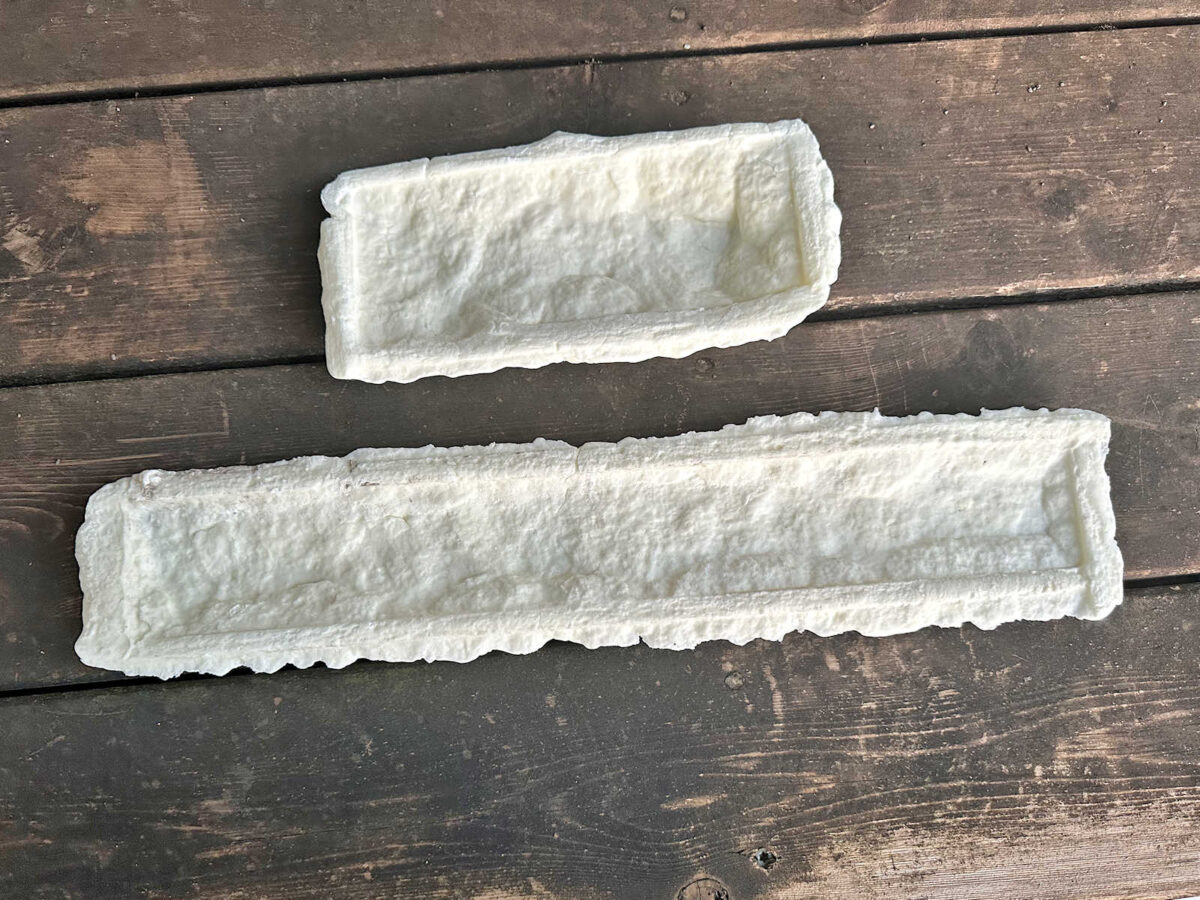
It took plenty of trial and error, and naturally, plenty of ready (about three hours for each to dry earlier than eradicating it), however I feel this concept goes to work. Proper now, I’ve three usable molds and one fail. I’d prefer to have a complete of six usable molds earlier than I am going to the following step. I’ll must trim these molds after which construct some sides round them to offer me one thing that I can pour concrete (I’ll be mixing aircrete) into to offer me my full kind for every stone. So keep tuned to see if I can really pull this off! Proper now, I’m about 75% assured that I can do that. 😀
Extra About Our Home Exterior & Yard


Addicted 2 Adorning is the place I share my DIY and adorning journey as I rework and adorn the 1948 fixer higher that my husband, Matt, and I purchased in 2013. Matt has M.S. and is unable to do bodily work, so I do the vast majority of the work on the home on my own. You’ll be able to study extra about me right here.


")


 by Sir Joseph Paxton")


